00198574-01_Process_Foundation_DEK_Micron_EN - 第9页
3 Stencil Print Process Foundation DEK Micron-Series 12/2017 9 3 Stencil Print Introduction to Stencil Printing ● What is the objective of the surface mount assembly process? To provide a conducting path between the bo…

2 Introduction
8 Process Foundation DEK Micron-Series 12/2017
3 Stencil Print
Process Foundation DEK Micron-Series 12/2017 9
3 Stencil Print
Introduction to Stencil Printing
●
What is the objective of the surface mount assembly process?
To provide a conducting path between the board (or substrate*) and components throughout
the designed life of the product.
●
What is the objective of the stencil print process?
To transfer the specified volume of material to the correct place on the board (or substrate*) at
the right time.
*Sometimes we print onto ceramic plates, PCBs (also known as PWBs – printed wire board), or
other things. The collective name for them is "substrate".
In addition we wish to achieve this objective at the required throughput with maximum yield and
minimum defects. The design of the product file and continued maintenance of the process is vital
in achieving this aim.
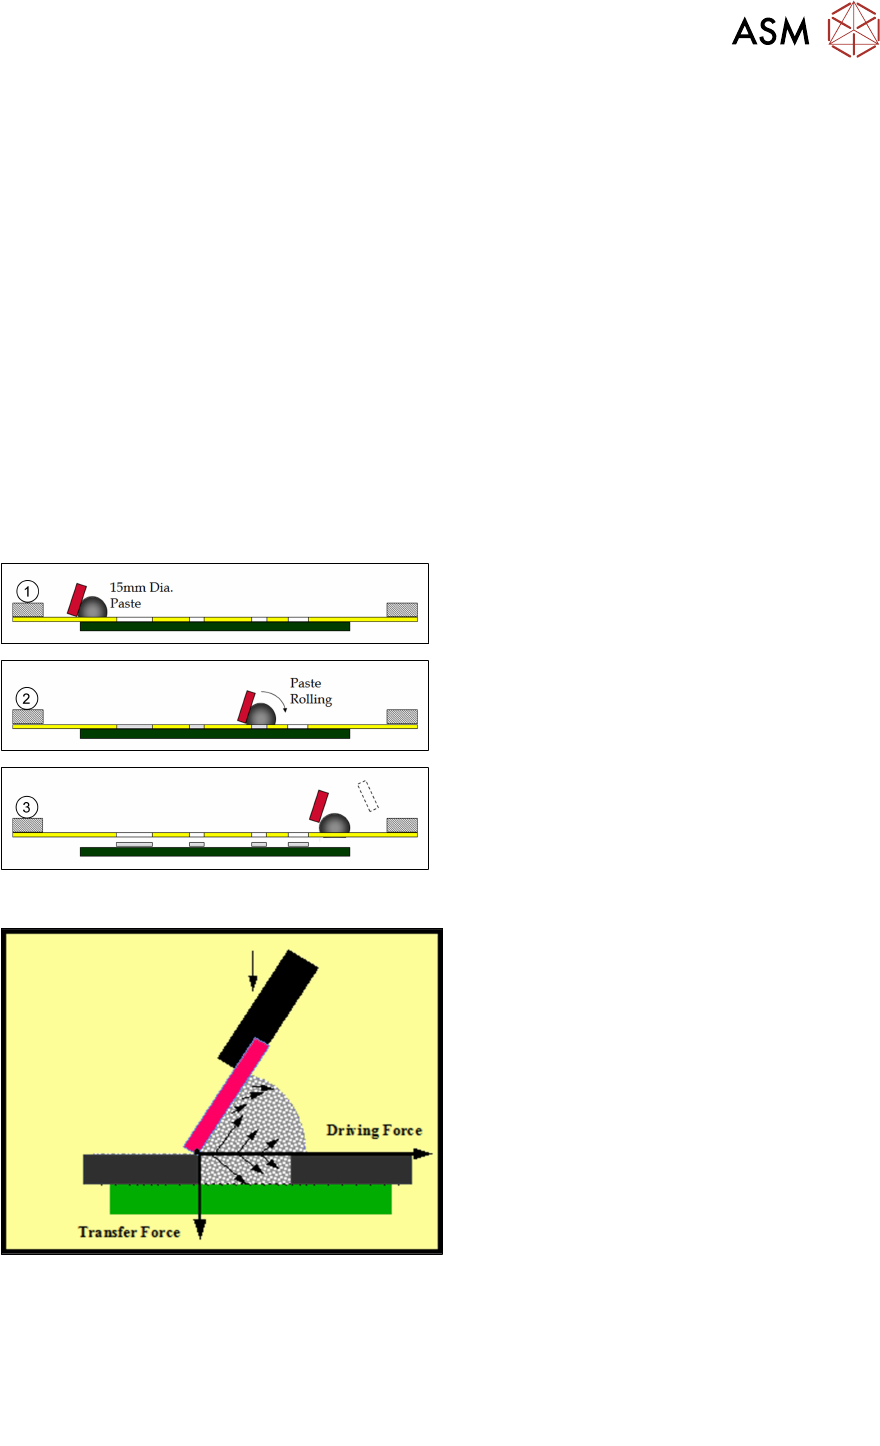
Stencil Print Process
1. Zero "Print Gap"
2. Controlled "Print Speed"
Even "Squeegee Pressure"
3. Board is lowered under controlled
"Separation Speed"
Stencil Print Theory
Squeegee Process
●
Transfer/ driving forces influenced by:
– Squeegee Angle
– Print Speed
– Paste Rheology
– Paste Roll Volume

3 Stencil Print
10 Process Foundation DEK Micron-Series 12/2017
Exercise
●
Set up the printer to run a product
●
Remove the squeegees and set the print pressure to 0kg
●
Cycle a board from left to left
●
Observe the machine as it carries out a print cycle
Number these actions in the correct sequence:
Camera Moves to Board Stop position Board exits machine
Tooling clearance check Board Stop is lowered
Fiducial positions are captured Board separates from stencil
Board travels to Board Stop position Stencil alignment completed
Press RUN Board is unclamped
Board is clamped in rails Board stop is raised
Camera homes Print stroke carried out
Board lifts to stencil
The Perfect Print
When inspected, a perfect print may have the
following features:
●
Straight and clean edges
●
Flat and even top surface
●
Consistent print height from pad to pad
and board to board
●
Good alignment – centralised on the pad
●
No flux bleed or print material out with the
deposit (i.e. solder balls)