00195376-05_SM_D1_D1i_D2_D2i_EN.pdf - 第53页
Service Work 4.1.2 Replacing the Complete Axis Unit Electrical System Service Manual SIPLACE D1/D1i/D2/D2i 53 4.1.2 4 . 1 . 2 R e p la c in g t h e C o m p le t e A x is U n it Replacing the Co mplete Axis Unit Axis unit…
Service Work
Electrical System 4.1.1 Power Supply Unit
52 Service Manual SIPLACE D1/D1i/D2/D2i
▪ 3 x 8.14 VAC
▪ 3 x 32.5 VAC
▪ 3 x 32.5 VAC
▪ 3 x 24.4 VAC
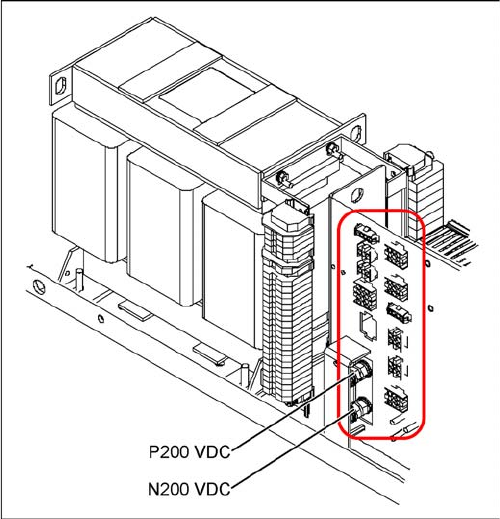
Terminal panel of the power supply unit
Terminal panel of the power supply unit
▪ T1: 11.1 kVA three-phase transformer
▪ X14: P200 V - screwed connection M6 (+) for supply-
ing the X/Y axis servo amplifier
▪ X15,16,17, EEP: N200 V - screwed connection M8/
M6 (-) for supplying the X/Y axis servo amplifier
▪ X2: To the monitor 1, 2
▪ X3: Box PC
▪ X4: Micro Box PC
▪ X5: Main distributor/subdistributor (regulated voltage)
▪ X6: PCB conveyor
▪ X7: Subdistributor (unregulated voltage)
▪ X8: Axis unit
▪ X10: Main distributor (unregulated voltage)
▪ X12: From/to the main distributor, (control signals,
power supply)
▪ X13: From/to the main distributor, (PCC peripherals)
The pin assignments of the individual plugs are shown in
the detailed circuit diagrams in section 3 "Circuit dia-
grams".
Service Work
4.1.2 Replacing the Complete Axis Unit Electrical System
Service Manual SIPLACE D1/D1i/D2/D2i 53
4.1.2
4.1.2 Replacing the Complete Axis Unit
Replacing the Complete Axis Unit
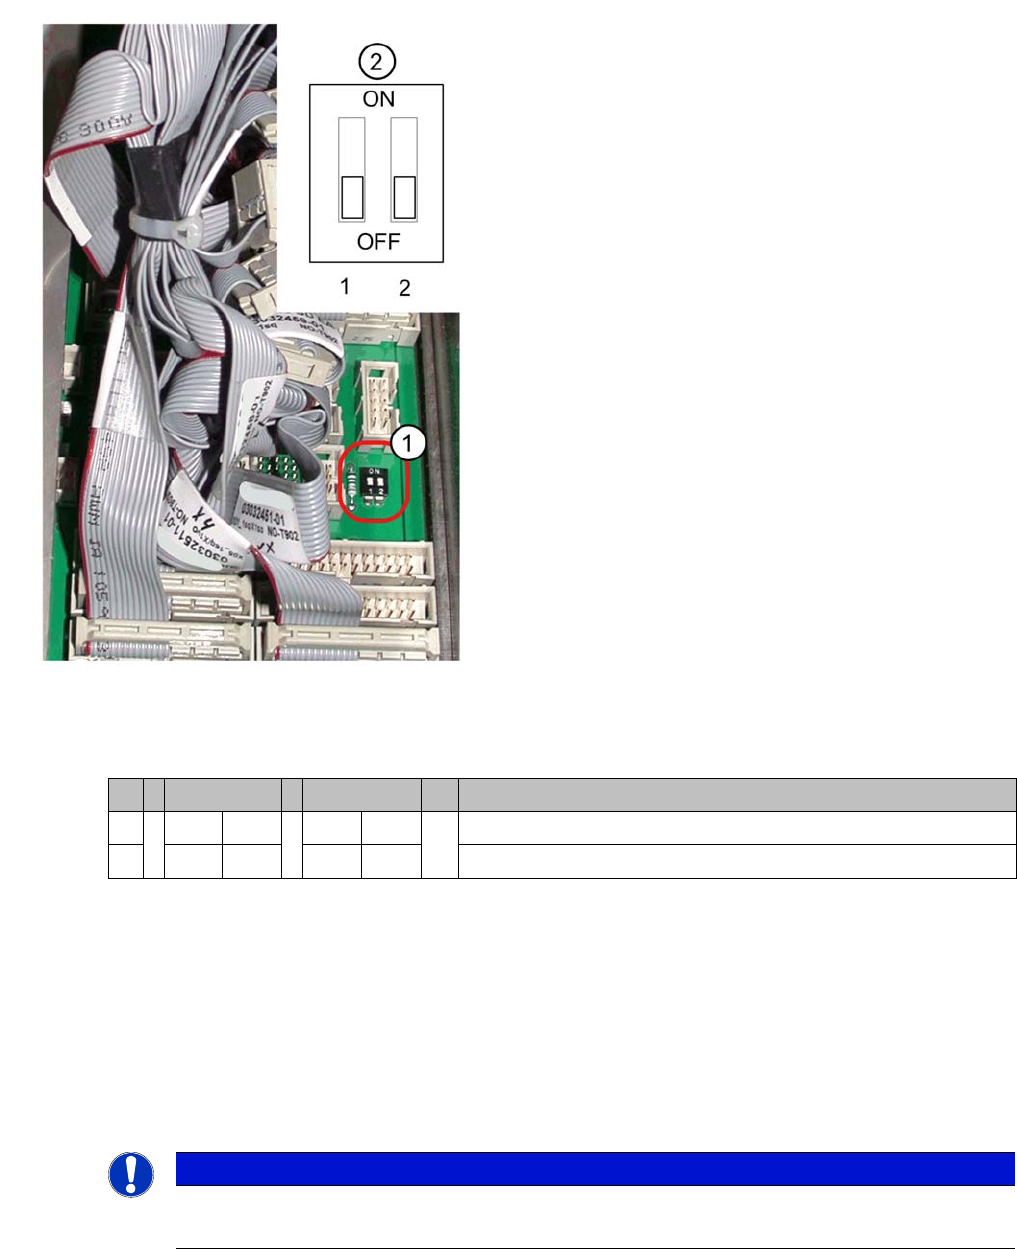
Axis unit DIP switch
4.1.3
4.1.3 Replacing the Axis Unit with Adapter Cable (X, D Series)
Replacing the Axis Unit with Adapter Cable (X, D Series)
Parts, equipment and tools
▪ Axis unit A364 replacement kit [03050365S02]
This contains the following parts:
– Axis unit A364 [03050365-02]
– Adapter cable harness for axis unit [03050590-01]
– 2 DIN912-M3 x 6-A2-70 screws [00201463-xx]
DIP switch on the backplane
► End all placement operations with the machine.
► Switch the placement system off at the main switch.
► Open the axis unit.
Legend
1. Position of DIP switch on the backplane
2. Setting for axis unit
shown here for axis unit 1
If the axis unit has been replaced, you will need to config-
ure the jumper setting (2).
S Axis unit 1 Axis unit 2 Comments
1OFF ON Axis unit 1 for SIPLACE D1/D2, D3, D4
2OFF ON Axis unit 2 only for SIPLACE D3, D4
NOTICE
Adapter cable harness
The adapter cable harness is only needed when an old axis unit is replaced with a new one.
Service Work
Electrical System 4.1.3 Replacing the Axis Unit with Adapter Cable (X, D Series)
54 Service Manual SIPLACE D1/D1i/D2/D2i
Removing the old axis unit
CAUTION
Labeling the connectors
When you disconnect connectors, always label their positions to ensure correct reconnection
later!
CAUTION
Make sure you do not damage any cables.
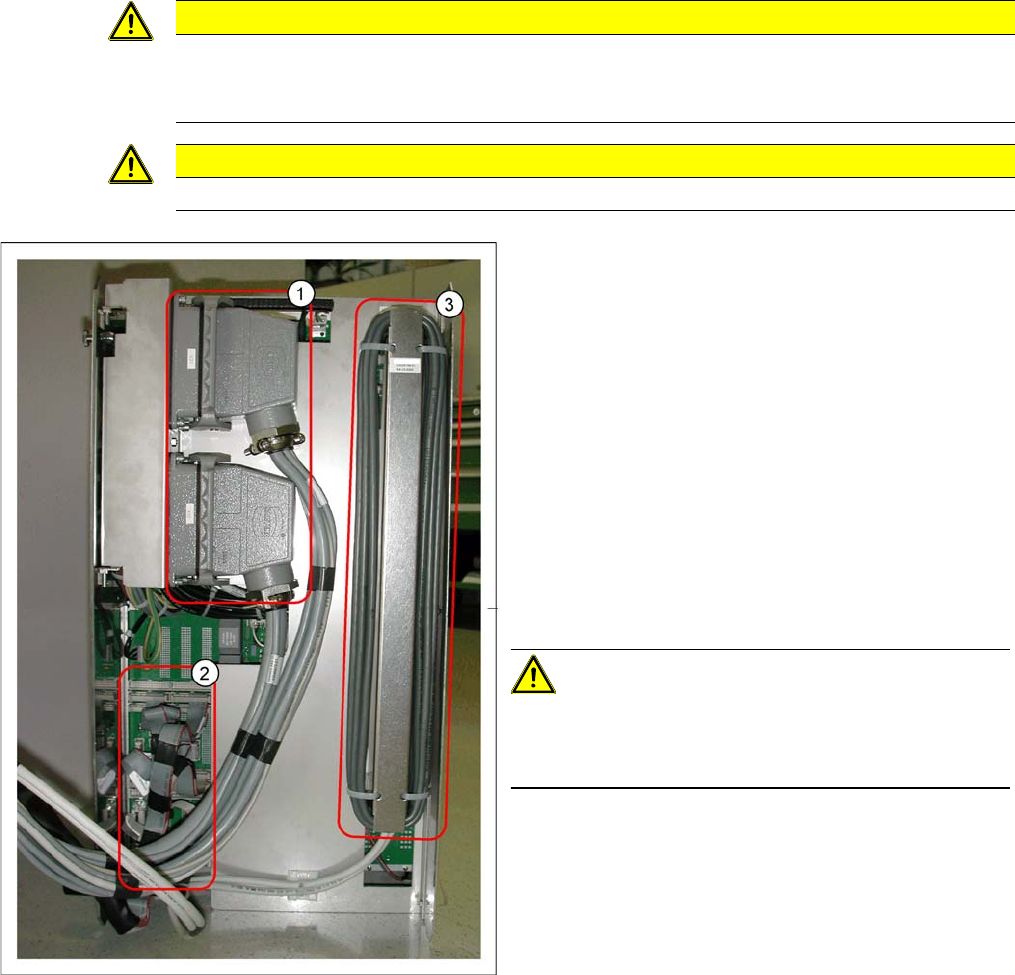
1. Harting connector
2. Flat ribbon cable
3. Ballast resistance
To remove the old axis unit, proceed as follows:
► Switch off the machine.
► Remove the protective cover above the axis unit, to
give you access to the axis unit.
► Pull the axis unit out of the machine.
► Lift the axis unit out of its guidance and place it down
on the ground.
► Unplug the Harting connector (1).
► Unplug all flat ribbon cables (2).
CAUTION!
Labeling the connectors
Label all flat ribbon cables to ensure correct reconnection
to the new axis unit, later on!
► Lift the ballast resistance (3) up and out and then un-
plug its connectors from the axis unit.