00197962-01_2nd_HMI_and_Tower_Light_en - 第14页
Installing a Second Human Machine Interface Parts 14 Assembly Instructions SIPLACE E ▪ Cable branch, option, Loc2 HMI extension [03 107735-xx] 1. Cable, DVI extension: monitor 2 [03 102207-xx] 2. Cable, U SB: touch scr e…
Installing a Second Human Machine Interface
Tools required
Assembly Instructions SIPLACE E 13
2
2 Installing a Second Human Machine Interface
Installing a Second Human Machine Interface
This section describes how to install a second human machine interface (HMI) at a SIPLACE E series
machine.
2.1
2.1 Tools required
Tools required
▪ M6 Hex screwdriver
▪ M4 Hex screwdriver
▪ M3 Hex screwdriver
2.2
2.2 Parts
Parts
2nd Location Human Machine Interface installation kit [03113590-xx] for SIPLACE E series
The installation kit consists of the following parts:
▪ SIPLACE E Series HMI Tower kit [03109055-xx]
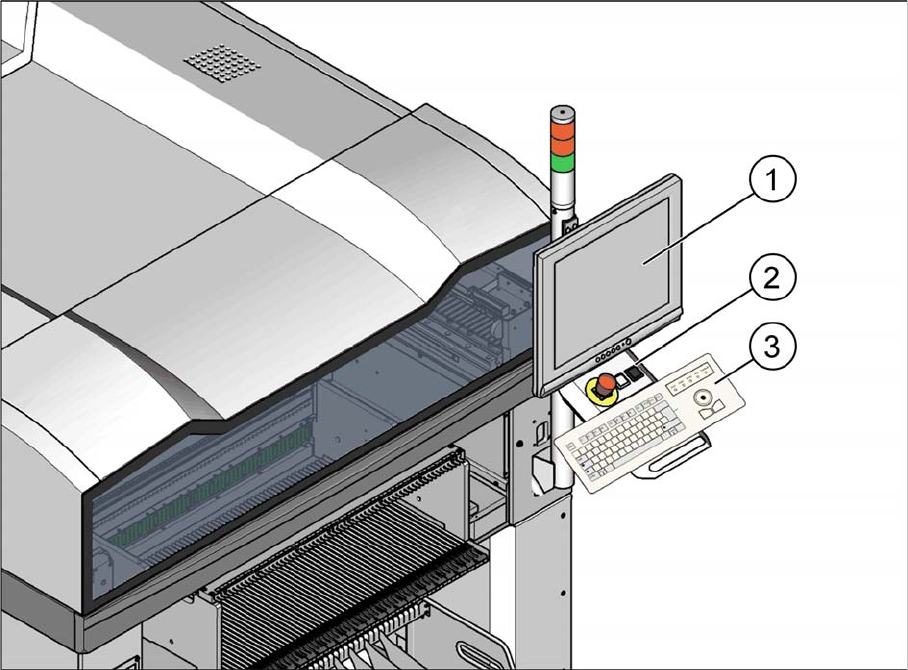
1. 17-inch monitor with USB AS-1707A [03106879-xx]
2. HMI Frame kit [03111429-xx]
3. Keyboard, German Layout [00373984-xx]
Installing a Second Human Machine Interface
Parts
14 Assembly Instructions SIPLACE E
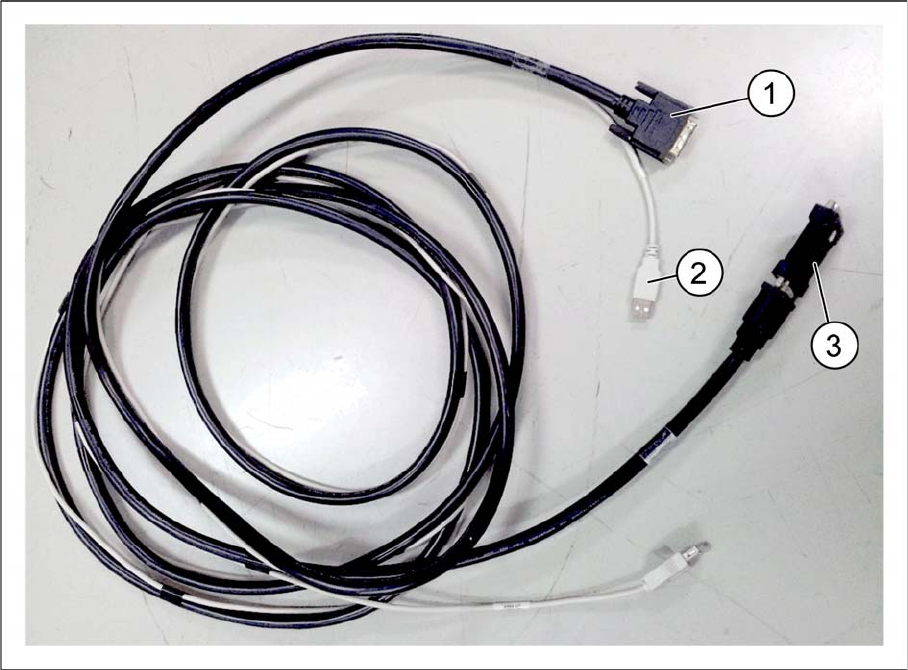
▪ Cable branch, option, Loc2 HMI extension [03107735-xx]
1. Cable, DVI extension: monitor 2 [03102207-xx]
2. Cable, USB: touch screen 2 [03102211-xx]
3. DVI-I F-F Adapter SZ-2011-061 [03107429-xx]

Installing a Second Human Machine Interface
2.3.1 Step 1: Removing the Base Machine Metal Covers Installing the Cable Branch into the Base Machine
Assembly Instructions SIPLACE E 15
2.3
2.3 Installing the Cable Branch into the Base Machine
Installing the Cable Branch into the Base Machine
2.3.1
2.3.1 Step 1: Removing the Base Machine Metal Covers
Step 1: Removing the Base Machine Metal Covers
► Pull out the movable feeder table at the location 2 side of the machine.
► Pull out the fixed feeder table and the movable feeder table at both sides of the machine.
► Remove the metal cover (1) at the bottom right on the fixed table side of the machine to access the
BoxPC.
► Remove the metal cover (1) at the bottom right side of the machine behind the BoxPC.
► Remove the metal cover (1) at the bottom left on the movable table side of the machine (location 2).