AltaPail II Bulk Melters Product Manual.pdf - 第115页
Advanced Software Me lter Configuration 7 -29 Part 1121836_03 E 1 1/2014 Nordson Corporation Configuring Scheduled Events Use the scheduler to time d aily heater and standby events. T he following figure illustrate s a t…
Advanced Software Melter Configuration
7-28
Part 1121836_03
E 11/2014 Nordson Corporation
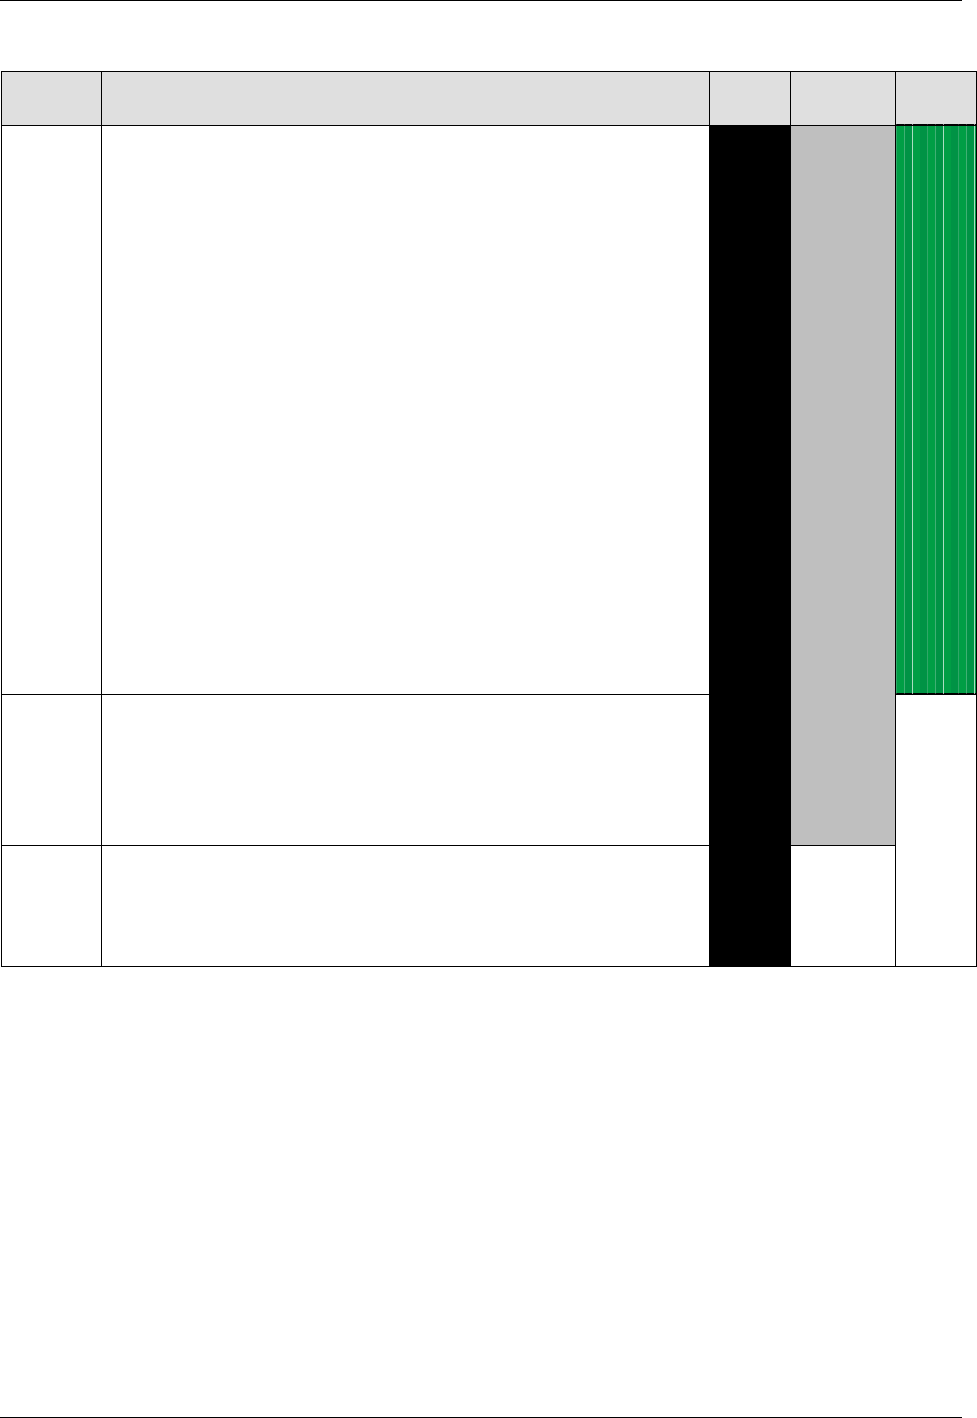
Table 7-4
Security level details
Security
Level
Functions Enabled High Medium Low
3 Application names (temperature channels and pumps
Controlled system heating rate temperature
Switch between °C, °F
Switch between bar, psi, kPa
Temperature channel settings (PID control mode)
Maximum temperature set point
Assign standard I/O inputs for application groups
Seven-day clock settings: (delete/edit schedule, copy schedule)
Motor enables from control panel / control panel AND standard I/O
Gear-to-line signal: Analog/frequency, voltage/current
Speed control / Line speed for min./max. pump speed/pressure
Threshold switch
Restore default settings
Melter configuration
Configuration code input (Local mode / field bus mode)
Customer setup (recipes / application names)
Service interval
System ready-delay setup
Password setup
2 Under-temperature/over-temperature warnings/faults
Standby values (setback delta and duration)
Automatic enter standby
Temperature channel enabled/disabled
Changing pump modes (manual and gear-to-line)
1 Temperature set point
Individual motor enable
Speed set point
Min. and max. pump speed/pressure (in gear-to-line mode)
NOTE: The table indicates the following:
S
High Security includes levels 1, 2 and 3
S
Medium Security includes levels 2 and 3
S
Low Security includes only level 3
Advanced Software Melter Configuration
7-29
Part 1121836_03
E 11/2014 Nordson Corporation
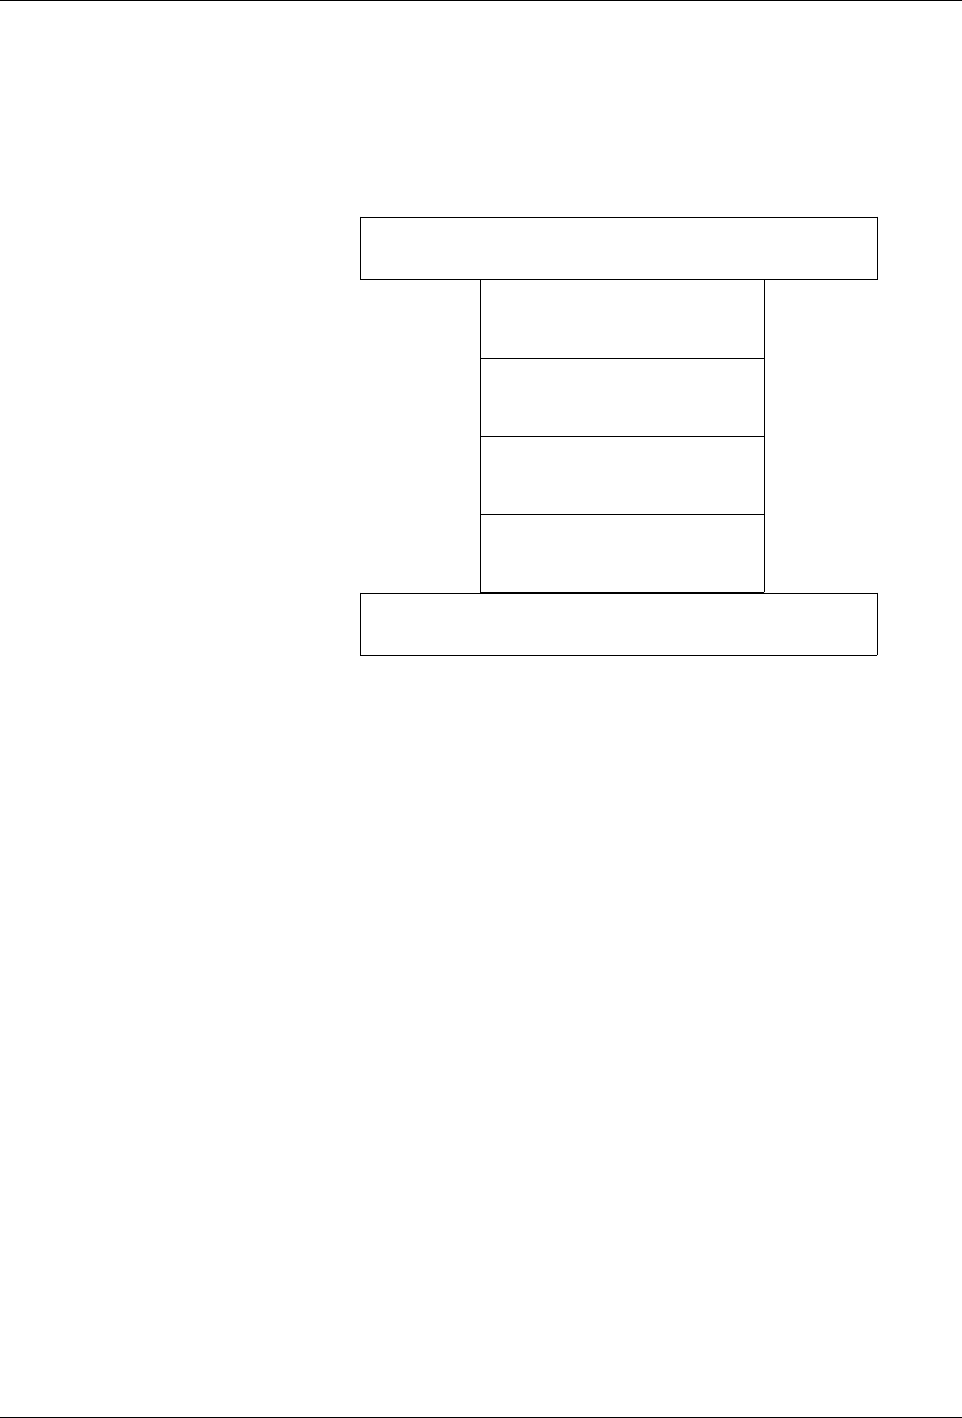
Configuring Scheduled Events
Use the scheduler to time daily heater and standby events. The following
figure illustrates a typical daily schedule.
Heaters On
Enter Standby - break
Heaters Off
Exit Standby
Enter Standby - shift change
Exit Standby
NOTE: About scheduling events:
S
Define up to 12 events per day.
S
Each day can have its own unique schedule.
S
Copy and paste schedules to other days of the week.
S
Scheduled events cannot cross over to the next day.
Creating a Schedule of events is a 3-step process
Step 1: Access the Scheduler and verify that the system date, time and day
of week are correct.
Step 2: Define the first work day of the week that you want to start
scheduling events.
Step 3: Switch On the Scheduler control.
Advanced Software Melter Configuration
7-30
Part 1121836_03
E 11/2014 Nordson Corporation
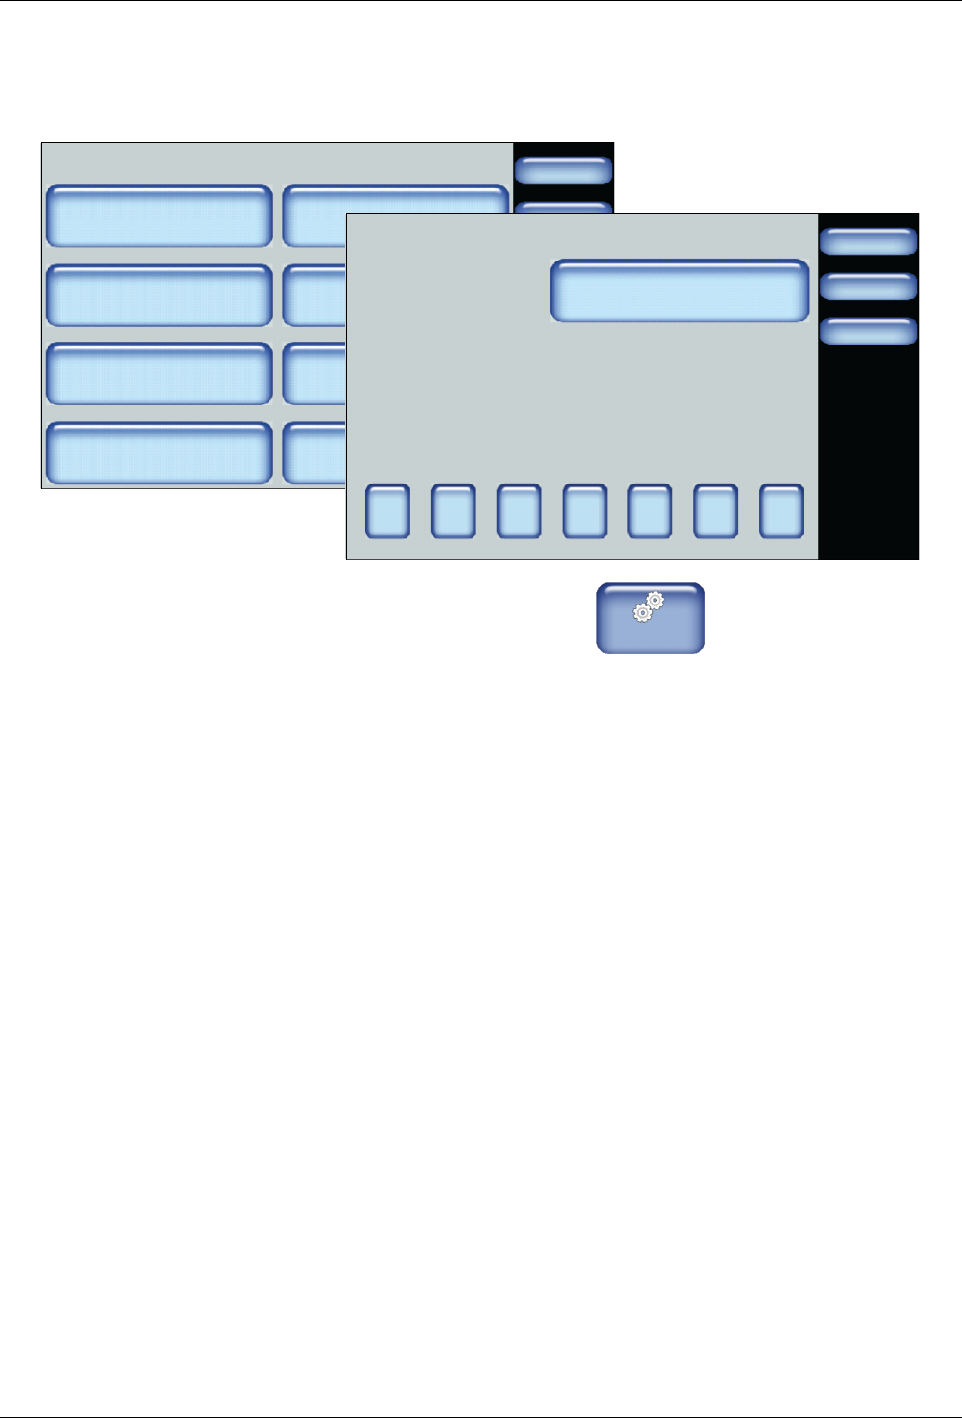
Step 1: Access the Scheduler and verify that the system date, time and
day of week are correct
System
Done
Home
Formats/Units
Date/Time
Password
Display
Service Interval Administration
Scheduler Language
03/20/2014 4:40PM
500 Hours
Done
Cancel
Sun
Scheduler
Update System Settings
Home
Current System Settings:
Sunday
03/20/2014
14:40
Mon Tue Wed Thu Fri Sat
1. From the Home Display touch
Master
Controls
2. Touch System, then Scheduler.
3. Make sure the Current System Settings are correct.
S
If the Day of the Week, Date and Time are incorrect, touch Update
System Settings and enter the correct information.
4. Touch the day of the week button that you want to schedule events. It is
recommended that you start with the first working day of the week, for
example Monday, and work forward. You can only copy/paste schedules
from one day to the next, but not backwards.
5. Proceed to the step 2.