AltaPail II Bulk Melters Product Manual.pdf - 第168页
1 Repair 10-6 Part 1121836_03 E 11/2014 Nordson Corporation Replacing Temperatur e Sensor or Thermostat WARNING: Hot! Risk of burns. Wea r heat-protective gloves. WARNING: Risk of electrica l shock. F ailure to observe m…
2
3
1
4
Repair
10-5
Part 1121836_03
E 11/2014 Nordson Corporation
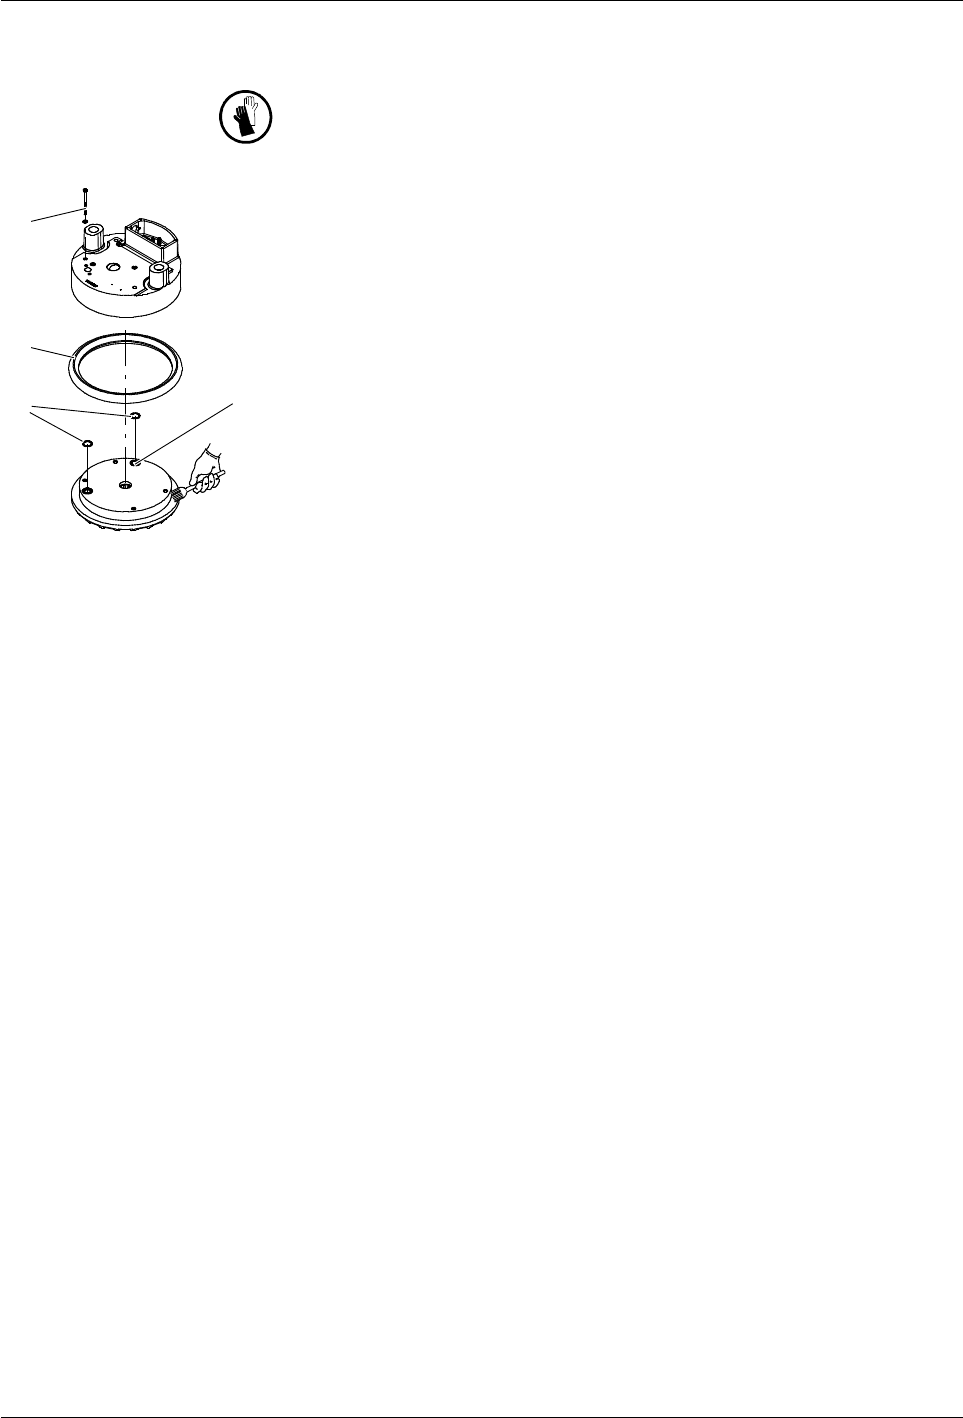
Replacing Melting Plate and/or Sealing Ring
WARNING: Hot! Risk of burns. Wear heat-protective gloves.
1. Heat the platen until the material softens (approx. 70 ° C / 158 ° F,
depending on the material).
2. Place a clean, hard, heat-resistant resting surface (e.g. metal plate) on
the container and lower the platen onto the surface.
3. Release all of the fixing screws (1).
4. Raise the platen approx. 10 cm. The melting plate remains on the resting
surface.
5. Shut down the bulk melter.
6. Carefully extract the temperature sensor from the bore (4).
7. Replace the O-rings (3). Clean and grease the grooves. Refer to page
8-2, Processing Materials for the type of grease to be used.
The sealing ring (2) can now be replaced. Refer to page 8-2, Processing
Materials for the type of grease to be used.
8. Apply heat transfer compound (Refer to page 8-2, Processing Materials)
to the temperature sensor and insert it into the bore (4).
9. Screw the melting plate into place:
a. Grease the fixing screws and screw in loosely such that the platen
and melting plate have thermal contact
b. Wait until the platen and melting plate are at the same temperature
c. Tighten the fixing screws with 10 Nm.
NOTE: The next time the platen is cold (e.g. weekend, factory vacation)
tighten the fixing screws again with the stated torque.
1
Repair
10-6
Part 1121836_03
E 11/2014 Nordson Corporation
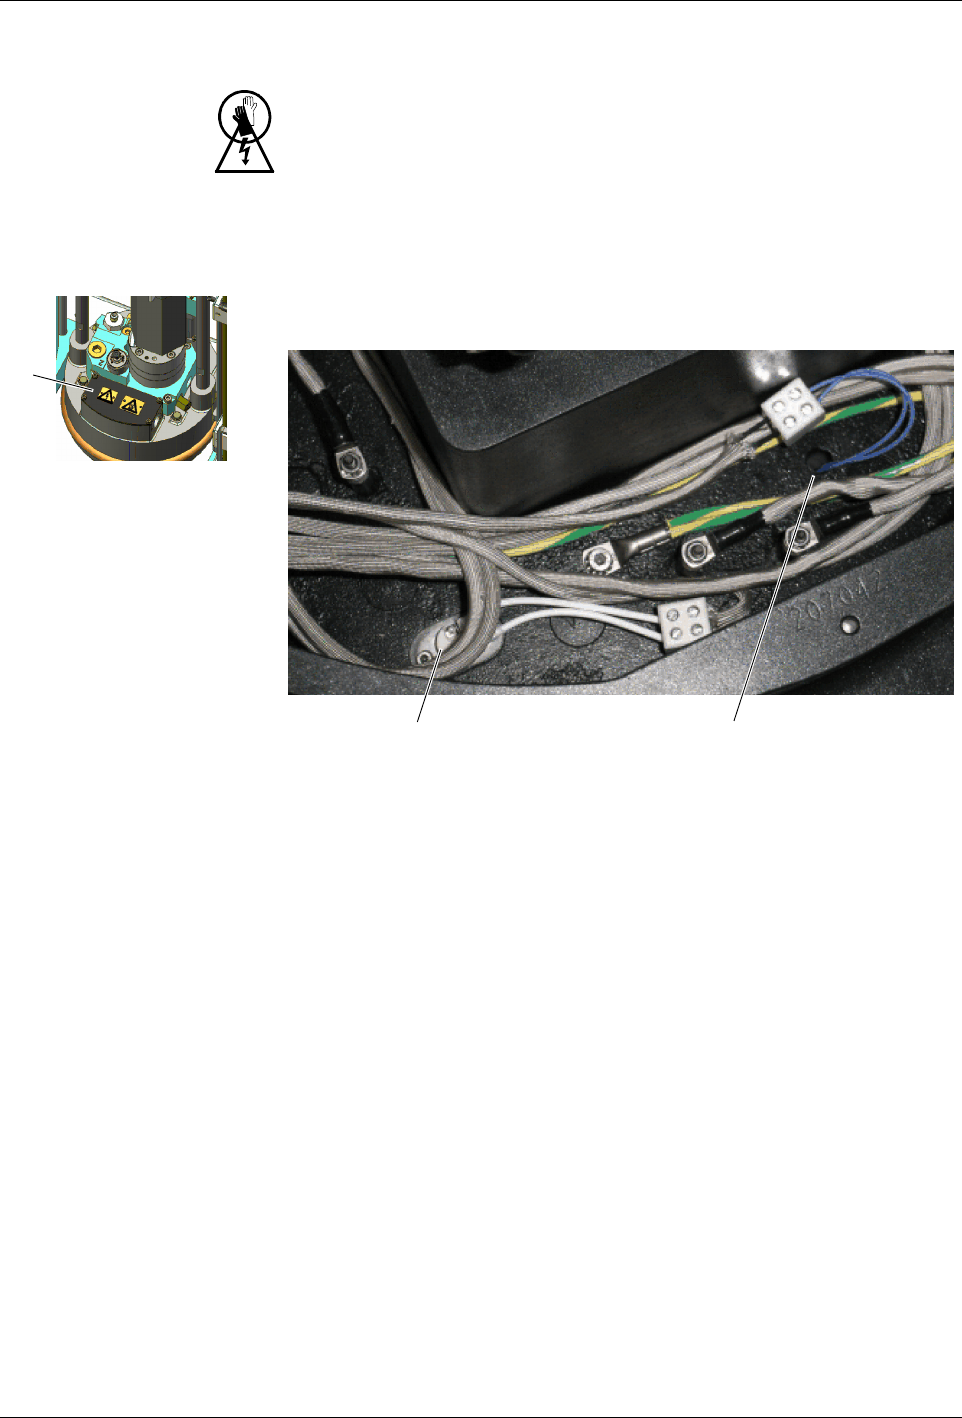
Replacing Temperature Sensor or Thermostat
WARNING: Hot! Risk of burns. Wear heat-protective gloves.
WARNING: Risk of electrical shock. Failure to observe may result in
personal injury, death, or equipment damage.
1. Disconnect the bulk melter from the line voltage.
2. Remove the cover (1).
2
3
3.
Thermostat (2)
1. Apply heat transfer compound (Refer to page 8-2, Processing
Materials) to the new thermostat and replace.
Temperature sensor (3)
1. Carefully pull the temperature sensor out of the melting plate by the
connecting cable. If it cannot be pulled out easily, the melting plate
must be removed. Refer to page 10-5, Replacing Melting Plate.
2. Apply heat transfer compound (Refer to page 8-2, Processing
Materials) to the temperature sensor and insert/fasten.
3. Re-attach the cover.
4. Start up the bulk melter again.
Repair
10-7
Part 1121836_03
E 11/2014 Nordson Corporation
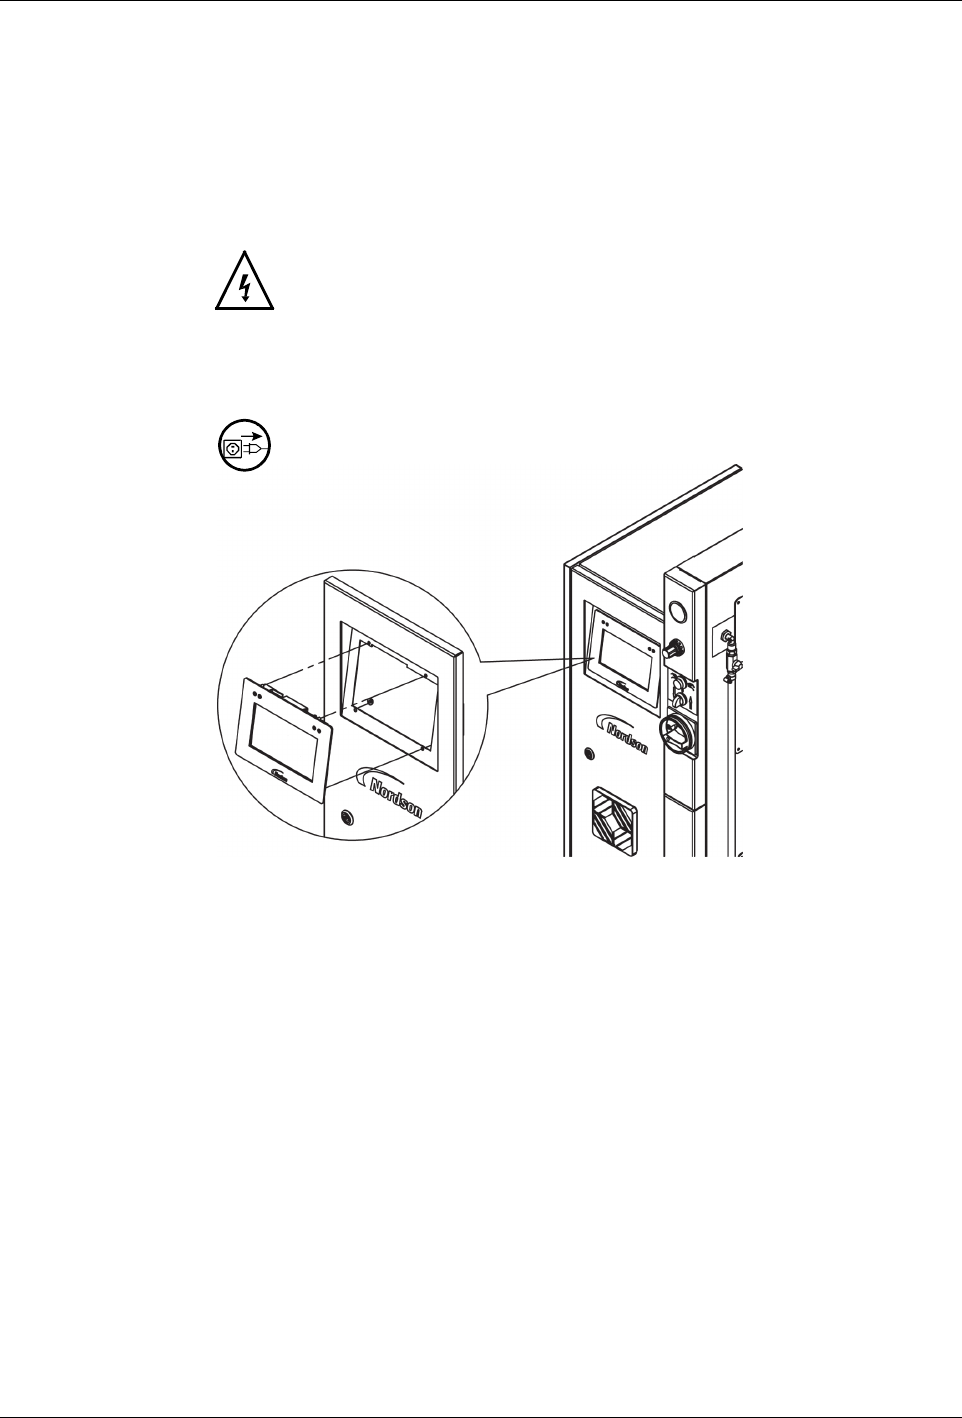
Replacing Control Panel
You must purchase Service kit P/N: 394734. You will need the following
tools:
S
Electrical cabinet key
S
Open-end or box wrench, size 7
WARNING: Risk of electrical shock. Failure to observe may result in
personal injury, death, or equipment damage.
Installing Service Kit
WARNING: Disconnect the bulk melter from the line voltage.
1. Set the main switch to 0/OFF and Open electrical cabinet door.
2. Unplug bus cable from old control panel.
3. Release the M4 hexagon nuts and remove with the tooth lock washers.
4. Press old control panel and old seal forwards and out of the electrical
cabinet door.
5. Insert the new control panel and secure it using the tooth lock washers.
6. Plug bus cable into new control panel and then close the electrical
cabinet door.
7. Simultaneously turn on the main switch and hold down the key Heater
and the platen icon on the control panel until the LEDs on the control
panel light up once.
NOTE: When a new control panel has been installed, the following step
must be performed the next time the system is switched on: