GD450 说明书(中英文版) - 第40页
- 4 0 - Pix 3-14(T he saved interface a fter setting o f m ark point and click “ 是 ” ( Y es ) to come back to the main interface.) 图 3- 15 (点 [ PCB 标志 1 ] 打开此界面,点击自动查找)
- 39 -
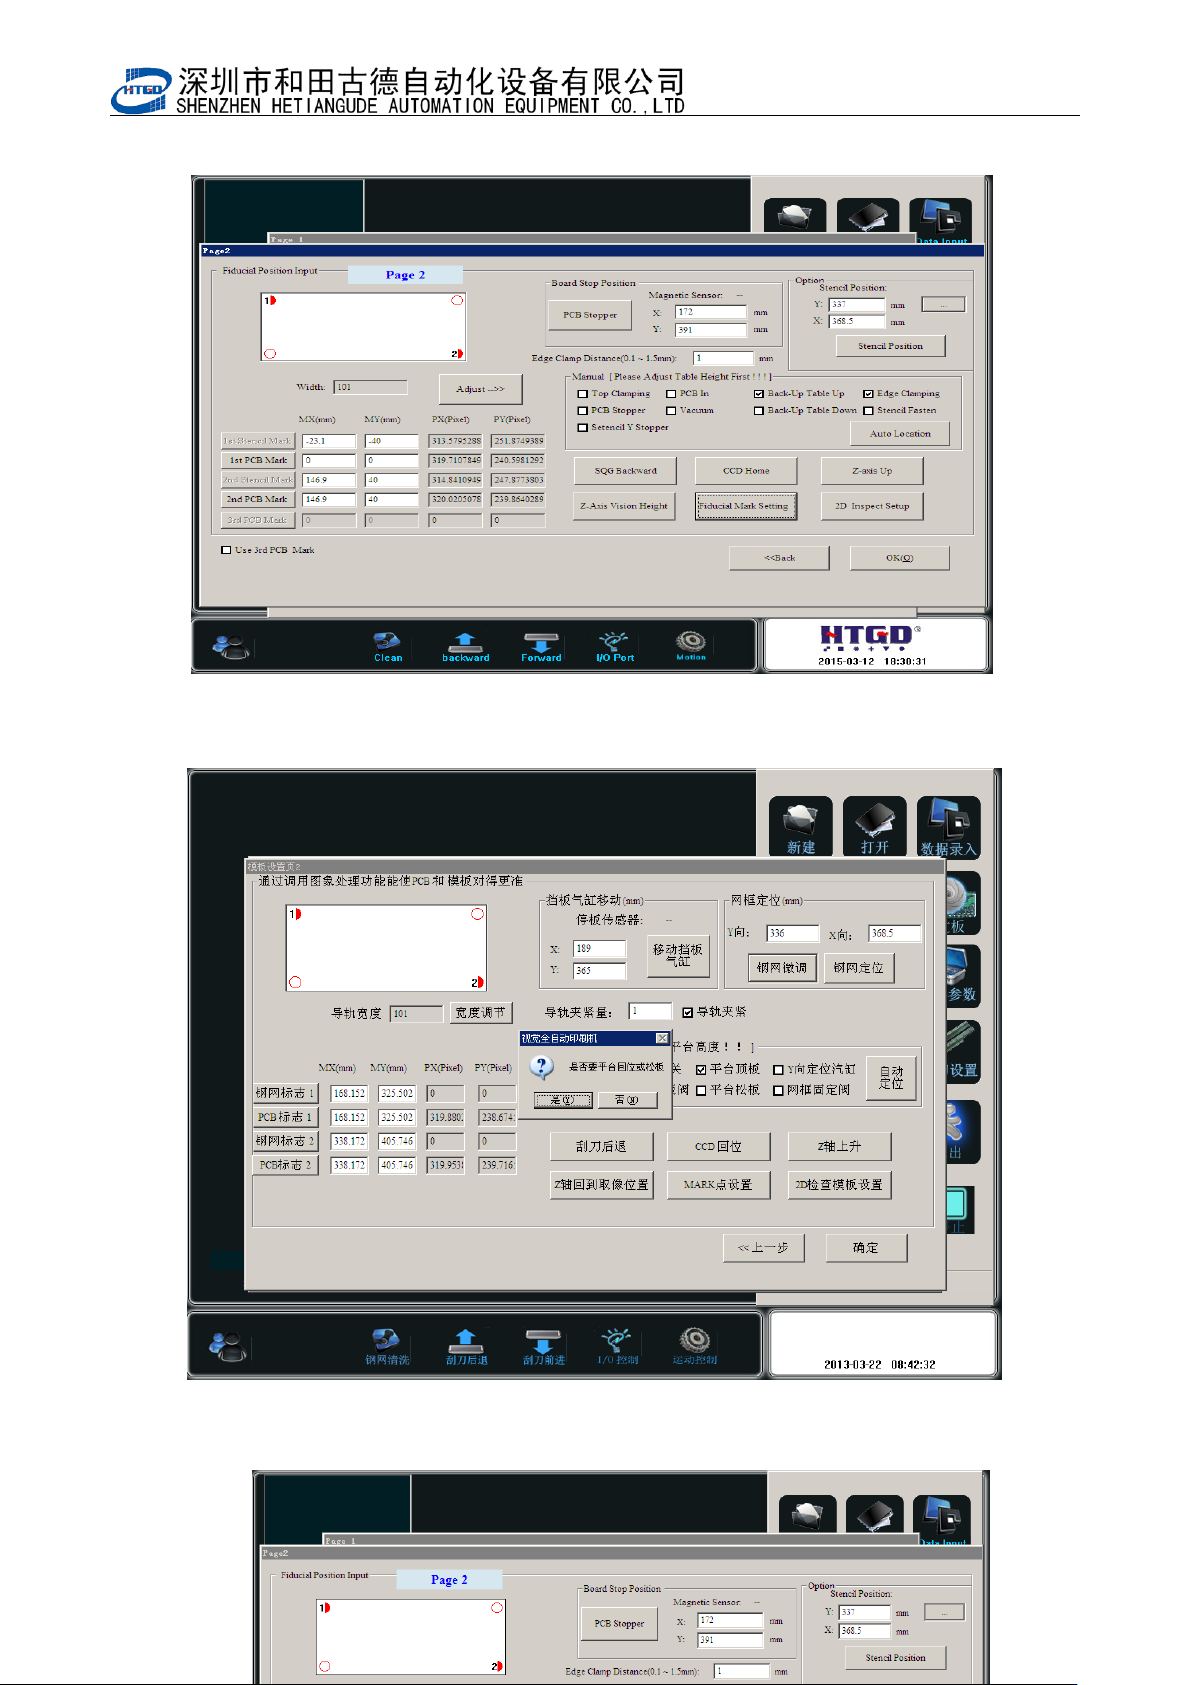
图 3-13(点击[MARK 点设置],开启 Mark 编辑状态)
Pix 3-13(the mark can be edited by clicking the “MARK 点设置”(Mark point setting) button.
图 3-14(Mark 点设置完毕后保存的界面,点击是回到主界面)
- 40 -
Pix 3-14(The saved interface after setting of mark point and click “是”(Yes)to come back
to the main interface.)
图 3-15(点[PCB 标志 1]打开此界面,点击自动查找)

- 41 -
Pix 3-15(Enter into this interface by click (PCB mark 1) button and click “自动查找”
(automatic searching) button)
图 3-15(在图 3-13 上点[PCB 标志 1]打开此界面, PCB Mark 点出现在视域中,点[自
动查找],Mark 点捕捉到,如图)。
Pix 3-15(Enter into this interface by click (PCB mark 1) button and the PCB mark
point will exist in the field of vision. Clicking “自动查找” (automatic searching)
button to capture the mark point. See in the pix.)
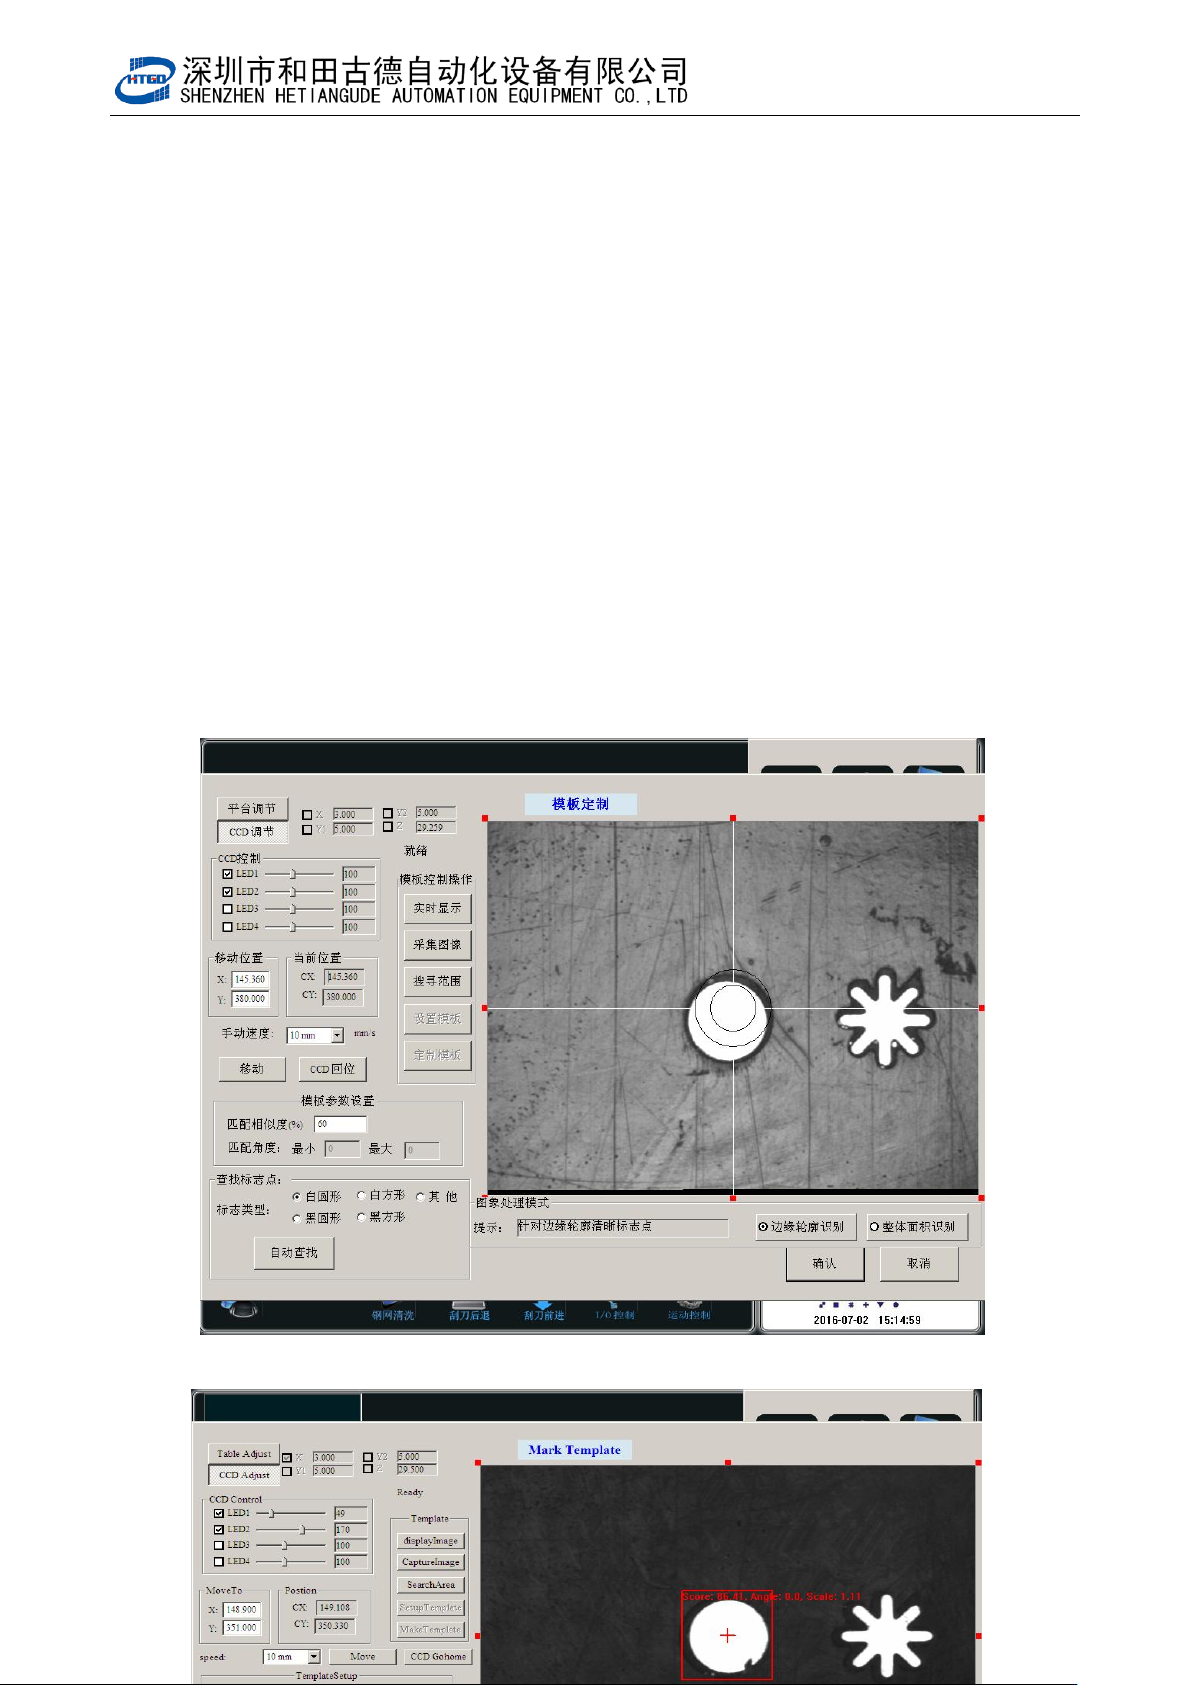
注:各按钮功能解释
Notice: The introduction of all the buttons.
A,[平台调节]:点击输入密码后调节平台的高度,平面位置等;
(platform adjustment): Adjust the height and position of the platform after clicking
“输入密码” (input password)button.
B,[CCD 调节]:移动 CCD 位置;
(CCD adjustment): Remove CCD.
C,[LED 1,2,3,4]:调节 LED 灯的亮度
[LED 1,2,3,4]: Adjust the brightness of the LED.
D,[手动速度]:使用键盘上方向键移动 CCD 的速度;
(manual speed): Adjust the CCD speed by pressing the direction keys on the
keyboard.
E,[匹配相似度]:MARK 点质量匹配分数设定分数越高,Mark 点越难设别,精度越
高;反之反是;
(matching degree of similarity):The setting score is higher for the mark point
matching, it is more difficult to set mark and the accuracy is more higher. And