GD450 说明书(中英文版) - 第87页
- 87 - Click “ 增 加 记 录 ” (add record) button and build inspection spot. Click “ 实时显 示 ” (real-time display) butt on. Ad just the lig ht source of L ED1 an d LED2 and m ake the image achieved the performance in the below …

- 86 -
inspection interface.
图 6-2(2D 检测界面)
Pix 6-2(2D inspection interface)
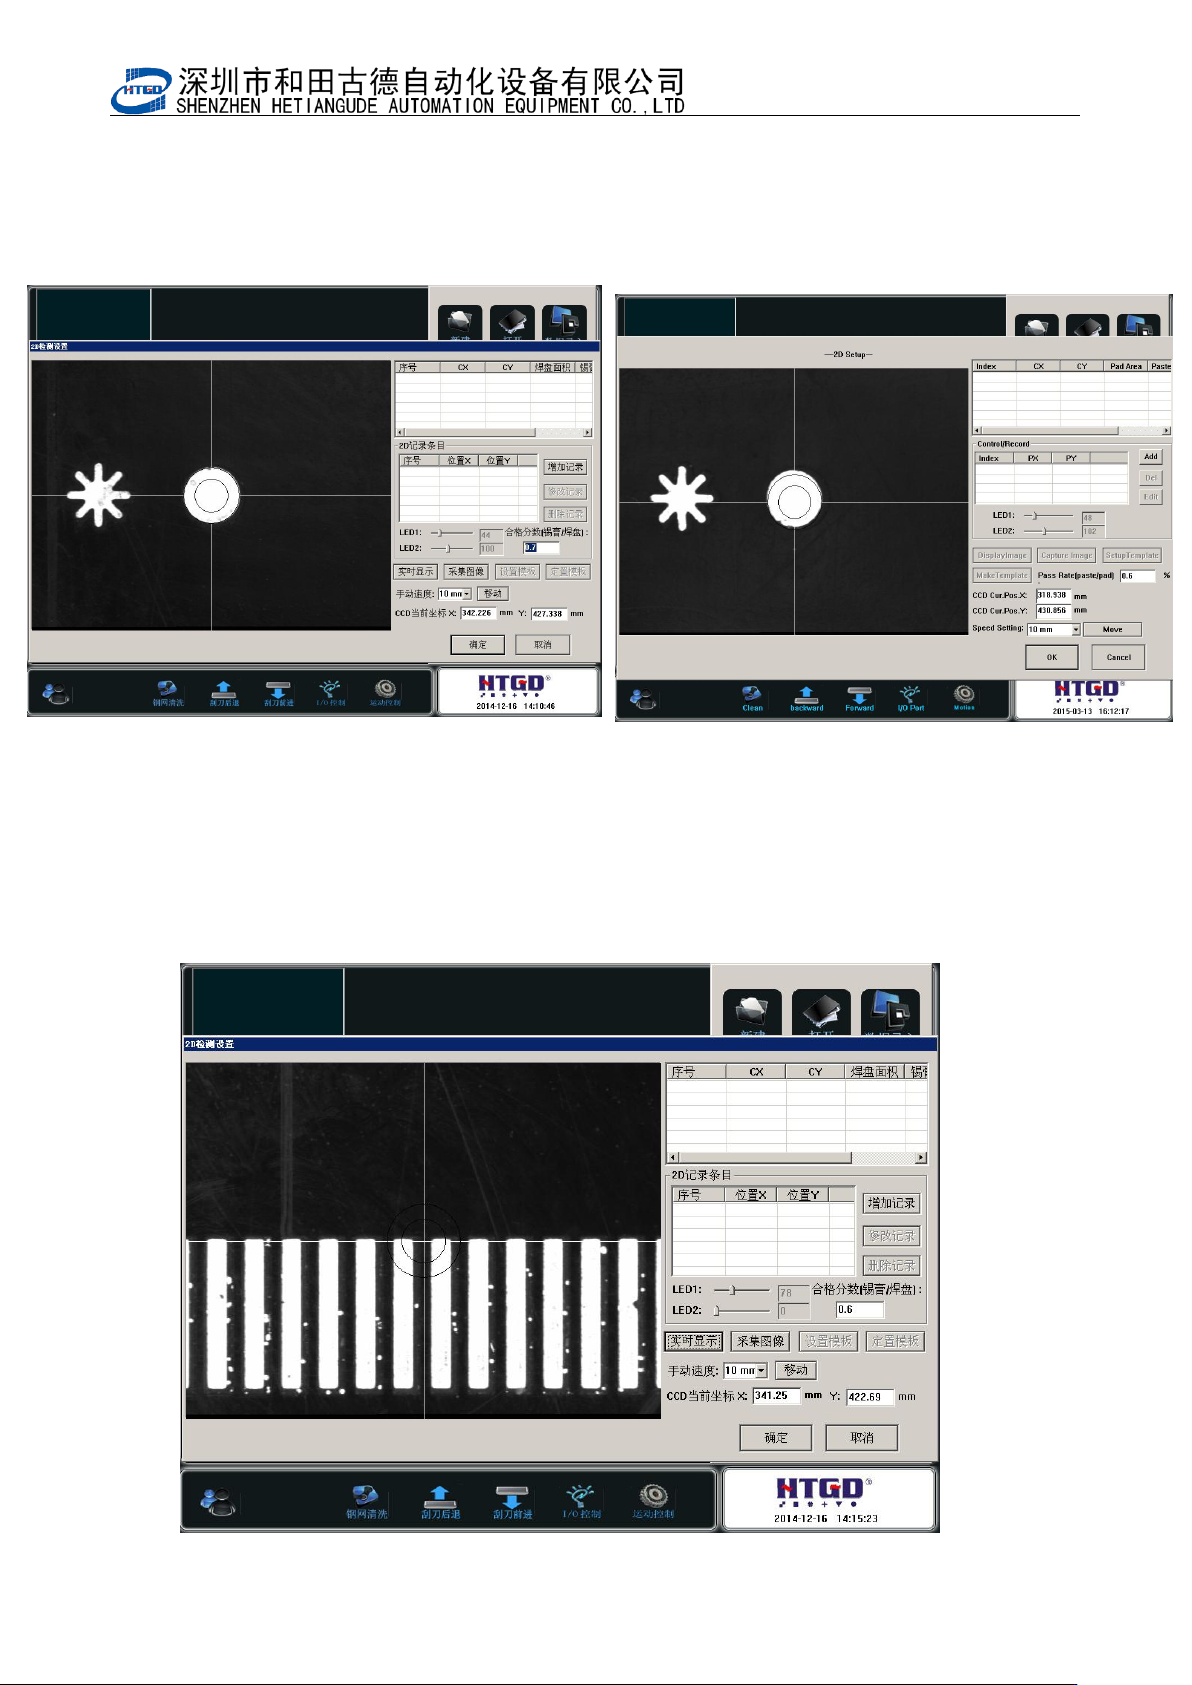
3. 点击增加记录,建立检测点。点击实时显示,并调整 LED1 与 LED2 光源,使图像达
到图中效果。
- 87 -
Click “ 增加 记 录”(add record) button and build inspection spot. Click “实时显
示”(real-time display) button. Adjust the light source of LED1 and LED2 and make the
image achieved the performance in the below pix.
图 6-3(实时显示界面)
Pix 6-3(real-time display interface)
4. 点击移动,然后使用键盘上的方向键,移动到要检测的位置
Click “移动”(move) button and press the direction key on the keyboard. Move to the
inspection position.
- 88 -
图 6-4(查找检测点)
Pix 6-4(search the inspection spot)
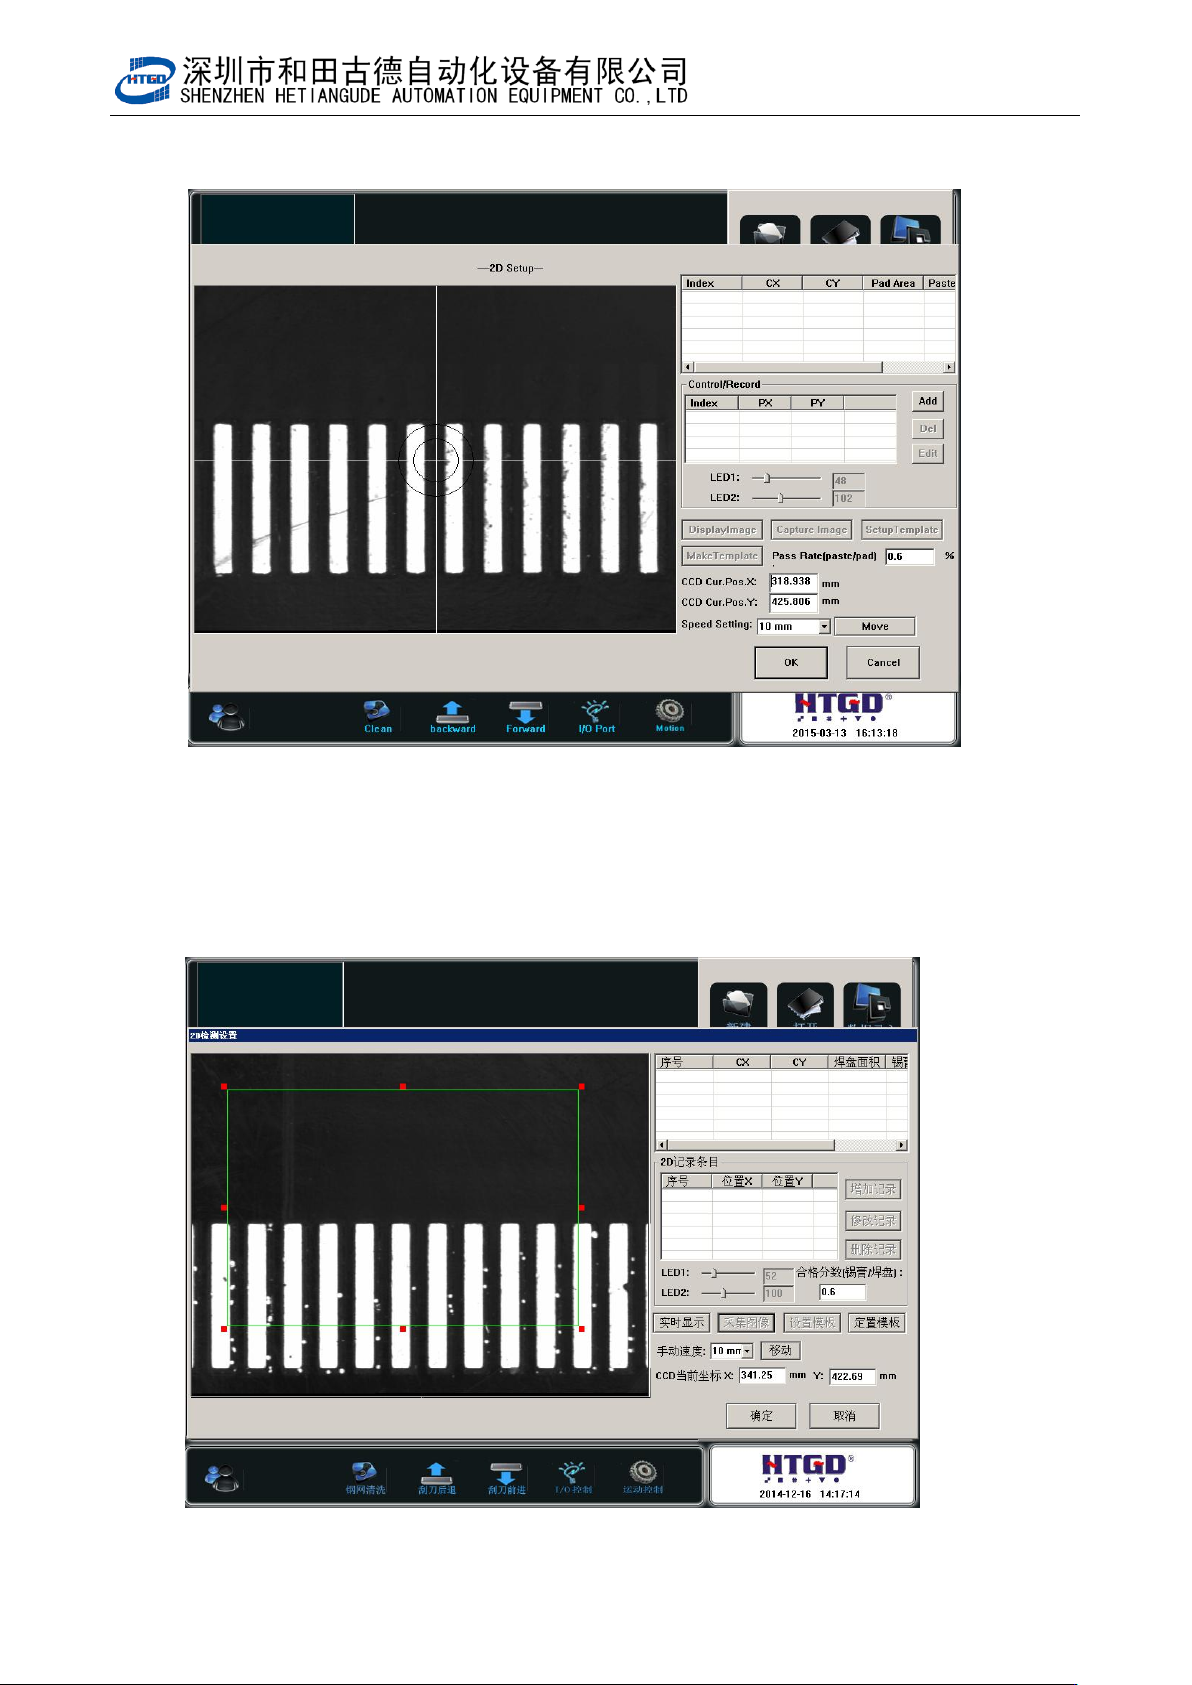
5. 点击采集图像,然后点击设置模板,手动设置 6-5 图上绿色方框
Click “采集图像”(image capture) button and click “设置模板”(template setting) button.
Setup the green square box manually in the pix 6-5.
图 6-5(设置模板)