GD450 说明书(中英文版) - 第92页
- 92 - 图 6-8 ( 2D 检测设置完确定) 11 点击生产 设置,打开生产设置界面,把 2D 检测选项选上,并点击确 定保存设置。 Click “ 生产设置 ” (production setting) butt on and enter into th e interface of produc tion setting. Select “ 2D 检测 ” (2D inspection) and Click “ 确定 ” (…
- 91 -
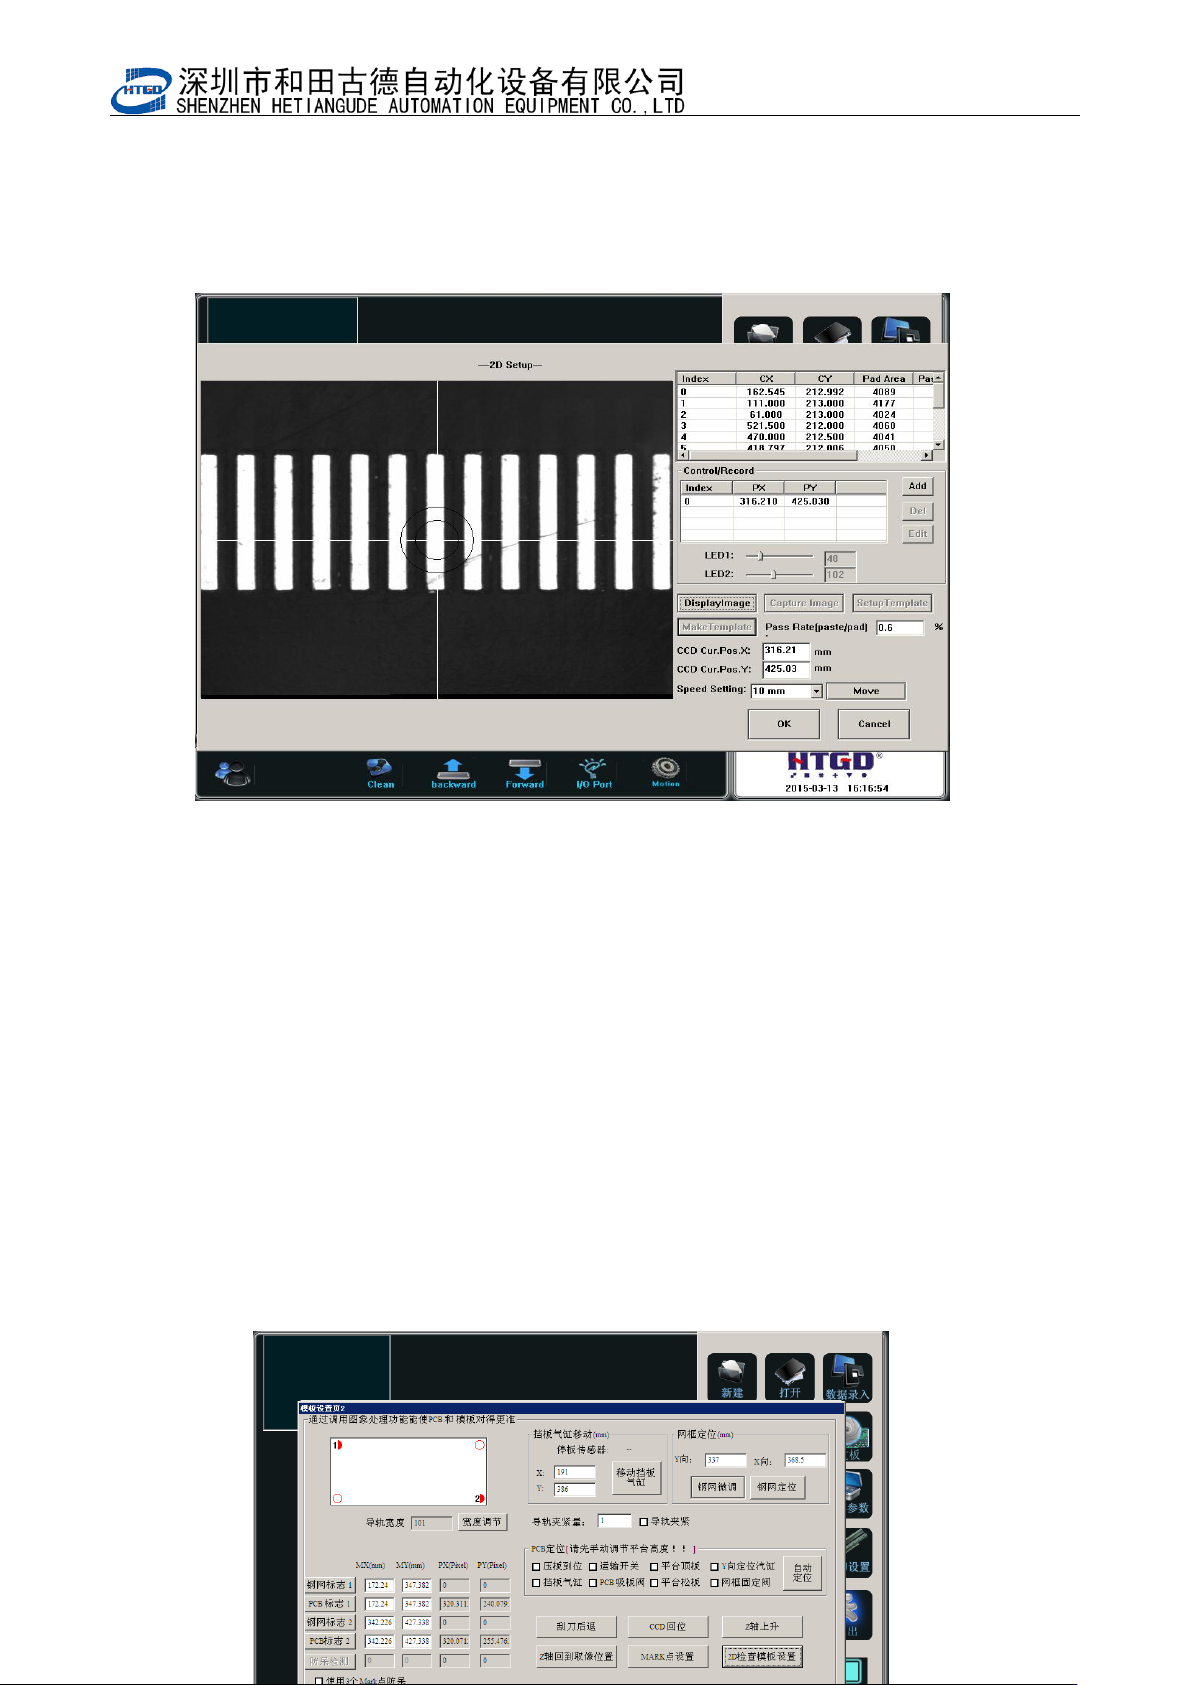
图 6-7(检测点)
Pix 6-7(inspection spot)
8 输入要检测的 PCB 上锡膏可以合格通过的覆盖率,本机器设定焊膏覆盖焊盘的面积在
60%以上即满足质量要求(即合格分析锡膏/焊盘:0.6)。
Input the cover rate which can pass the inspection for the solder paste printed on the PCB. If
there are above 60% solder paste printed on the bonding pad, then it can meet the printing
quality requirement. (The qualified rate: solder paste/bonding pad: 0.6)
9 如图 6-7,点击确定,完成 2D 检测点的建立、增加的动作及参数设置。
Click “确定”(ok)button, then finish the build of 2D inspection spot, movement add and
parameter setting. See pix 6-7.
10 点击确定,保存已更改的数据。如图 6-8
Click “确定”(ok)button to save the changed data. See pix 6-8.Pix 6-8(click
“确定” (ok)button after setting the 2D inspection)
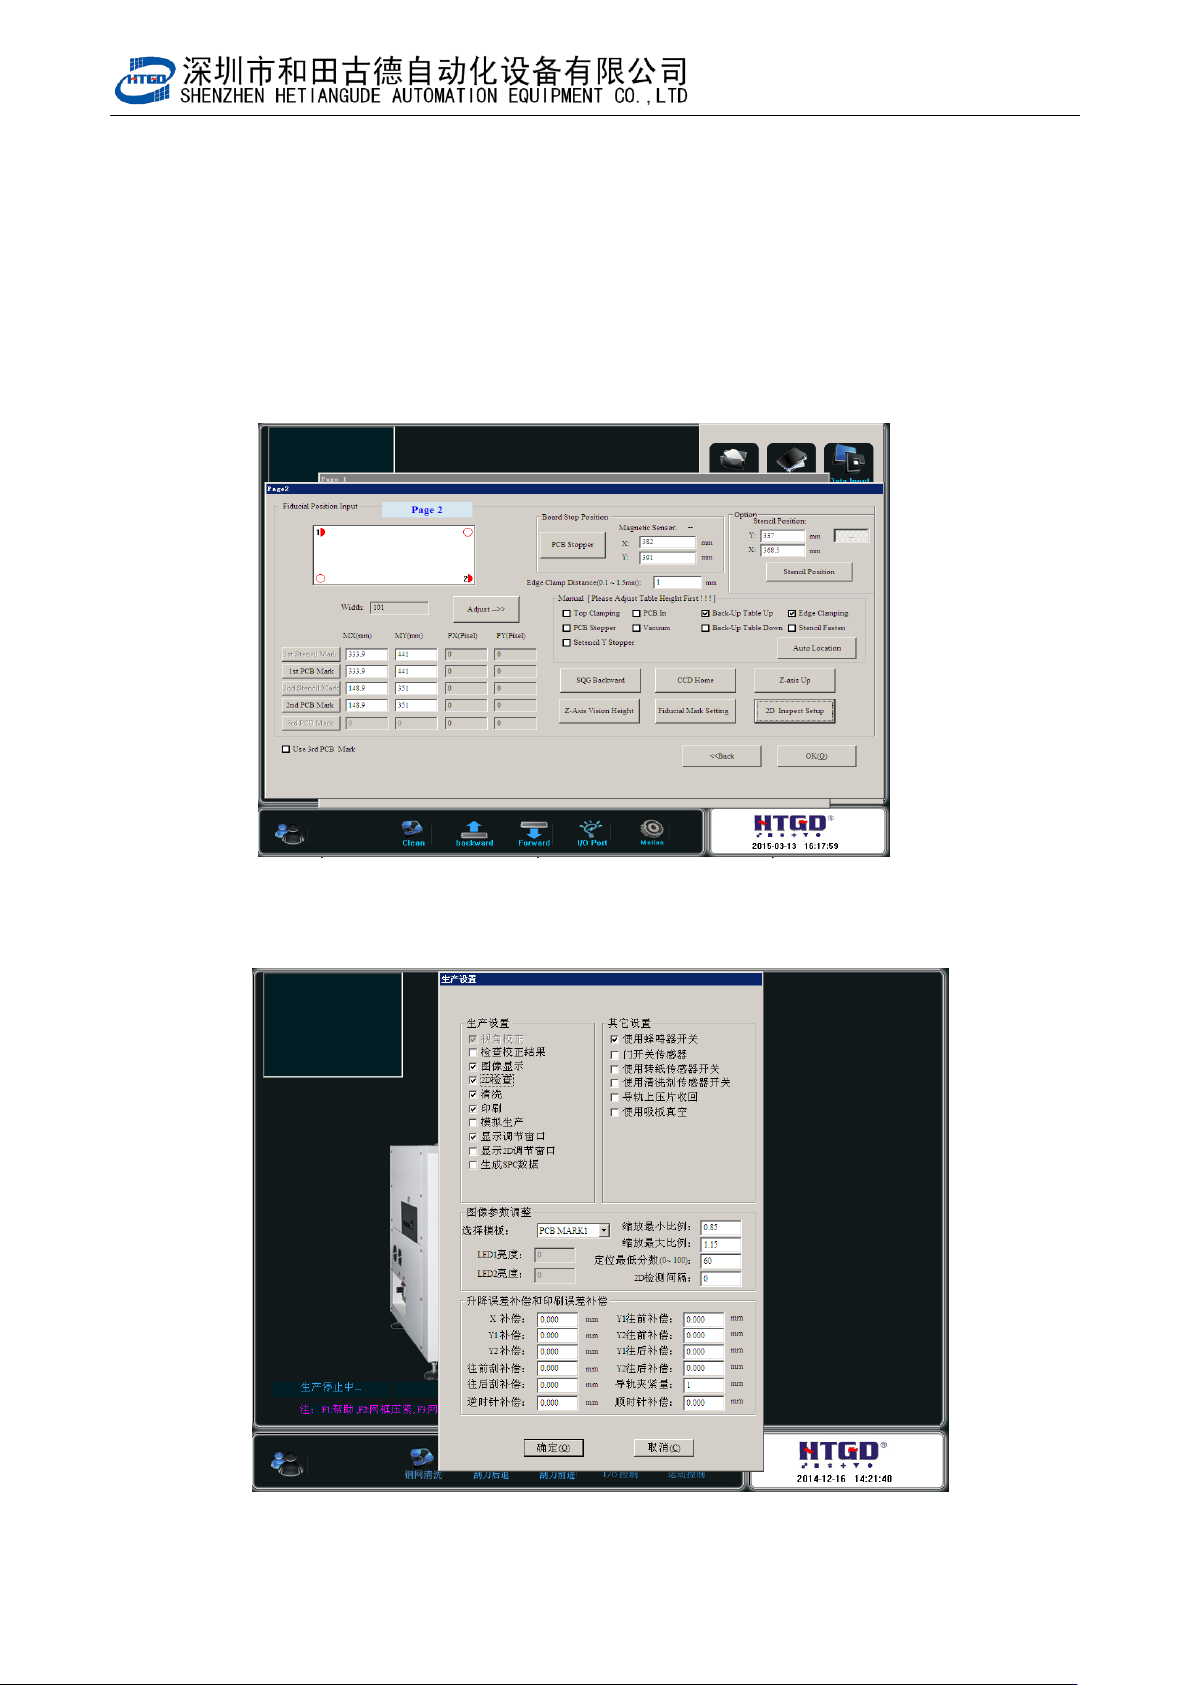
- 92 -
图 6-8(2D 检测设置完确定)
11 点击生产设置,打开生产设置界面,把 2D 检测选项选上,并点击确定保存设置。
Click “生产设置”(production setting) button and enter into the interface of production setting. Select “2D
检测” (2D inspection) and Click “确定”(ok) button to save the setting.
图 6-9(生产设置界面)
- 93 -
Pix 6-9(production setting interface)
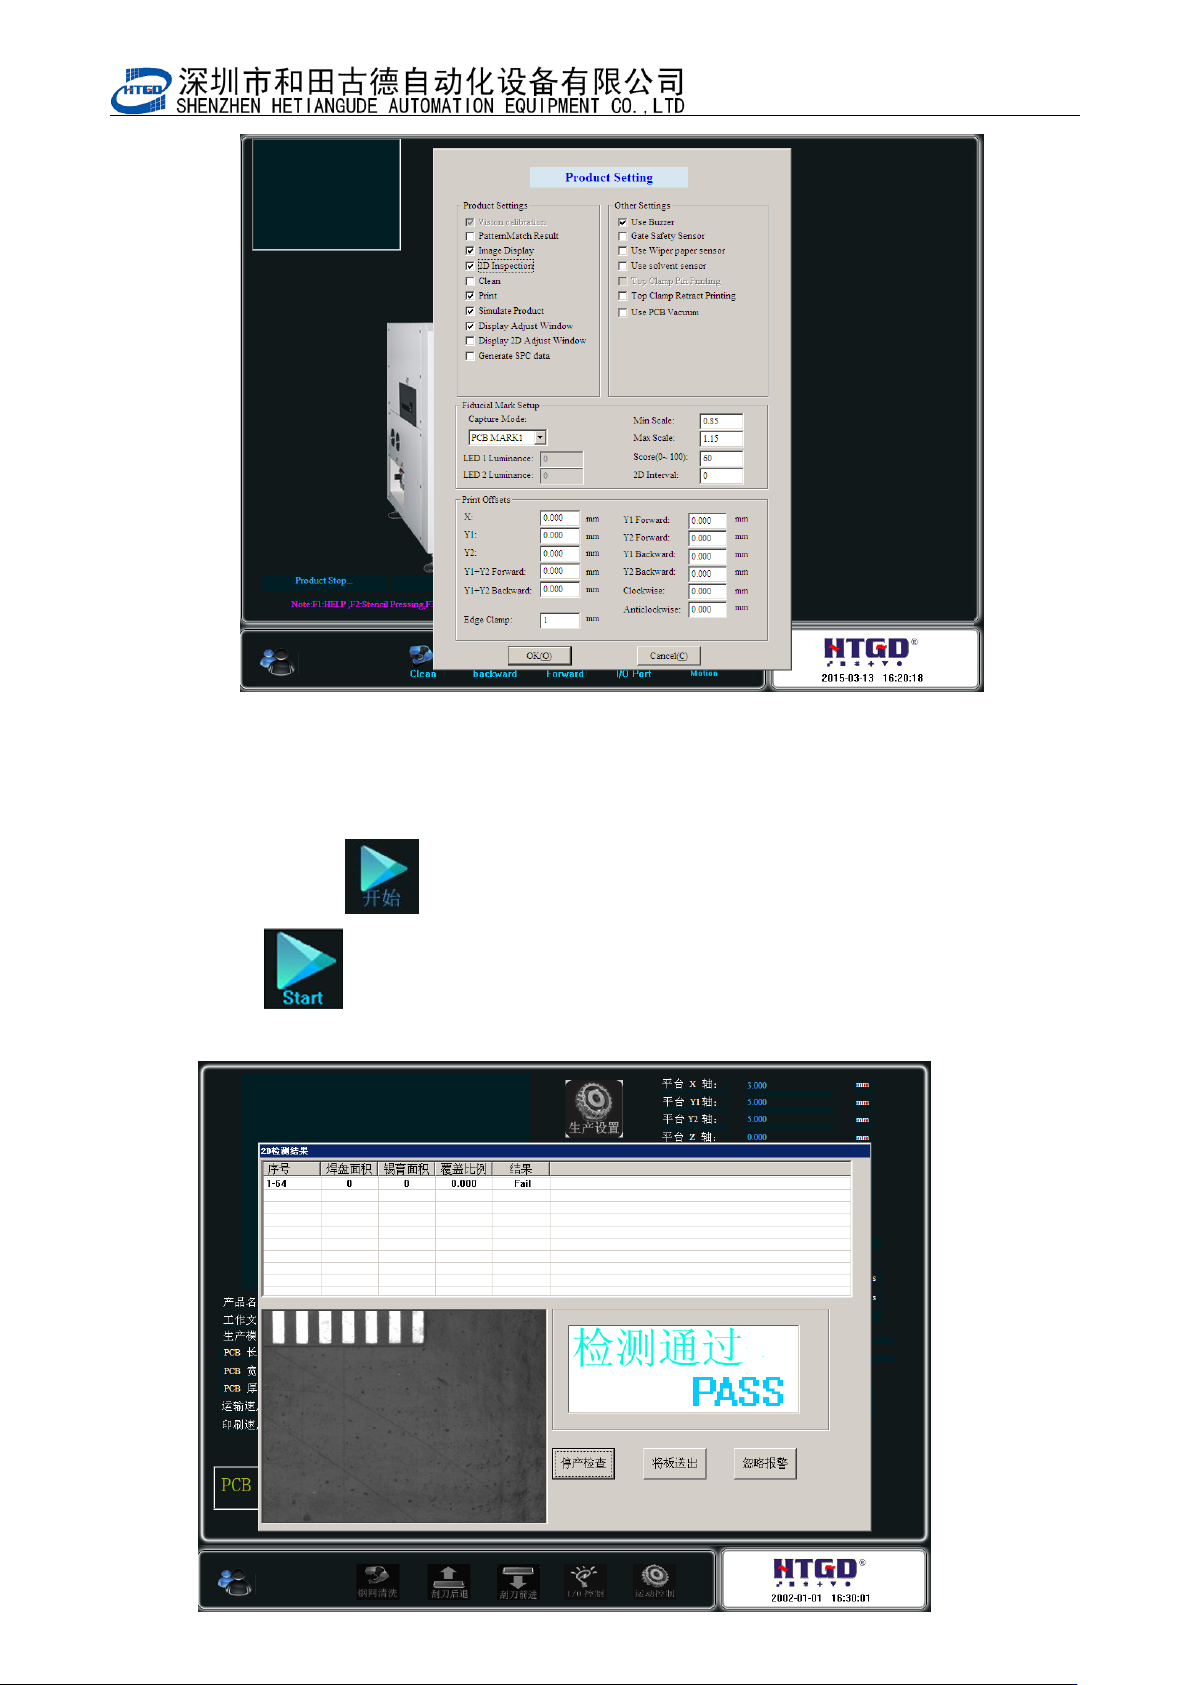
12 点击开始按钮 进入生产状态。印刷完成后,显示检测界面。
Click “ ” (start) button to start production. The inspection interface will display
after the printing has been finished.