QP132三级参考手册.pdf.pdf - 第76页
5.2 Measuring Mark Camera Proper Data and Adjustment 5.2.1 Delta and Mark Camera Pixel 1. Move the camera using inching to display the mark of the resolution (ACGPJ9030) jig on the center of the monitor. 2. Press [SET] →…
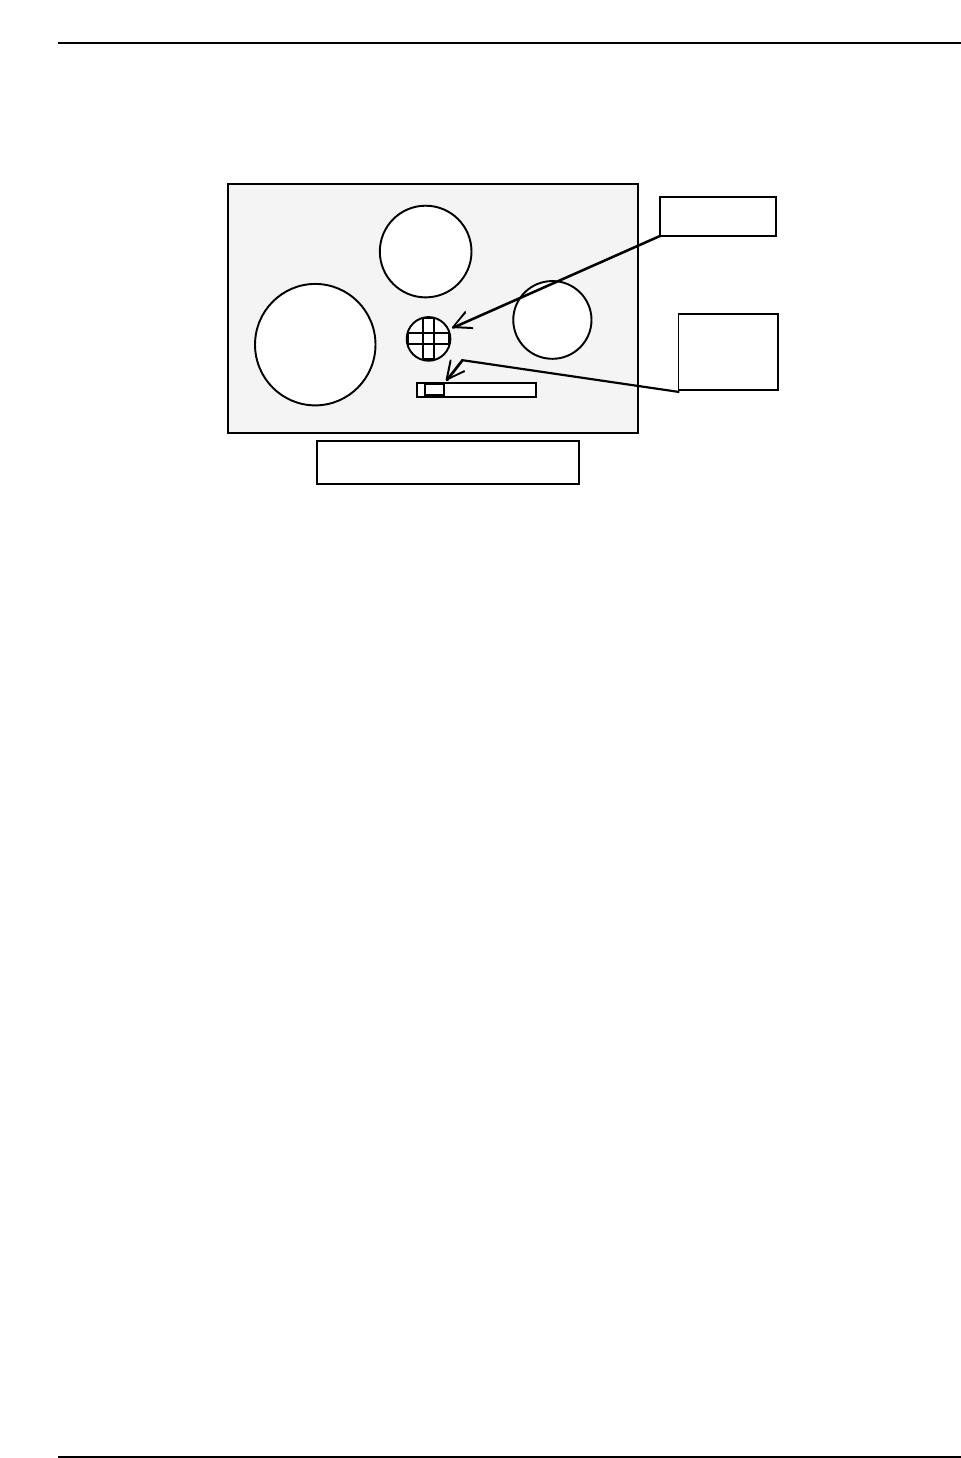
11. Check the displayed image and adjust the gain volume behind the
camera.
12. Adjust the focus using the Focus adj. bolt on top of the camera bracket.
Rear side of the mark camera
Set switch
to M
Gain volume
QP132T5001
M F A GAIN
Chapter 5 5.1 Replacing Mark Camera
Edition 1.1 5-2 QP-132 Level 3 Tutorial

5.2 Measuring Mark Camera Proper Data and
Adjustment
5.2.1 Delta and Mark Camera Pixel
1. Move the camera using inching to display the mark of the resolution
(ACGPJ9030) jig on the center of the monitor.
2. Press [SET] → [PROPER] → [PM] → PM SELECT → [PARTS CAMERA]
→ [RESOLUTION] → START to measure the resolution.
Delta, Q = ± 0.050 deg
Delta, X = ± 50 um
Delta, Y = ± 50 um
Mark Camera Pixel X = 17.5 um ~ 19.0 um
Mark Camera Pixel Y = 17.5 um ~ 19.0 um
3. Adjust the camera using Eccentric bolt and Focus adj. bolt.
4. Re-tighten and check resolution several times.
Chapter 5
5.2 Measuring Mark Camera Proper Data and Adjustment
Edition 1.1 5-3 QP-132 Level 3 Tutorial
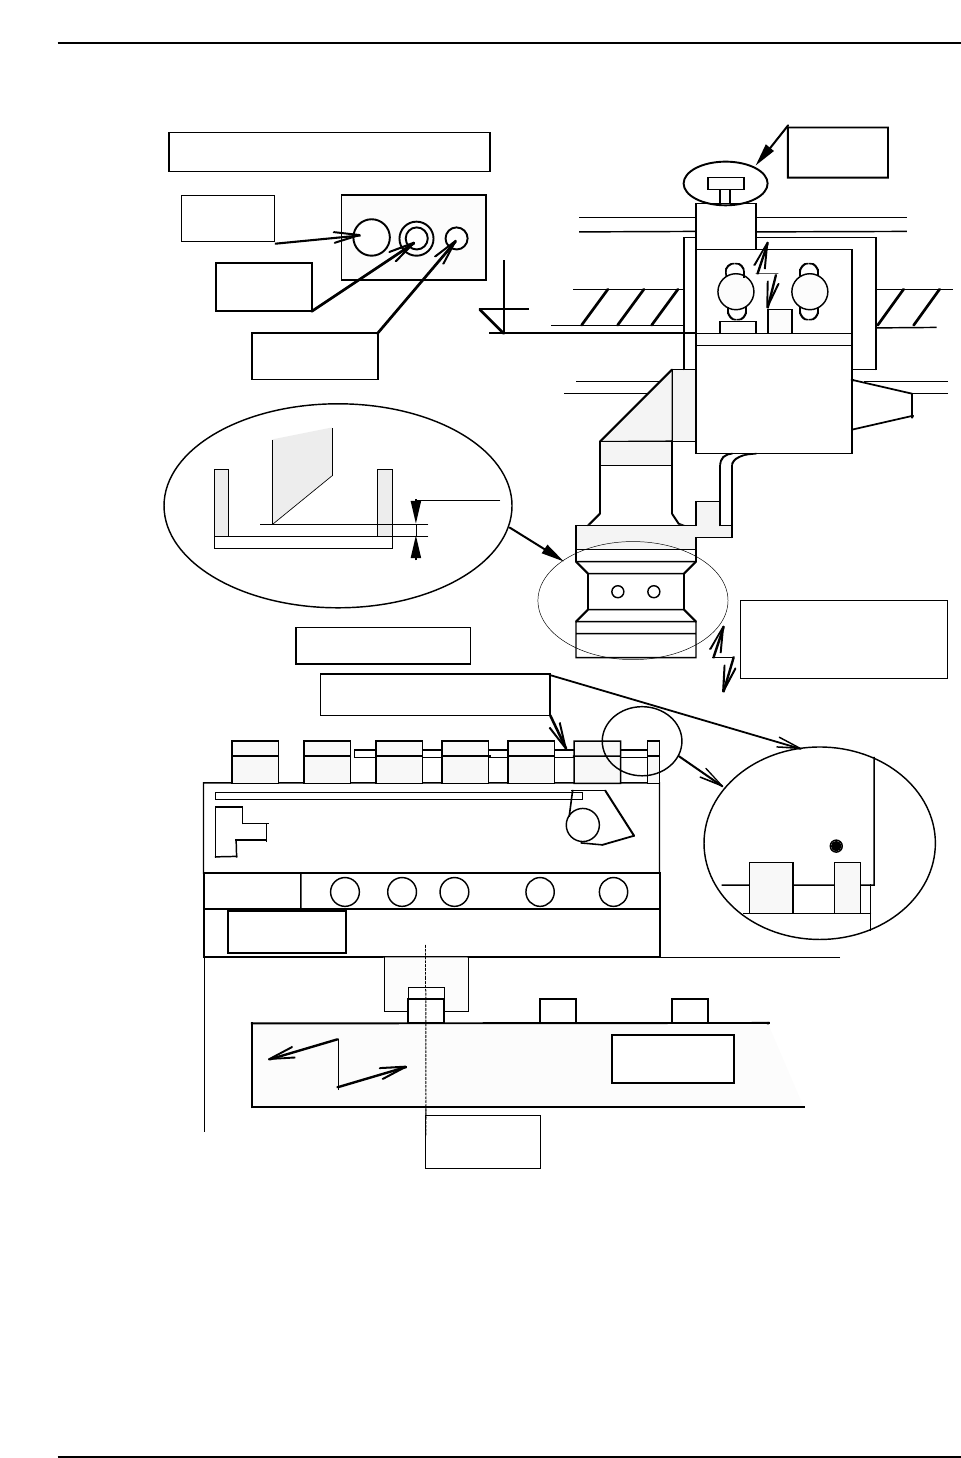
Adjust camera focus by adjusting bolt.
Center pin
Fixing bolt
Eccentric bolt
1 mm
Mark camera calibration jig
M/C from IN side ←
8-inch pallet
SS0 position
SS index rail
Focus adj.
bolt
Low/raise the camera
to adjust focus.
After that, calibrate.
¥
¥
QP132T5002
Chapter 5
5.2 Measuring Mark Camera Proper Data and Adjustment
Edition 1.1 5-4 QP-132 Level 3 Tutorial