80S-2080F480F4-680F5 User’s Manual.pdf - 第636页
SIPLACE 80S-20/F4/F4-6/F5 User’s Manual 11 Station Extensions/Options Edition 03/98 from Software Version SR.404.xx 11.7 Dispenser Flux A pplication Unit for SIPLACE 80F4/F4-6/F5 11 - 39 11.7.5 Replacing the Entire Dispe…
11 Station Extensions/Options SIPLACE 80S-20/F4/F4-6/F5 User’s Manual
11.7 Dispenser Flux Application Unit for SIPLACE 80F4/F4-6/F5 Edition 03/98 from Software Version SR.404.xx
11 - 38
11.7.4 Changing the Syringe
During normal operation it will not be necessary to change the syringe. You may however need to remove or
replace the syringe during servicing work.
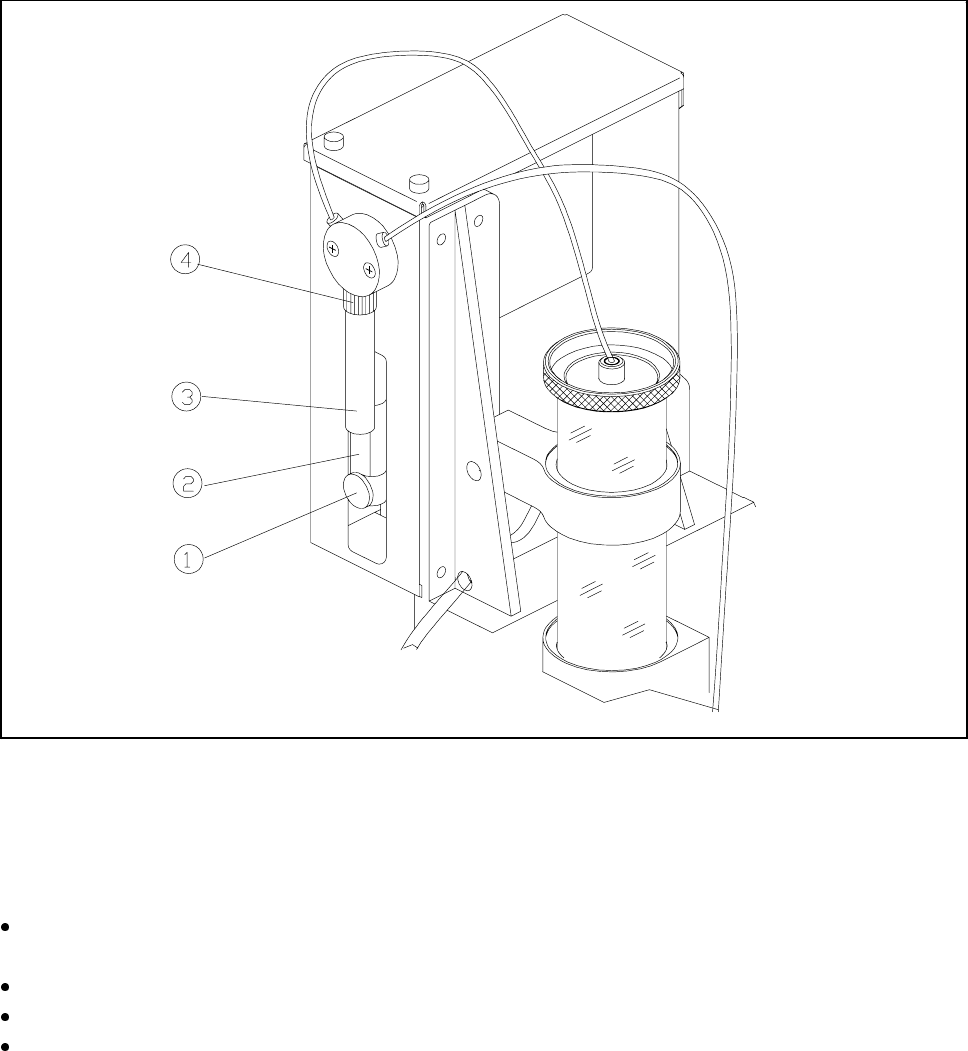
Fig. 11.7.3 Changing the syringe
- Key to Fig. 11.7.3
1 Knurled screw 2 Dosing plunger
3 Syringe 4 Unscrew retaining nut
Under Single functions bring the flux into the Refill position. See Section 11.7.6.4 "Single Functions".
The dosing plunger of the syringe now moves downwards.
Undo the knurled screw on the dosing plunger.
Slide the dosing plunger upwards. This empties the syringe and the flux is forced back into the reservoir.
Unscrew and remove the retaining nut together with the syringe.
SIPLACE 80S-20/F4/F4-6/F5 User’s Manual 11 Station Extensions/Options
Edition 03/98 from Software Version SR.404.xx 11.7 Dispenser Flux Application Unit for SIPLACE 80F4/F4-6/F5
11 - 39
11.7.5 Replacing the Entire Dispensing Needle with Centering Nozzle
If the centering nozzle is defective, it can be replaced on its own. The dispensing needle is a complete assem-
bly.
It may be necessary to replace the entire dispensing needle if it or the hose is clogged by the formation of
crystals in the flux and thus has to be replaced. In this case, the entire assembly is replaced.
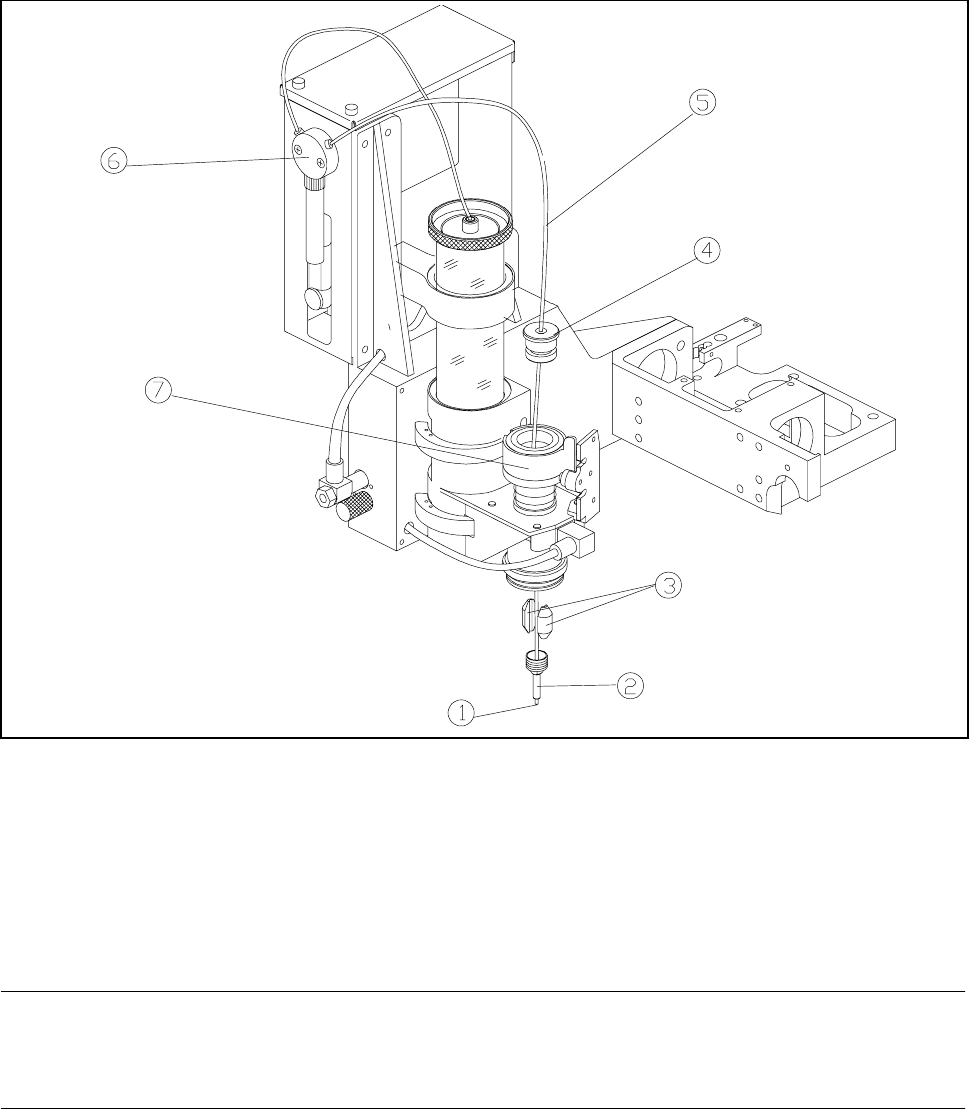
Fig. 11.7.4 Replacing dosing hose (Tube blunt 29”)
- Key to Fig. 11.7.4
1 Tip of dosing needle 2 Centering nozzle
3 Clamping pieces 4 Cylinder cover
5 Dosing needle, complete 6 Valve
7Cylinder
CAUTION
When you unscrew the centering nozzle, make sure that you do not lose the two clamping pieces which clamp
the dispensing needle in the cylinder.
11 Station Extensions/Options SIPLACE 80S-20/F4/F4-6/F5 User’s Manual
11.7 Dispenser Flux Application Unit for SIPLACE 80F4/F4-6/F5 Edition 03/98 from Software Version SR.404.xx
11 - 40
Loosen the centering nozzle.
Pull the cylinder cover and the dispensing needle away from the cylinder and pull out the entire dispensing
needle from the cylinder.
Disconnect the end of the hose of the dispensing needle from the valve of the metering pump.
Thread the new dispensing needle through the cylinder cover and through the cylinder and into the center-
ing nozzle. The tip of the dispensing needle must protrude approximately 3 mm from the centering nozzle.
Tighten the centering nozzle once more.
Push the cylinder cover onto the cylinder.
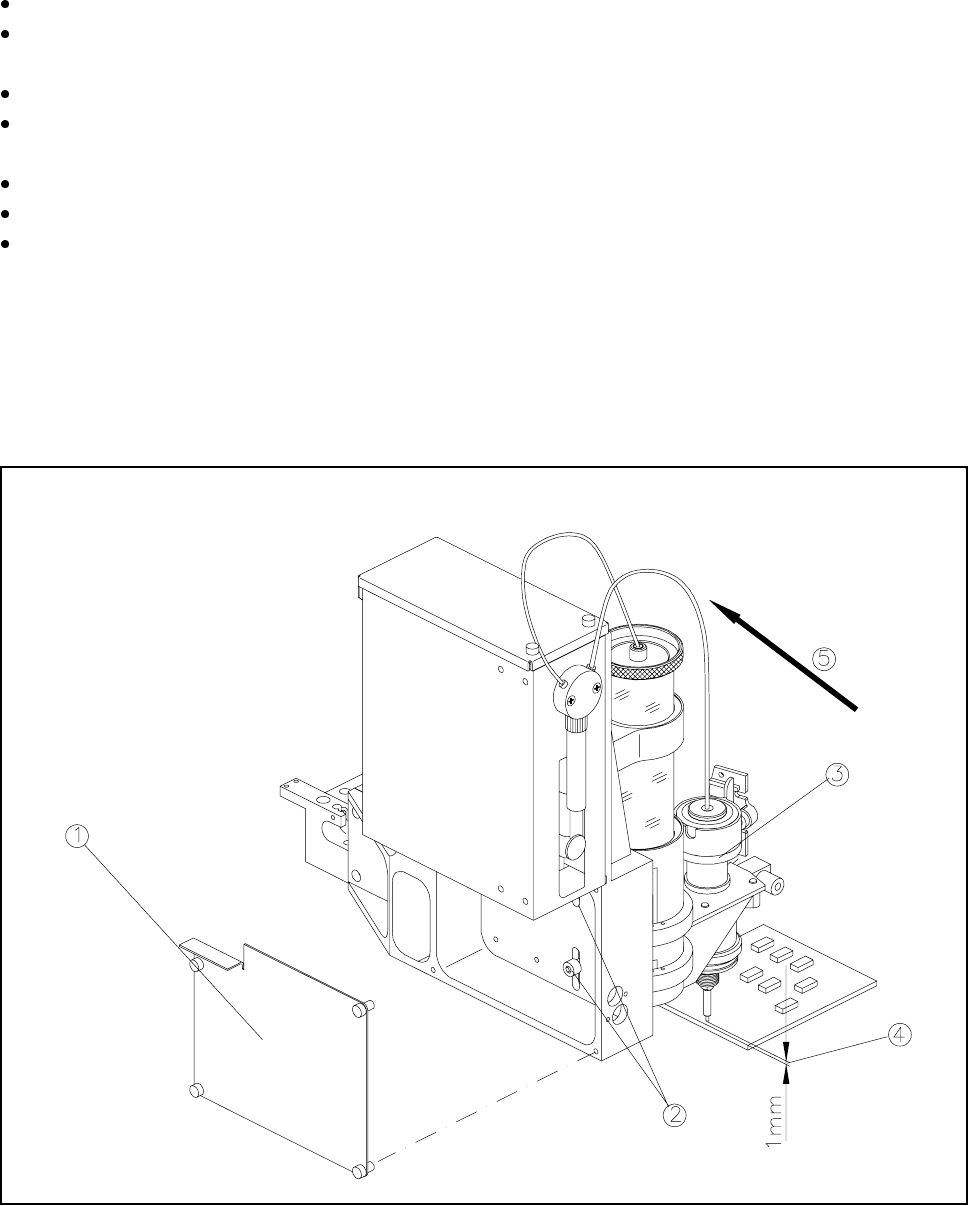
Check the distance between the dispensing needle and the PCB. Push the piston down as you do so. The
distance must be approximately 1 mm.
If this distance is not correct, it must be reset.
11.7.5.1 Setting the Distance Between the Dispensing Needle and the PCB
Fig. 11.7.5 11.7.5 Setting the distance between the dispensing needle and the PCB
- Key to Fig. 11.7.5
1 Rear cover with 4 fixing screws 2 2 fixing screws for the flux application unit
3 Lifting piston 4 Set the distance to 1 mm from the PCB
5 Push the flux application unit against the stop