Nordson_EFD_Performus_I_操作手册
Performus I Series Fluid Dispensers Quick Start Guide Electronic pdf files of Nordson EFD manuals are also available at www.nordsonefd.com ™
Performus I Series Fluid Dispensers
Quick Start Guide
Electronic pdf files of Nordson EFD
manuals are also available at
www.nordsonefd.com
™
2 3
Unpack the unit. Now is a good time to activate
the warranty online at www.nordsonefd.com/
warranty/dispensers/one.
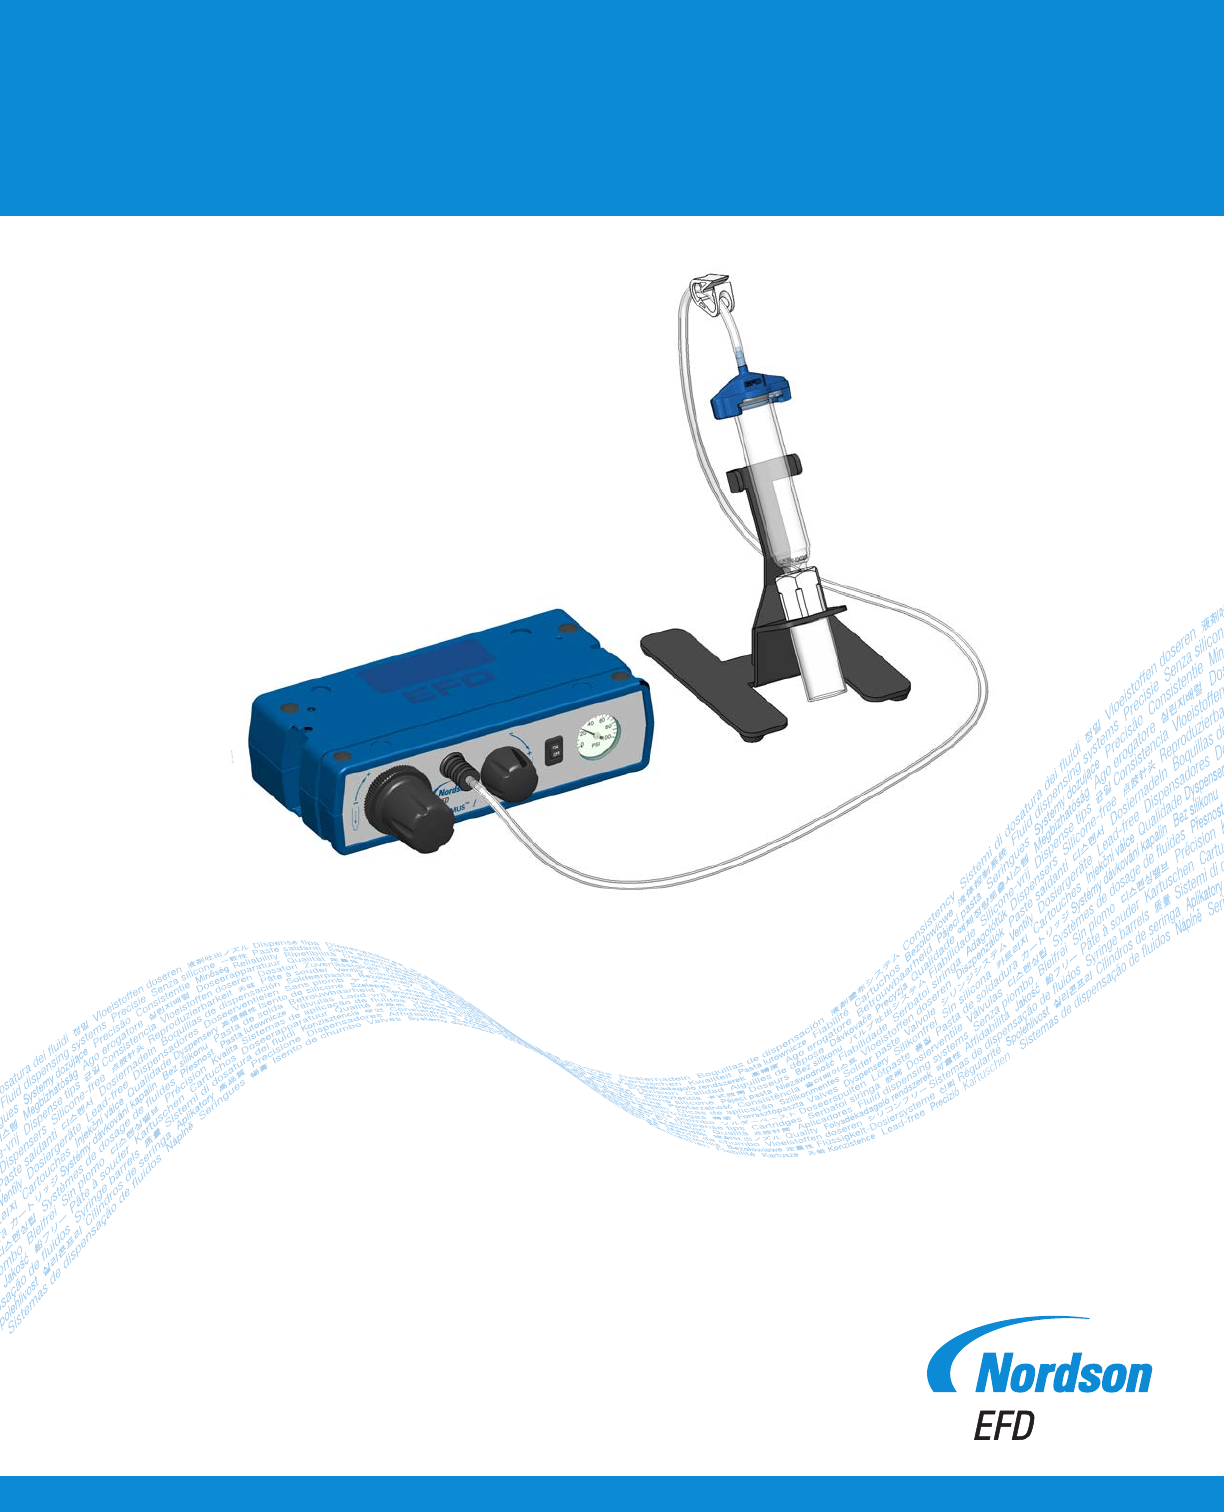
1. NOTE: Clean, dry filtered air is required
to meet warranty. If your air supply is
not filtered, order the 5-micron filter /
regulator (P/N 7002002).
Turn the air regulator adjustment knob
to zero (0).
Connect one end of the air input hose
to the Performus
™
; connect the other
end to the plant air supply. Set the
plant air supply between 5.5–7.0bar
(80–100 psi).
2. Attach the plug that matches the local
power outlet to the power pack.
Connect the power cord to the
Performus and insert the plug into the
local power source.
Press the power button on the front
panel.
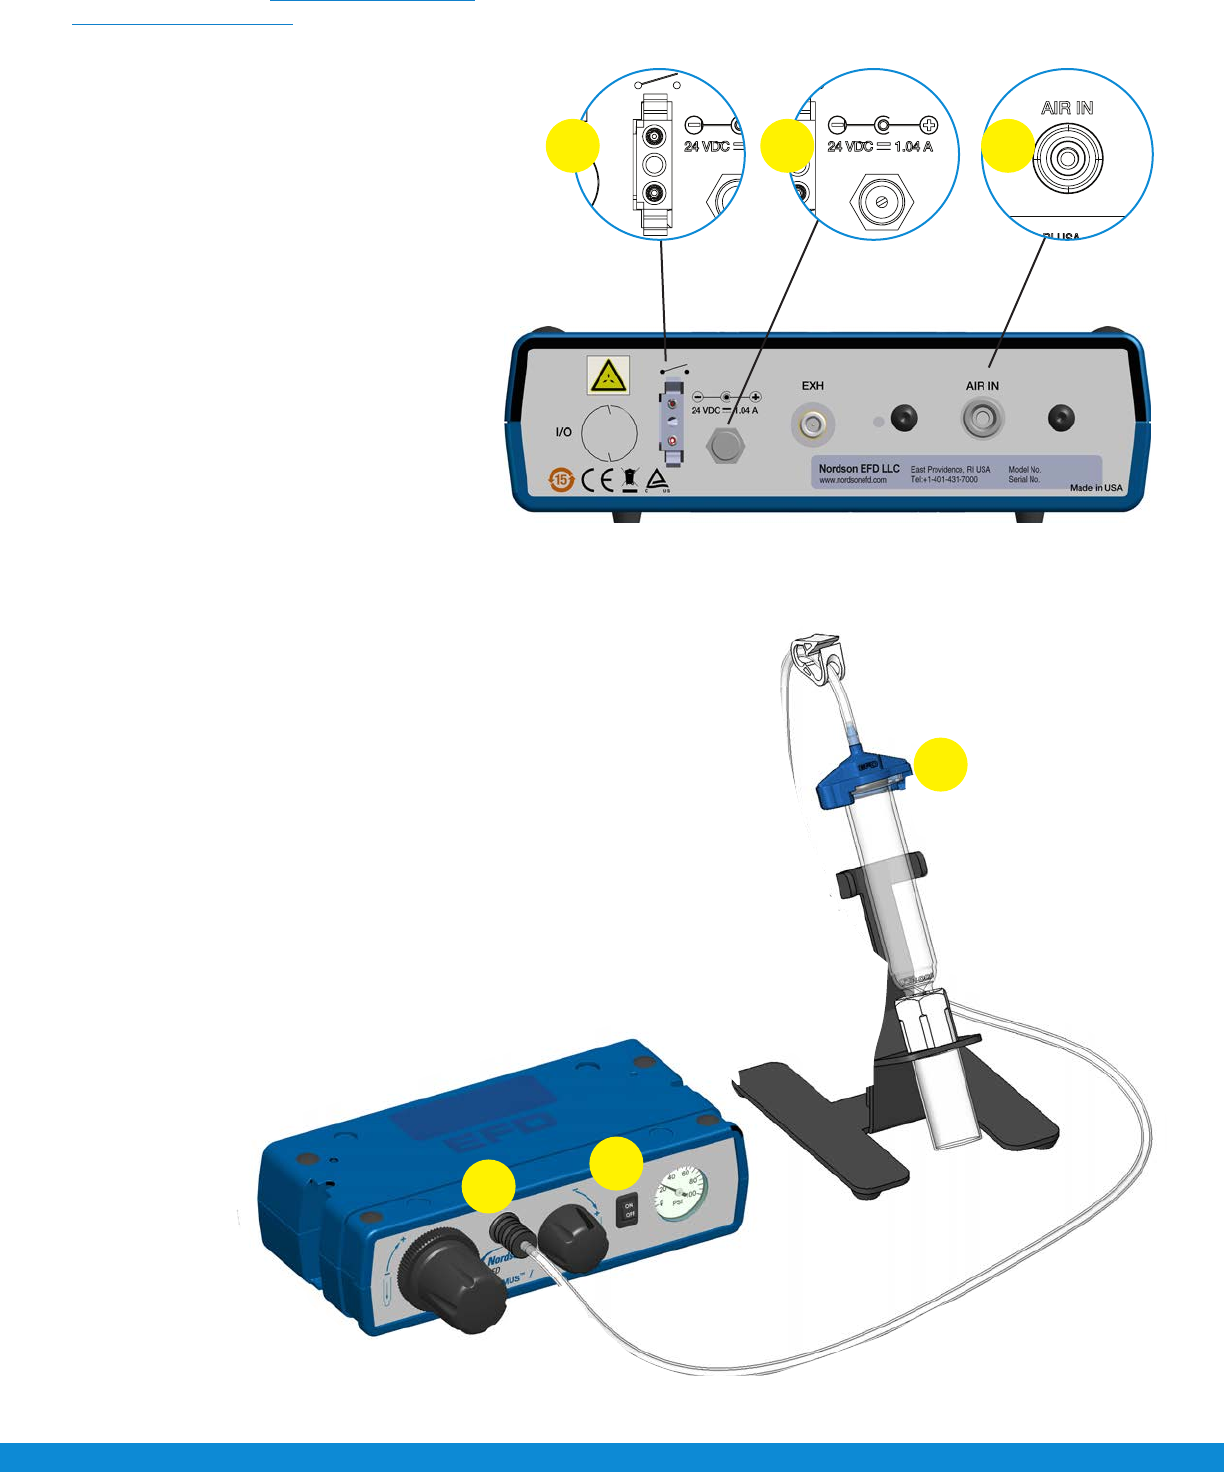
3. Connect the foot pedal or optional finger
switch.
4. Attach a filled Nordson EFD syringe
barrel to the adapter assembly and snap
the safety clip closed. Replace the tip
cap with a Nordson EFD dispense tip
and place the syringe barrel in the barrel
stand.
5. Insert the adapter assembly into the
quick-connect fitting on the front of the
Performus and twist to lock.
5
4
2
3 12

2 3
6. Unsnap the safety clip. Depress and hold the foot pedal for the
remainder of this setup.
7. While resting the tip on the paper (test surface), SLOWLY turn the
air pressure regulator clockwise until fluid starts to exit from the
tip.
8. Keep increasing the air pressure until you have reached the
desired fluid dispensing flow rate.
NOTE: Always use the lowest possible pressure and the largest
possible tip size. The combination of the lowest possible output
pressure + largest possible tip size + longest possible dispense
duration = most consistent and accurate deposits.
9. Release the foot pedal.
10. Retest the dispensing rate a few more times. Fine-tune as
required by making small changes in pressure.
11. Push the air regulator adjustment knob in to lock the setting.
Open
Closed
6
6
8