182050 User manual.pdf - 第15页
semi automatic 0$&+,1 (352*5 $00,1 * 67$*( (',7 $352' 8&7),/( Software Version 07SP02 User Manual 1.5 ST AGE 3 - EDIT A PRODUCT FILE 1. Select Edit Dat a (F3). The following Edit Current Proces…
semi automatic
0$&+,1(352*5$00,1*
67$*(/2$'$352'8&7),/(
1.4 User Manual Software Version 07SP02
STAGE 2 - LOAD A PRODUCT FILE
1. For an existing product, the product file has already been written. If the
product is new, either edit an existing or a default file.
NOTE
The product file displayed after the machine has been initialized is the same
one that was resident in the printer when it was powered down. If this file is
correct for the product, continue to Stage 9 - Print in Run Mode. If the
product file is incorrect for the current product, continue with this procedure
2. Press Setup (F6).
3. Press Load Data (F2).
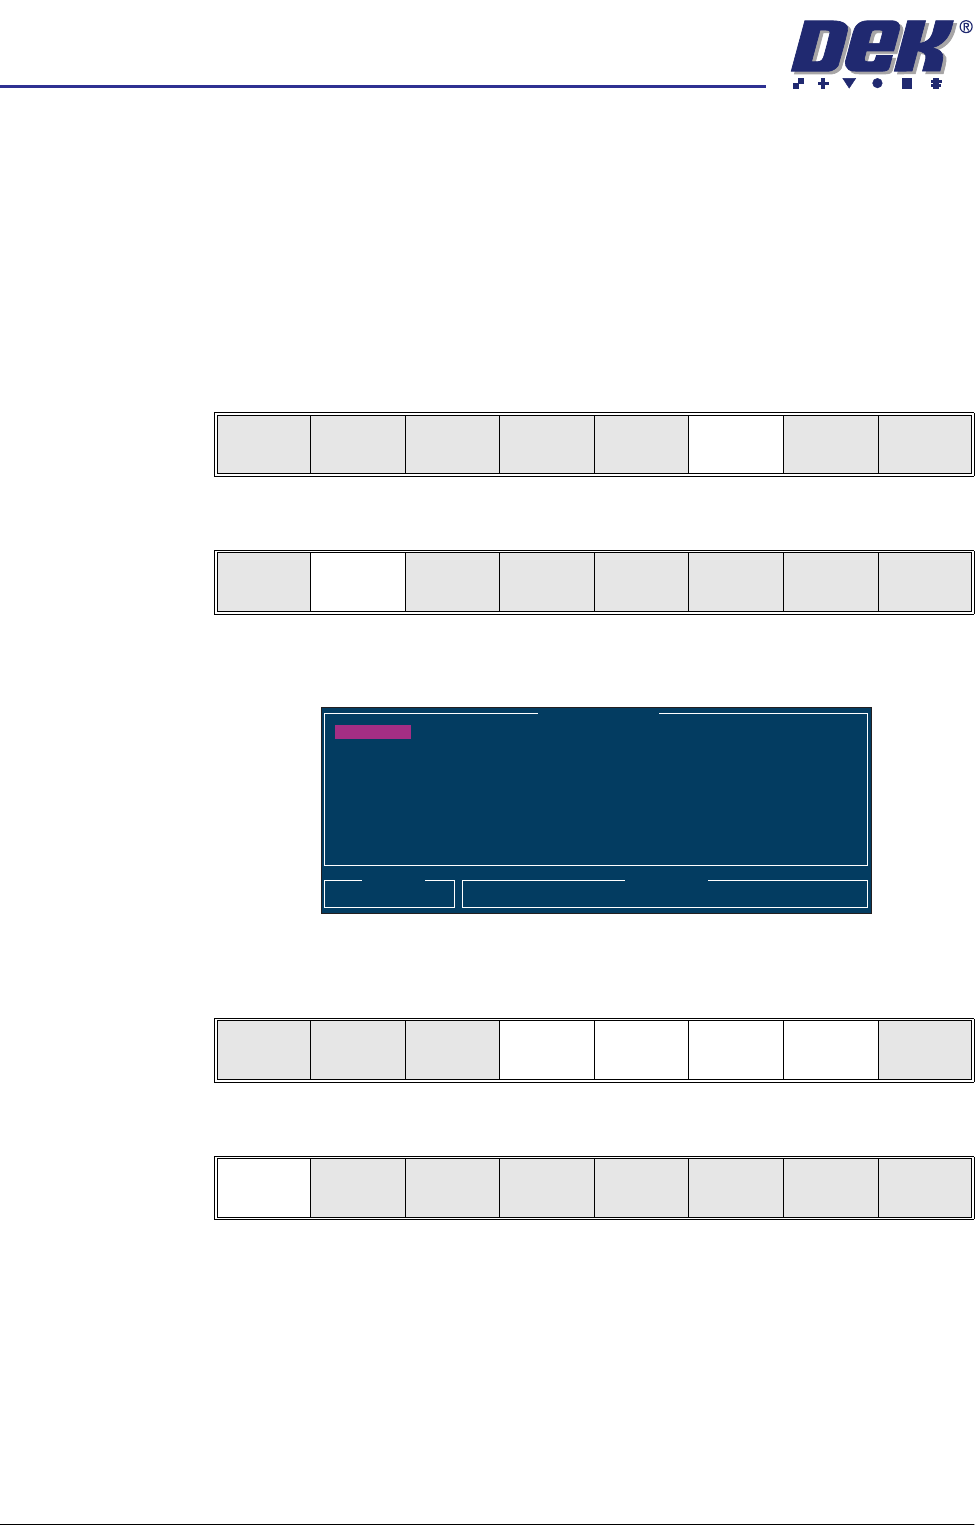
The following Load Data File Window is displayed:
4. Use Left, Right, Up or Down function keys (F4-F7) to highlight the required
file.
5. Press Load (F1).
The selected file is now displayed on the monitor.
If this is the correct file for the product proceed to Stage 4. If the file has to
be edited proceed to Stage 3.
Run
Open
Cover
Paste
Load
Clean
Screen
Setup Monitor Maint.
Mode
Load
Data
Edit
Data
Setup
Squeegee
Change
Screen
Change
Tooling
Change
Language
Exit
Load Data File
Product ID
Search
Training
265TEST1
265TEST1
ANDY H
CALIBRA
DEFAULT
DEK04
DEK06
Load
Rebuild
List
Left Right Up Down Exit
Load
Rebuild
List
Left Right Up Down Exit
semi automatic
0$&+,1(352*5$00,1*
67$*((',7$352'8&7),/(
Software Version 07SP02 User Manual 1.5
STAGE 3 - EDIT A PRODUCT FILE
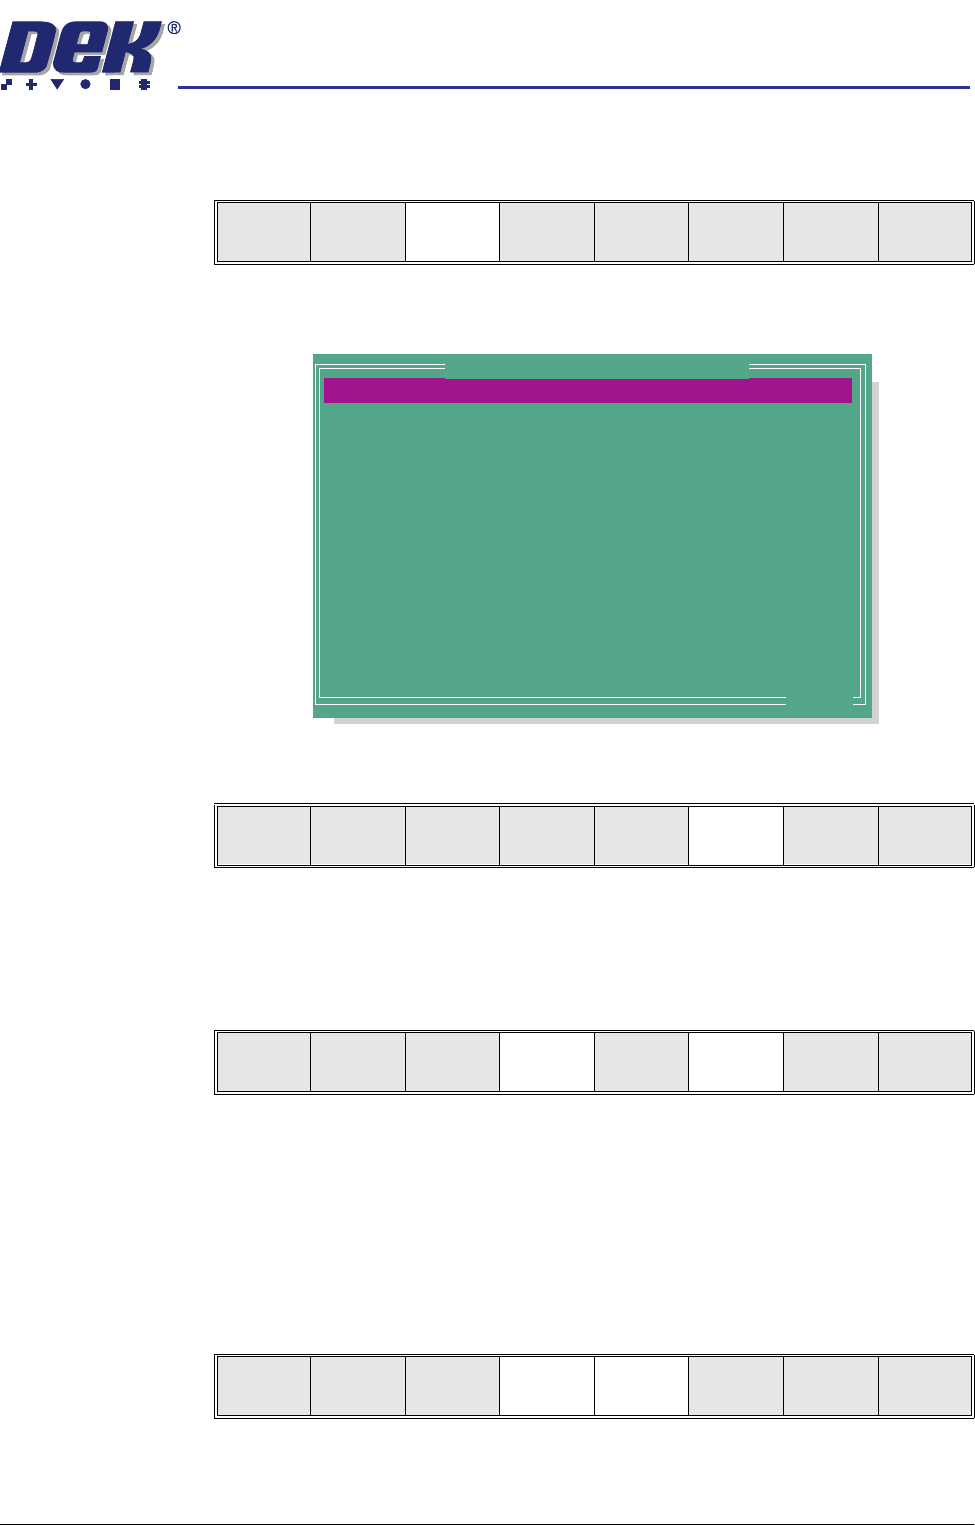
1. Select Edit Data (F3).
The following Edit Current Process Parameters window is displayed:
2. Select Incr. (F6). The message ‘Please type in the text, then press
Return’ is displayed. The menu softkeys are blanked out.
3. Type in the required product name and press Return using the keyboard.
4. Highlight Product ID using the Next key (F4). Select Incr. (F6). The
message ‘Please type in the text, then press Return’ is displayed. The
menu softkeys are blanked out.
5. Type in the required product ID and press Return using the keyboard.
NOTE
If 2D Inspection is enabled and the product file being copied has an
assigned inspection file, the user is prompted to make a copy of the file.
(See 2Di Setup in 2Di Inspection chapter later in this manual).
6. Use the Next and Previous keys (F4 - F5) to highlight the relevant param-
eter.
Mode
Load
Data
Edit
Data
Setup
Squeegee
Change
Screen
Change
Tooling
Change
Language
Exit
PRODUCT NAME
PRODUCT ID
SCREEN ADAPTOR
SCREEN IMAGE
CUSTOM SCREEN
BOARD WIDTH
BOARD LENGTH
BOARD THICKNESS
FRONT PRINT SPEED
REAR PRINT SPEED
FLOOD SPEED
PRINT FRONT LIMIT
PRINT REAR LIMIT
FRONT PRINT PRESSURE
DEFAULT
Alignment Test Board
NONE
EDGE
DISABLED
250.0
250.0
1.6
150
150
20
0.0
0.0
5.0
mm
mm
mm
mm/s
mm/s
mm/s
mm
mm
kg
.. more
Edit Current Process Parameters
Save Next Previous Incr. Decr. Exit
Save Next Previous Incr. Decr. Exit
Save Next Previous Incr. Decr. Exit
semi automatic
0$&+,1(352*5$00,1*
67$*((',7$352'8&7),/(
1.6 User Manual Software Version 07SP02
7. Use either the Incr. and Decr. keys (F6 - F7) or the forward slash key (/) on
the keyboard to change the parameter value.
NOTE
A definition of all editable parameters is contained at the end of this chapter.
8. Select Save (F2). The message ‘Saving fiducial data - Please wait Board
data file saved’ is displayed.
9. Repeat Steps 6 - 8 for the remaining parameters.
10. Select Exit (F8).
Save Next Previous Incr. Decr. Exit
Save Next Previous Incr. Decr. Exit
Save Next Previous Incr. Decr. Exit