182050 User manual.pdf - 第187页
semi automatic ',163(& 7,21 ',163(&7,2 16(7 83 Software Version 07SP02 User Manual 7.13 16. Select Change Scr een . 17. Select Ex it . 18. Select Ru n . 19. If the stencil has not been changed the …
semi automatic
',163(&7,21
',163(&7,216(783
7.12 User Manual Software Version 07SP02
5. If the product name is changed the message ‘Do you also want to create
a copy of the inspection file?’ is displayed. Select one of the following:
Yes - All data is copied, including the sites coordinates.
Global Only - The global parameters and limits are copied.
No - No inspection file is copied. Use when setting up an inspection file for
the first time.
6. Using the Next, Previous, Incr. and Decr. keys, edit the current process
parameters for the new product.
7. Press Save.
8. When the message ‘Board Data File Saved’ is displayed, press Exit.
9. Select Mode until Step appears in mode option of the printer status display.
If the required stencil is already in the printer go to Step 18.
If the stencil needs to be changed continue with Step 10.
10. Select Change Screen.
11. When the message ‘Open Front Cover and Remove screen’ is displayed
lift the printhead cover.
12. Remove the stencil from the printer.
13. Fit the new stencil into the printer ensuring the correct orientation of the
stencil.
14. Lower the printhead cover.
15. Press the System button.
Yes
Global
Only
No
Save Next Previous Incr. Decr. Exit
Save Next Previous Incr. Decr. Exit
Save Next Previous Incr. Decr. Exit
Mode
Load
Data
Edit
Data
Setup
Squeegee
Change
Screen
Change
Tooling
Change
Language
Exit
Mode
Load
Data
Edit
Data
Setup
Squeegee
Change
Screen
Change
Tooling
Change
Language
Exit
semi automatic
',163(&7,21
',163(&7,216(783
Software Version 07SP02 User Manual 7.13
16. Select Change Screen.
17. Select Exit.
18. Select Run.
19. If the stencil has not been changed the message ‘Screen has not been
changed for this product’ is displayed, select Use Screen to continue.
20. Select Auto Board.
21. Setup the board and stencil fiducials.
22. Select Inspect Setup. If this option is unavailable, check set prefs for 2D
Inspection enabled. The following message on the operator prompt bar is
displayed, ‘Click on the board representation to add a new site or select
an existing site to edit’.
Mode
Load
Data
Edit
Data
Setup
Squeegee
Change
Screen
Change
Tooling
Change
Language
Exit
Mode
Load
Data
Edit
Data
Setup
Squeegee
Change
Screen
Change
Tooling
Change
Language
Exit
Run
Open
Cover
Paste
Load
Clean
Screen
Setup Monitor Maint.
Auto
Board
Manual
Board
Exit
Step
Open
Cover
Inspect
Setup
Single Exit
semi automatic
',163(&7,21
',163(&7,216(783
7.14 User Manual Software Version 07SP02
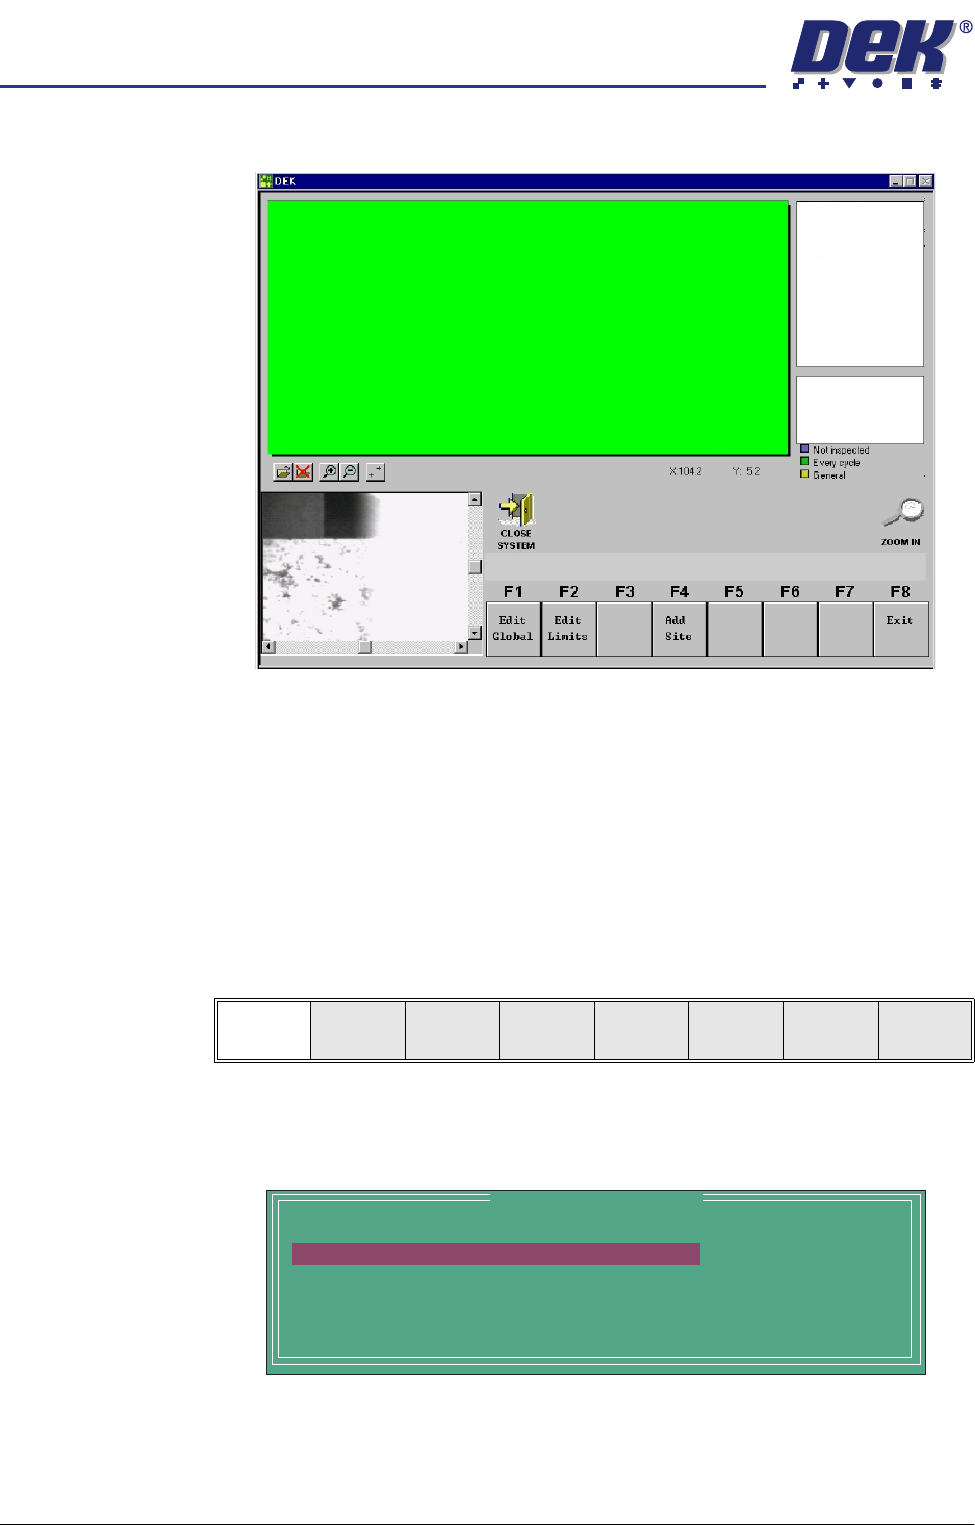
The following 2Di GUI window (example) appears:
CAUTION
FIDUCIAL POSITION.
If during the print cycle, the position of board
fiducials are changed, the position of previous inspection sites, (if any)
may be affected. Small changes are automatically compensated for,
however large changes, ie more than 3mm may require sites to be
relearnt.
NOTE
If selecting a product file with site listings pre-loaded, a ‘Please Wait’
indicator bar may be displayed whilst all sites are being downloaded.
Edit Global 1. Select Edit Global.
NOTE
Delete Site is only available if at least one site exists already.
The following Edit Global Parameters window is displayed:
Edit
Global
Edit
Limits
Add
Site
Exit
Edit Global Parameters
BOARD 2DI TYPE
PRE-IMAGE MODE
MIN SITES/CYCLE
WARNING LIMIT
LOW PASTE ACTION
BASIC
EVERY
3
3
MANUAL