182050 User manual.pdf - 第231页
semi automatic &21680$ %/(5( 3/(1,6+0 (176 %/8(81' (56&5 ((1& /($1(5 Software Version 07SP02 User Manual 8.23 13. Insert t he paper roll rod into the right hand flan ge of the shaf t. Lay the rod alon…
semi automatic
&21680$%/(5(3/(1,6+0(176
%/8(81'(56&5((1&/($1(5
8.22 User Manual Software Version 07SP02
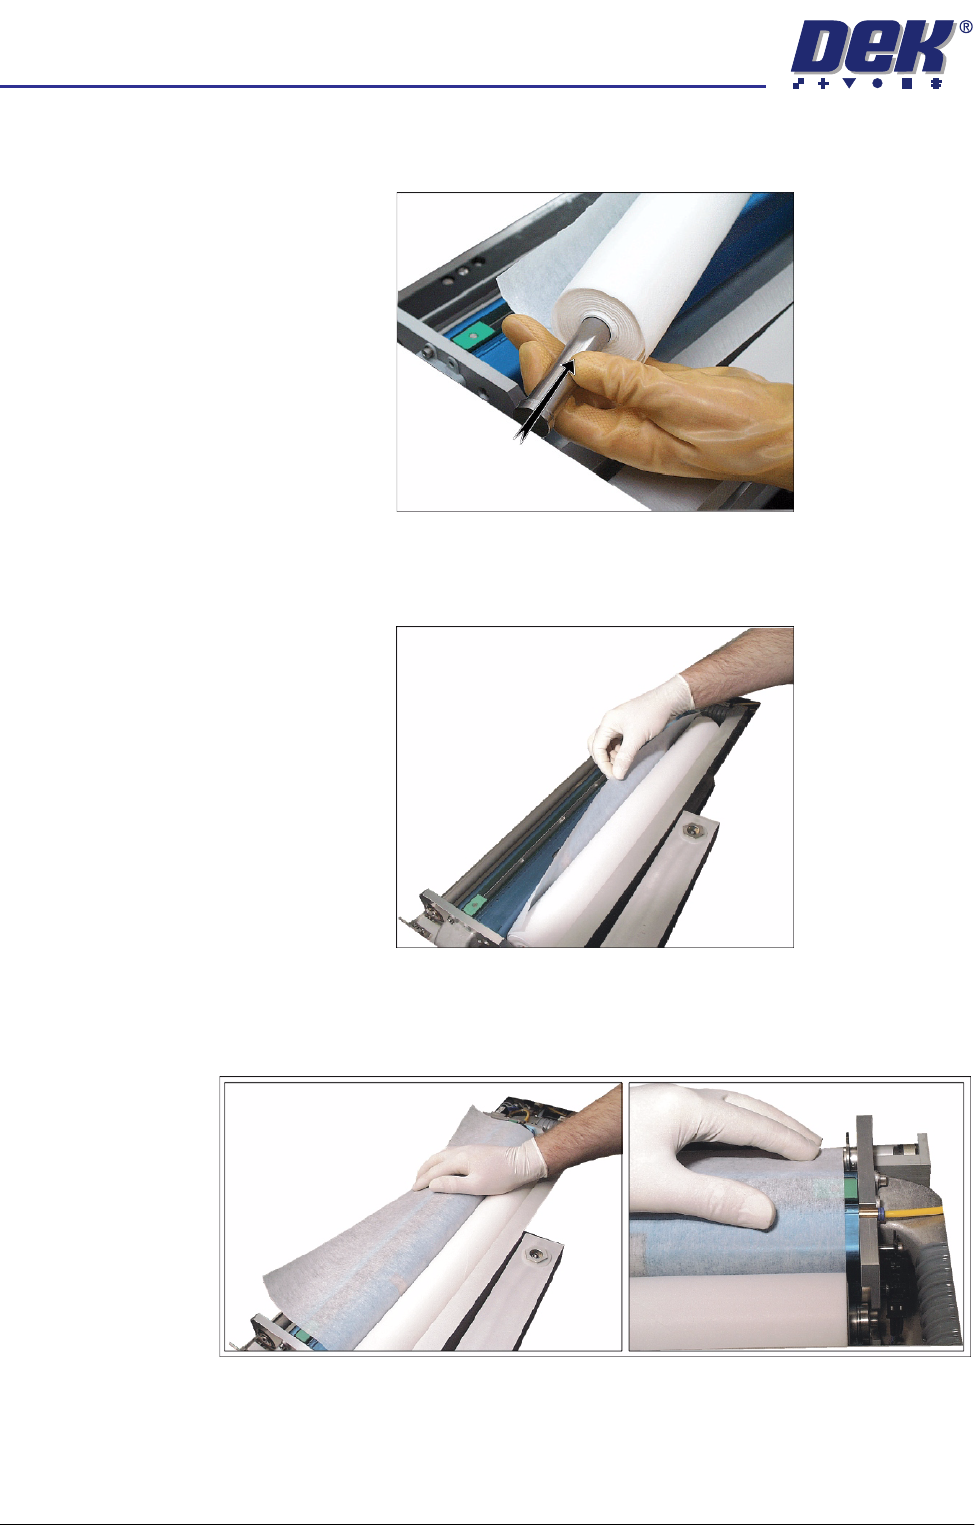
10. Refit the paper spindles to both ends of the new paper roll. Ensure both
faces of the new paper roll are flush.
11. Install the new clean paper roll at the front of the unit, ensure the paper is
routed from underneath the roll towards the rear of the unit.
12. Feed the cleaner paper across the body assembly, ensuring the cleaner
paper is aligned parallel to the unit end plate.
semi automatic
&21680$%/(5(3/(1,6+0(176
%/8(81'(56&5((1&/($1(5
Software Version 07SP02 User Manual 8.23
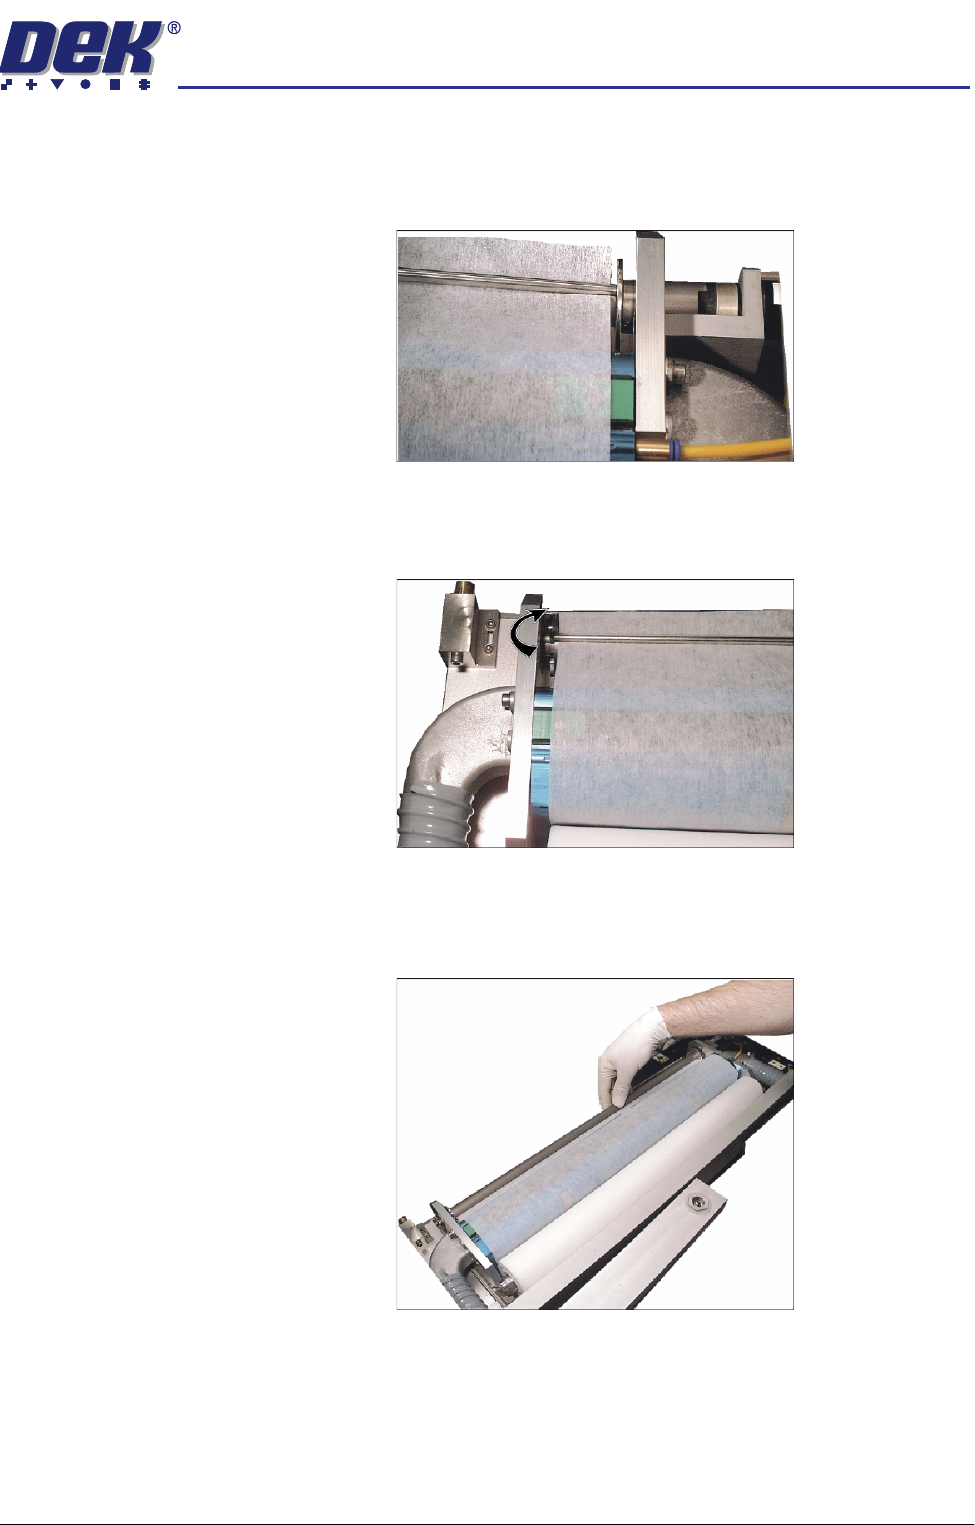
13. Insert the paper roll rod into the right hand flange of the shaft. Lay the rod
along the shafts groove trapping the cleaner paper between the shaft and
rod.
14. Rotate the end of the flange of the rod towards the rear of the machine to
lock the rod onto the shaft.
15. Rotate the take up roll one complete revolution against the motor clutch to
tension the cleaner paper across the cleaner squeegee assembly.
semi automatic
&21680$%/(5(3/(1,6+0(176
%/8(81'(56&5((1&/($1(5
8.24 User Manual Software Version 07SP02
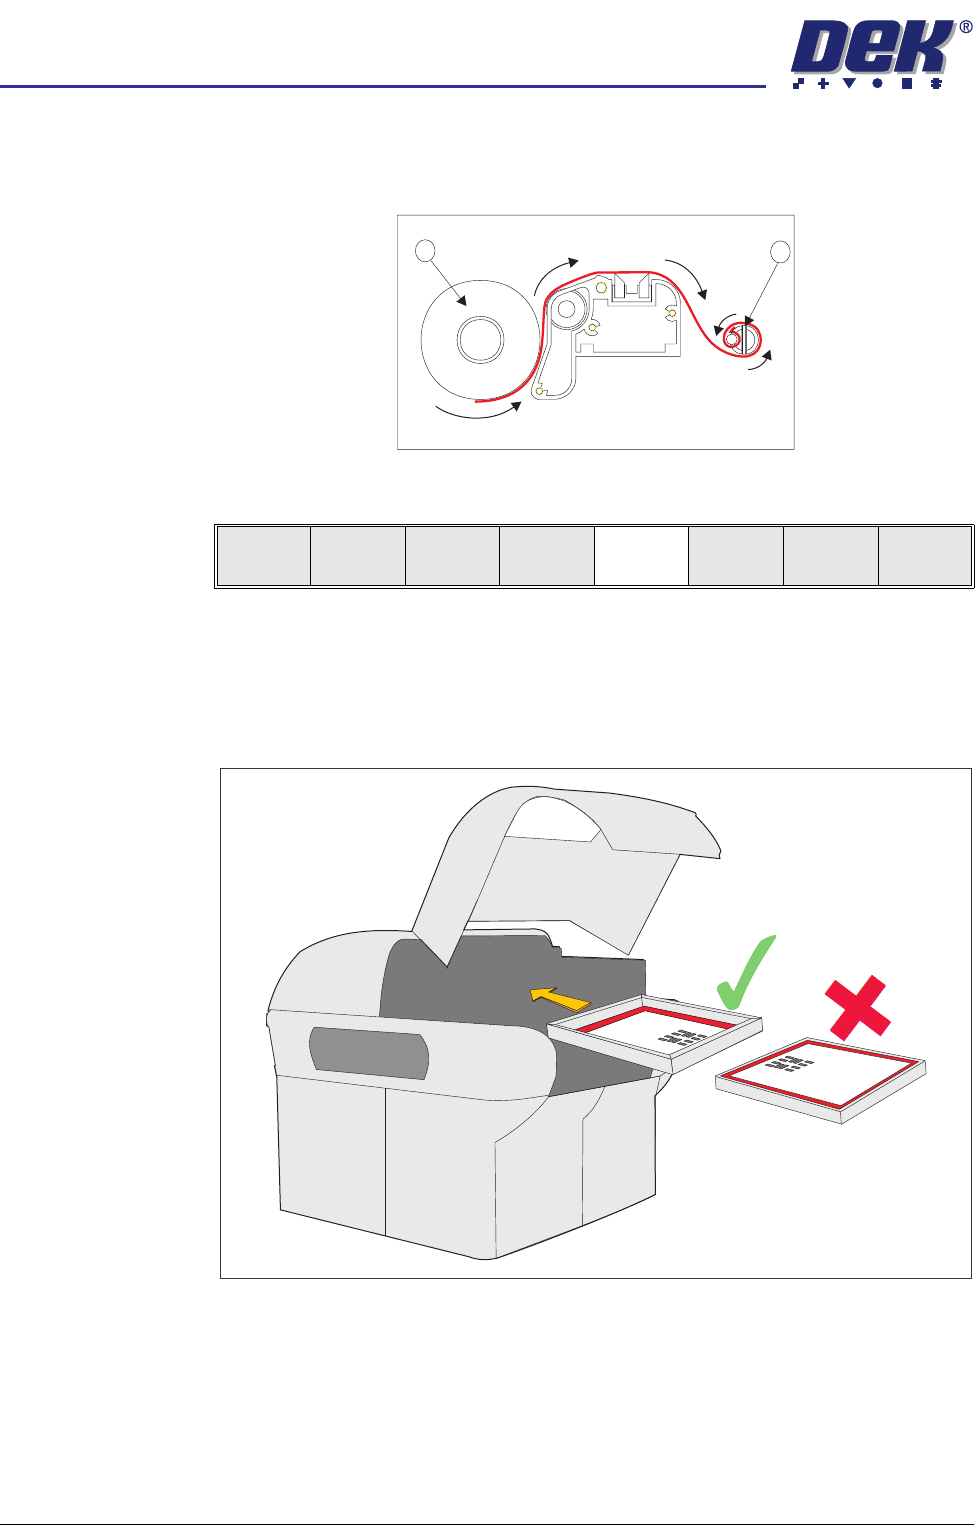
16. Ensure the cleaner paper has been routed correctly, from underneath the
paper roll (1) rearwards across the squeegee assembly and threaded
between paper rod and shaft (2).
17. Press Prime Paper (F5).
The message ‘Press the two control buttons to feed paper’ is displayed.
18. Using the two button control, prime the paper ensuring it feeds correctly.
19. Insert the stencil into the printer, ensure correct orientation and print justifi-
cation.
1
2
Screen
Clamps
Board
Clamps
Prime
Paper
Prime
Solvent
Exit