YSM20R_YSM20WR_Mainte_E.pdf - 第112页
3-51 3 Periodic maintenance items 9 Mount the board clamp plate. 1. Fit the board clamp plate into its original position and tighten the board clamp plate mounting bolts with hex wrench (3). 2. Remove the square cloth. 0…
3-50
3
Periodic maintenance items
Transfer direction
Transfer direction
Transfer direction
Dual-lane type
Lane 1
Lane 2
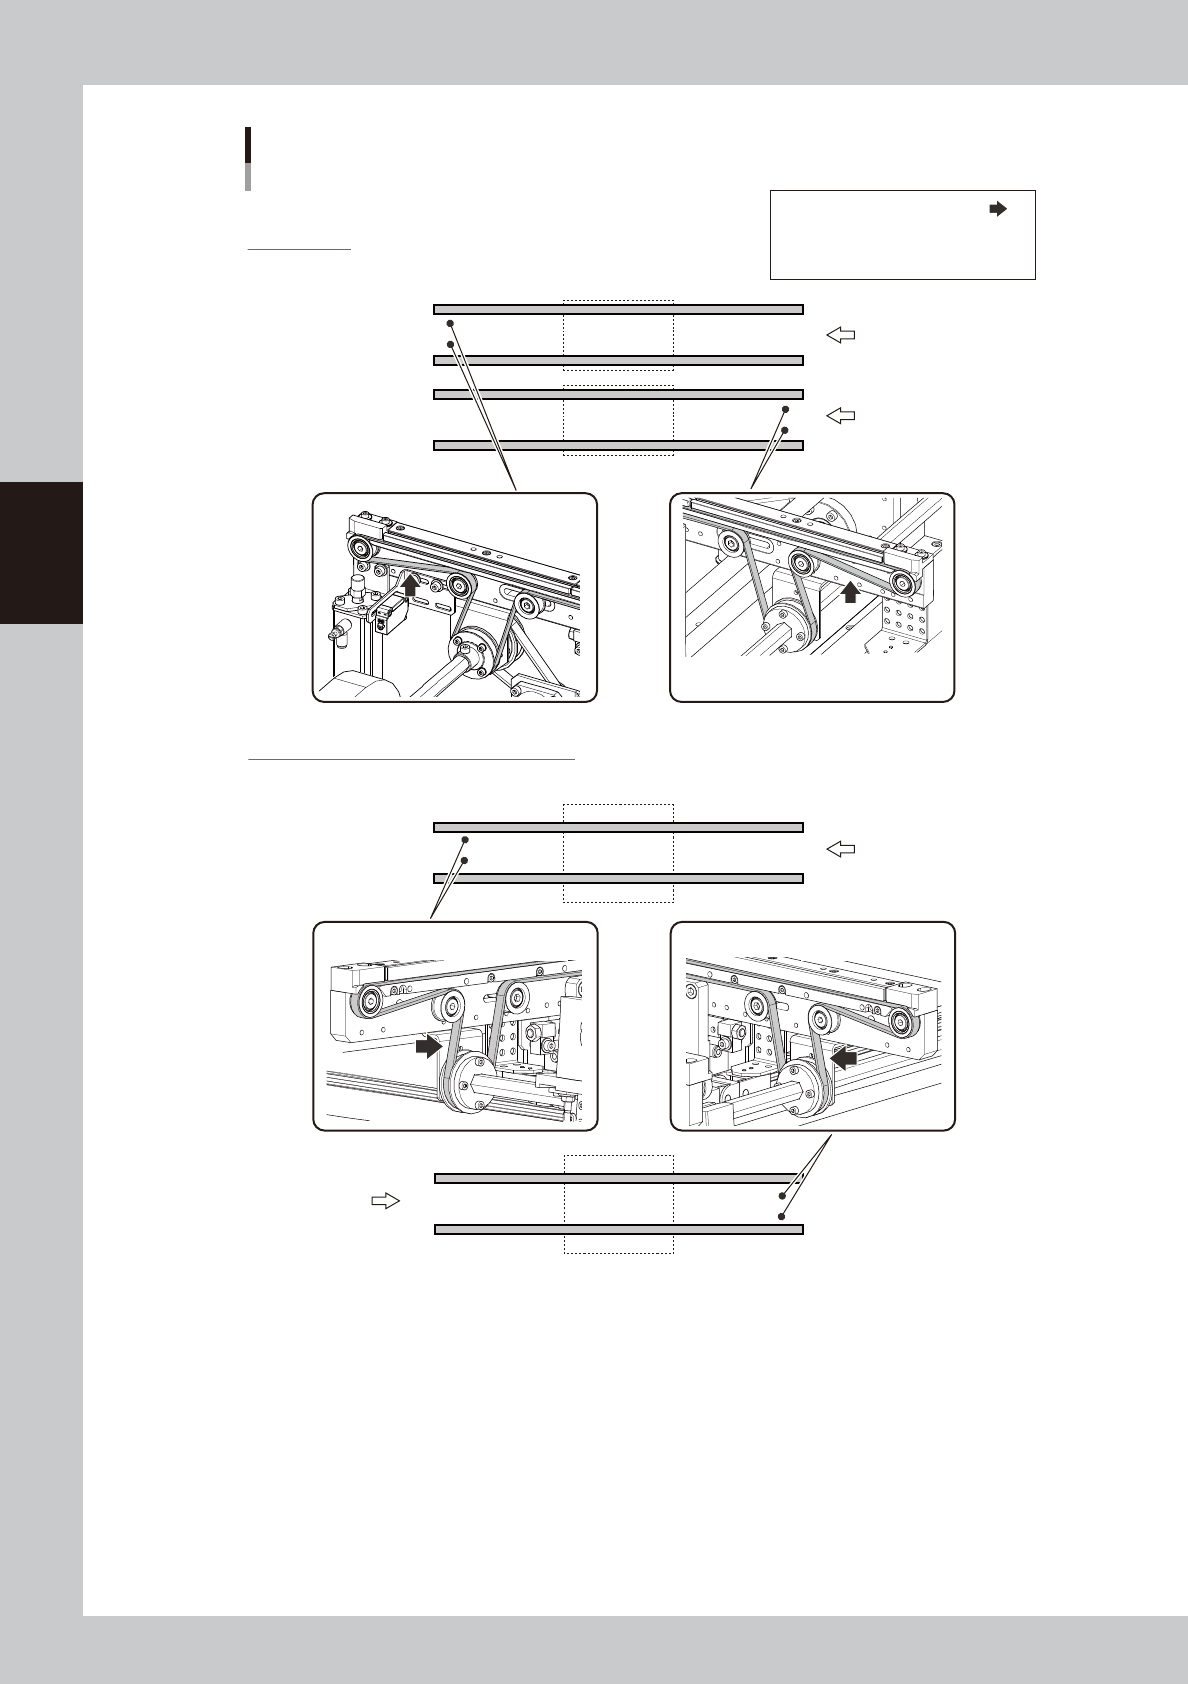
STD : 350 - 420 Hz
EXT : 110 - 130 Hz
STD : 350 - 420 Hz
EXT : 110 - 130 Hz
Conveyor belt: Tension measurement locations / Tension standards
YSM20WR
Tension measurement location:
STD: Tension of standard conveyor
EXT: Tension of extended conveyor
Single-lane type (for transferring heavy board)
STD : 274-334 Hz STD : 274-334 Hz
533A4-KMK-10
3-51
3
Periodic maintenance items
9
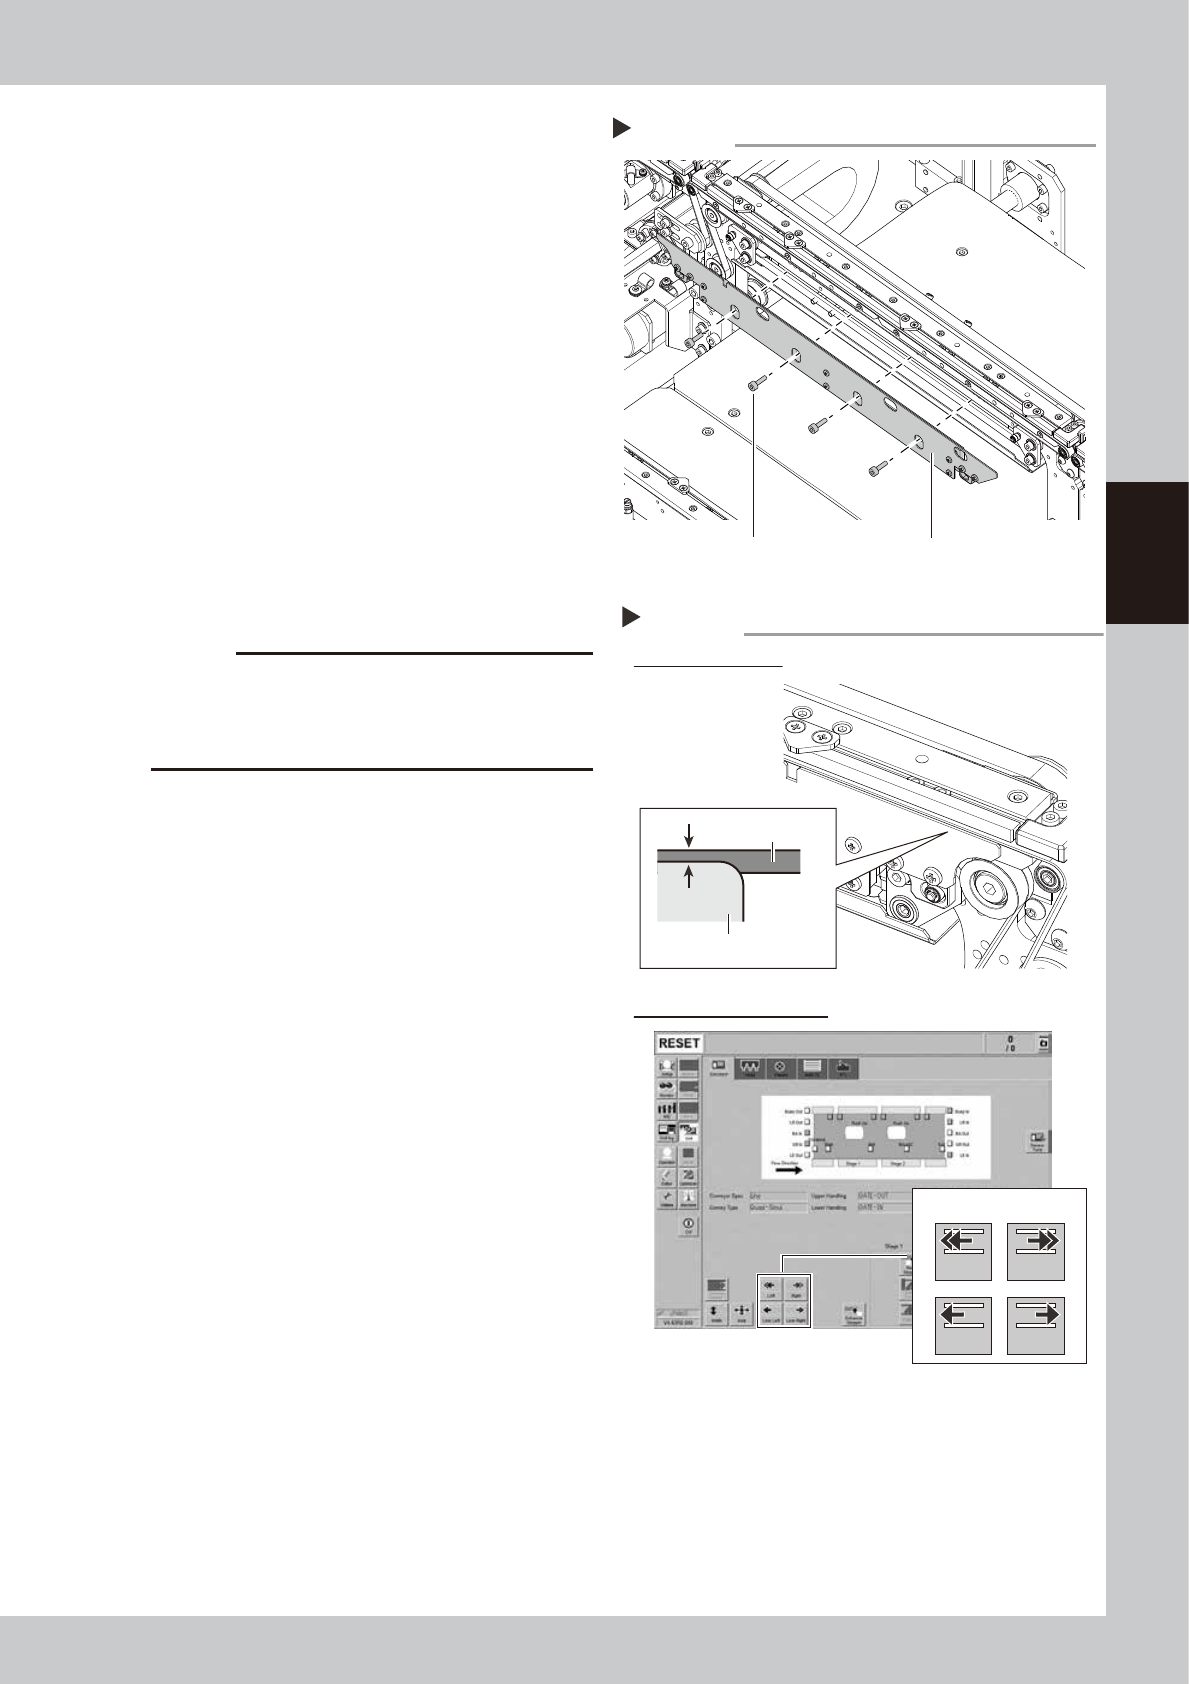
Mount the board clamp plate.
1. Fit the board clamp plate into its original
position and tighten the board clamp
plate mounting bolts with hex wrench (3).
2. Remove the square cloth.
0
Check the belt setting.
1. Make sure that the board clamp top
surface is approx. 0.5 mm lower than the
belt upper surface.
2. Close the machine safety cover and
cancel the emergency stop. Attach the
carriage if the machine is carriage type.
3. On the [Unit] - [Conveyor] screen, press
the [Conveyor In] button or [Conveyor
Out] button to turn on the conveyor
motor and check the belt rotation.
4. If the conveyor belt rotation is uneven or
if the belt deflects, adjust the tensioner
(pulley bracket) position again.
c
CAUTION
When the difference between the belt upper surface
and board clamp top surface is very little, the board
transfer error may occur easily. In this case, contact
YAMAHA sales representatives.
Mounting the board clamp plate
Step 9
Board clamp plate
Mounting bolt
53368-KMK-00
Board clamp plate
Belt
Check belt setting and rotation
Step 10
Checking conveyor rotation
Checking belt setting
0.5 mm
Conveyor drive buttons
Left Right
Low Left Low Right
54305-KMK-00
3-52
3
Periodic maintenance items
5.3 Cleaning and lubricating W-axis
Cleaning and lubricating the ball screw, guide, and hexagon spline of W-axis and U-axis (for YSM20R dual-
stage type) are required once a year. See "Chapter 5 Lubrication points" for details about lubrication points.
Note that the lubrication procedure differs among YSM20R Dual-stage type, YSM20R/YSM20WR Single-lane
type, and YSM20WR Dual-lane type. The following describes each lubrication procedure.
5.3.1 YSM20R Dual-stage: Cleaning and lubricating W/U axes
The following describes the cleaning and lubrication procedure of W-axis and U-axis of YSM20R dual-stage type.
1
Read the desired board data.
TIP
The push-up units of both stage 1 and 2 can be moved
by reading the board data.
2
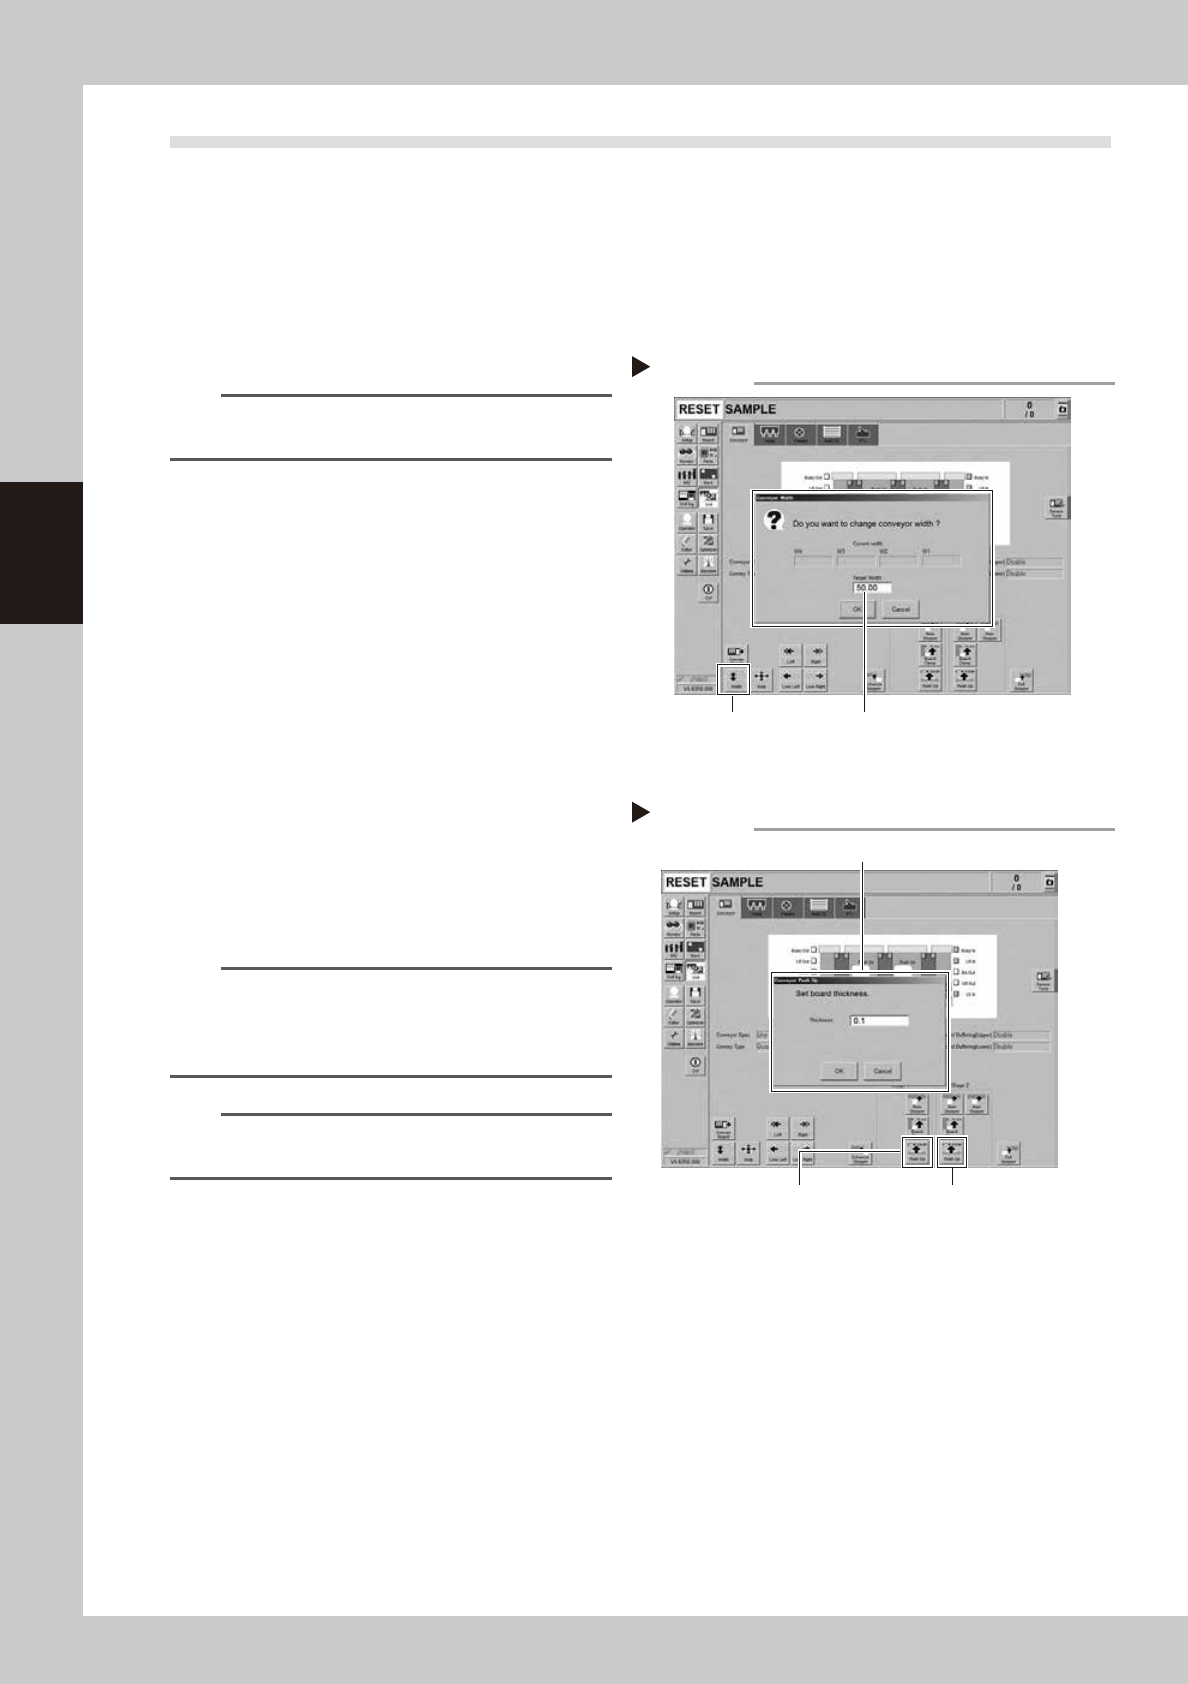
Change the conveyor width to the
minimum width.
1. Press the [Width] button on the [Unit]
- [Conveyor] screen to display the
"Conveyor Width" screen.
2. Enter the minimum conveyor width "50
mm" in the "Target Width" box and press
the [OK] button. The conveyor width is
changed to the specified width.
3
Raise the push-up unit.
1. Press the [Push Up] button to display the
"Conveyor Push Up" screen.
2. Enter "0.1 mm" in the "Thickness" box and
press the [OK] button. The push-up unit is
raised.
3. Raise the push-up units of stage 1 and 2
following the procedure above.
n
NOTE
If the board size X of the board data selected in Step 1
is over 380 mm, the [Push Up] button on the upstream is
grayed out. If raising the push-up unit of downstream,
that of upstream is also raised.
n
NOTE
It is convenient to access to the U-axis guide and ball
screw by raising the push-up unit.
Change conveyor width to minimum
Step 2
[Width] button Enter “50 mm”.
54306-KMK-00
Raising push-up unit
Step 3
Stage 1
[Push Up] button
Enter “0.1 mm”.
Stage 2
[Push Up] button
54307-KMK-00