YSM20R_YSM20WR_Mainte_E.pdf - 第158页
6-2 6 How to replace consumable parts 1.2 Replacing nozzle O-ring e 1 Remo ve the nozzle. 1. Press the emergency stop button and then open the machine safety cover . 2. If the machine is carriage type, detach the carriag…
6-1
6
How to replace consumable parts
1. Nozzle
If the nozzle tip or O-ring is worn out as the nozzle is used for a long time, this may cause the placement or
pickup error. Additionally, if the spring action is not smooth even after cleaning and lubricating the nozzle,
the spring may need to be replaced.
1.1 Replacing nozzle tip and spring
e
1
Remove the nozzle.
1. Press the emergency stop button and
then open the machine safety cover.
2. If the machine is carriage type, detach
the carriage to easily access to the
machine inside.
3. Remove the target nozzle manually.
2
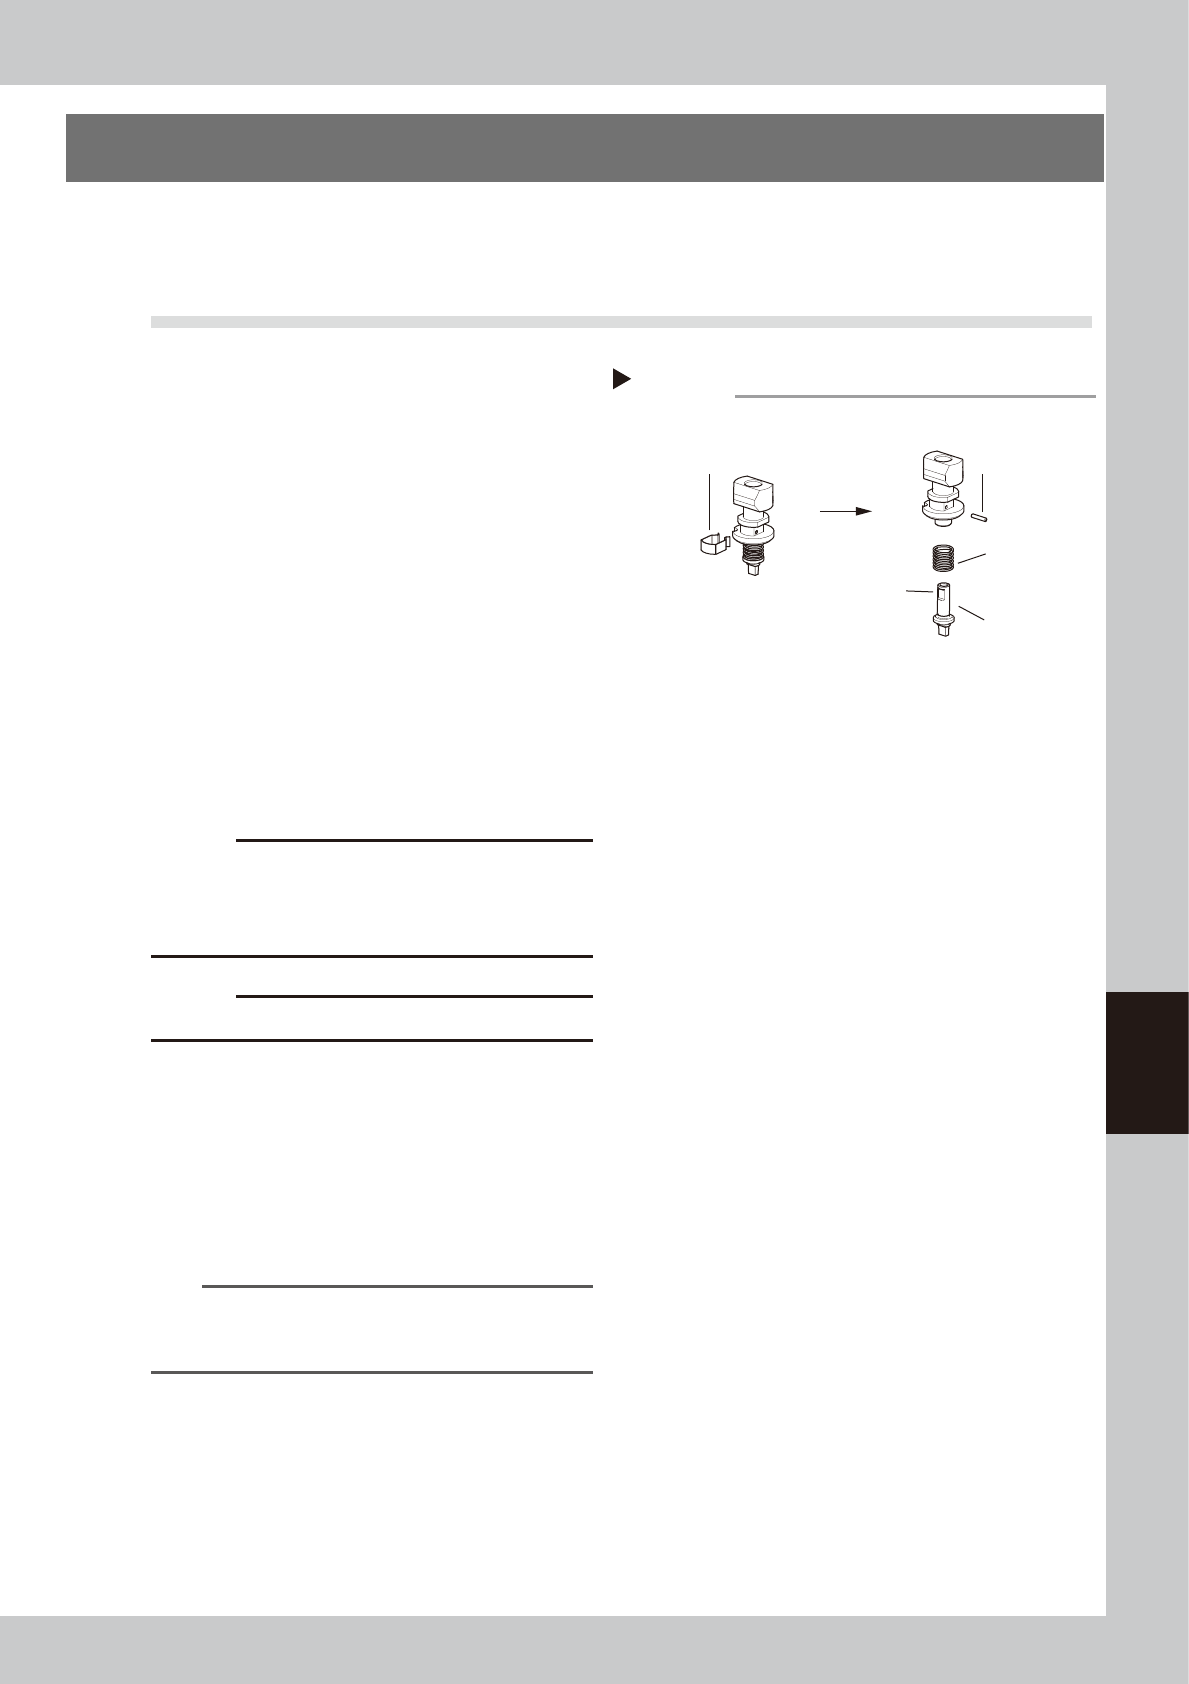
Replace the nozzle tip and spring.
1. Detach the clip.
2. Pull out the nozzle pin.
3. Replace the spring or nozzle tip.
4. Mount the nozzle tip with the pin. A
groove is provided on the nozzle tip.
Insert the pin along the groove.
5. Attach the clip. If the clip is loose or
deformed, replace it.
c
CAUTION
Check that the nozzle marking (example: 301A, 303A)
described on the nozzle main unit meets the tip type
No. referring to "2.1.3 Replaceable parts for all models"
in chapter 1.
c
CAUTION
Be careful not to deform the clip.
3
Lubricate the slide section.
Lubricate the nozzle slide section referring to
"1.2.1 Cleaning and lubricating nozzle slide
section" in chapter 3.
4
Return the nozzles to its original
position.
Return removed nozzle to the head.
n
NOTE
Return the removed nozzles to the original positions of
the head. If removed nozzles from the nozzle station
(option), return them to the original storage positions.
Replacing the nozzle tip
Step 2
Detach the clip.
Pull out the pin.
■ Detaching/attaching the tip
Spring
Nozzle tip
Groove
53600-KMK-00
6-2
6
How to replace consumable parts
1.2 Replacing nozzle O-ring
e
1
Remove the nozzle.
1. Press the emergency stop button and
then open the machine safety cover.
2. If the machine is carriage type, detach
the carriage to easily access to the
machine inside.
3. Remove the target nozzle manually.
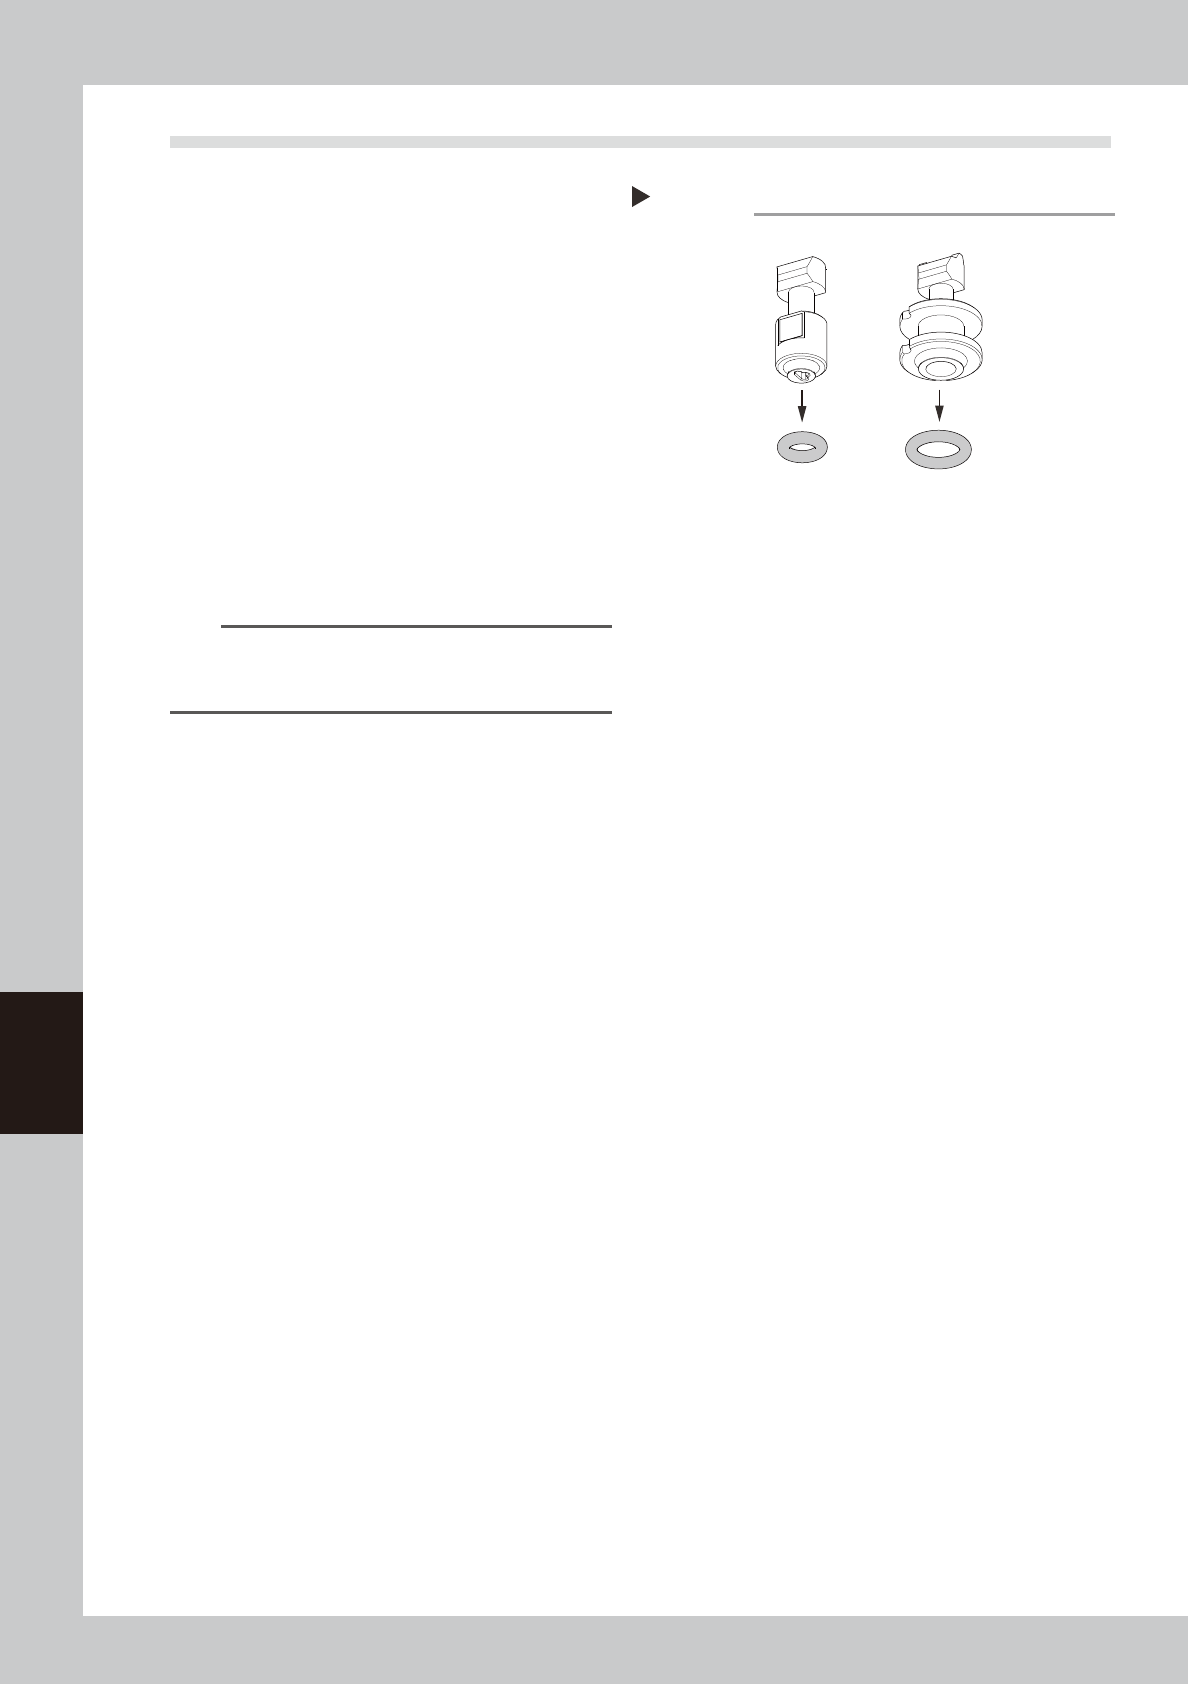
2
Replace the nozzle O-ring.
Remove the O-ring and replace it with a
new one.
If the O-ring is difficult to remove, remove it
with a precision flat-head screwdriver.
3
Return the nozzle to its original
position.
Return the removed nozzles to the head.
n
NOTE
Return the removed nozzles to the original positions of
the head. If removed nozzles from the nozzle station
(option), return them to the original storage positions.
Replacing the nozzle O-ring
Step 2
304A Nozzle
Removing the O-ring
307A Nozzle
53601-KMK-00
6-3
6
How to replace consumable parts
2. Nozzle leaf springs and roller lock
If an error is found after performing "1.1.2 Checking leaf spring/roller lock"in chapter 3, it is necessary to
replace the nozzle leaf springs or roller lock.
c
CAUTION
As a rule, be sure to replace a pair of parts even when only the nozzle leaf spring or roller lock (roller) on one side
deteriorates.
2.1 Replacing nozzle leaf springs
The following describes how to replace the nozzle leaf spring (hereafter "leaf spring"). If the leaf spring
attachment tool is provided, see " About leaf spring positioning tool" described later on.
2.1.1 HM head
e
1
Remove the nozzle.
1. Press the emergency stop button and then open the machine safety cover.
2. If the machine is carriage type, detach the carriage to easily access to the head.
3. Place a square cloth under the head unit.
4. Remove the nozzle with the target leaf spring manually.
n
NOTE
When the machine is equipped with a nozzle station,
store all nozzles to the nozzle station.
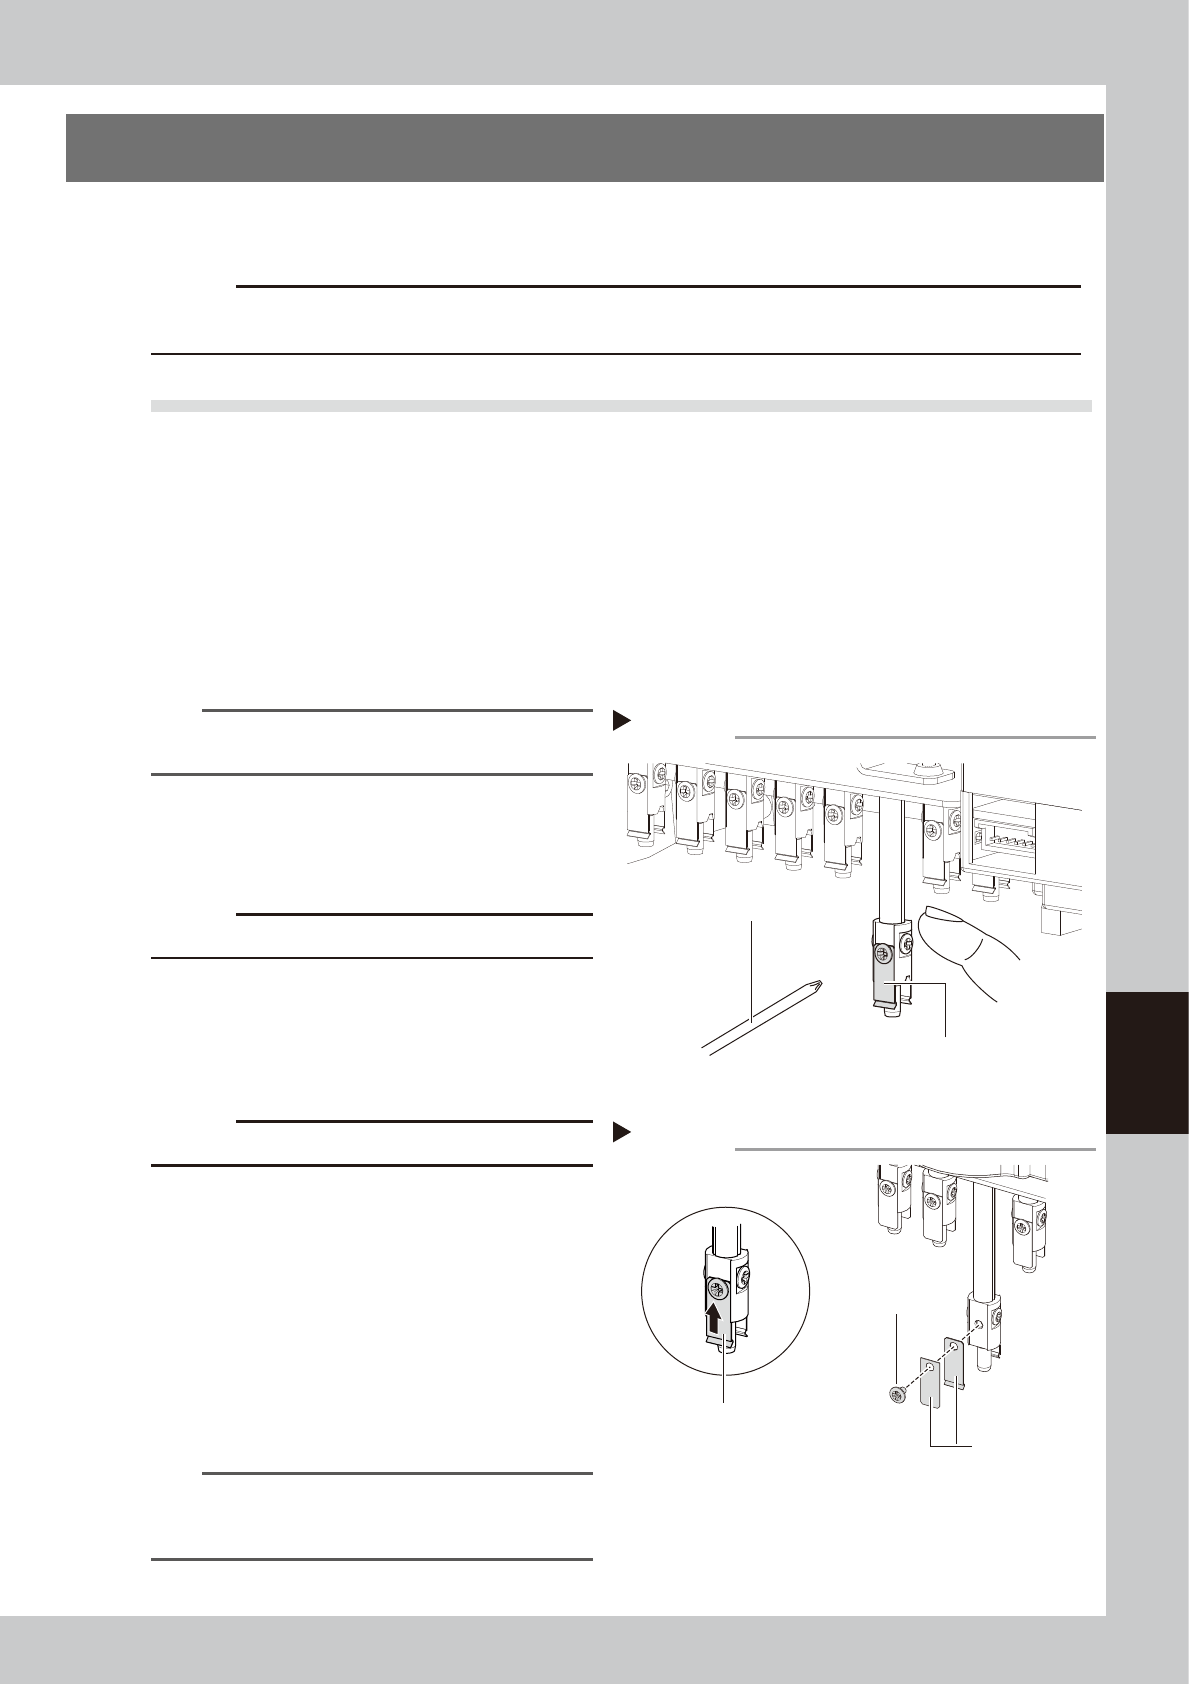
2
Detach the leaf springs.
Remove the mounting screw with a precision
Phillips screwdriver while holding the shaft.
Then remove the leaf springs to be replaced.
c
CAUTION
Only remove the screw of leaf springs.
3
Attach the new leaf spring.
With the leaf springs kept pushed upward,
tighten the mounting screw with the Phillips
precision screwdriver to assemble the leaf
spring.
c
CAUTION
Make sure to attach the leaf springs parallel.
4
Attach the nozzle.
5
Check that nozzle is held securely.
1. Insert the nozzle in place and check that
there is no gap between the leaf spring
and the nozzle.
2. Attempt detaching/attaching the nozzle
several times to check that there is no
looseness.
3. Remove the square cloth.
n
NOTE
Return the removed nozzles to the original positions of
the head. If removed nozzles from the nozzle station
(option), return them to the original storage positions.
Detaching leaf spring
Step 2
Precision screwdriver
Leaf spring to be replaced
53602-KMK-00
Attaching new leaf spring
Step 3
New leaf spring
Mounting screw
While pressing the leaf spring
upward, tighten the mounting screw.
53603-KMK-00