YSM20R_YSM20WR_Mainte_E.pdf - 第172页
6-16 6 How to replace consumable parts w Clean the belt guides and pulley s. 1. Use a vacuum assembly (option) to suck the belt wear debris on the belt guides and sensors, etc. 2. Use a plastic spatula or similar tool to…
6-15
6
How to replace consumable parts
9
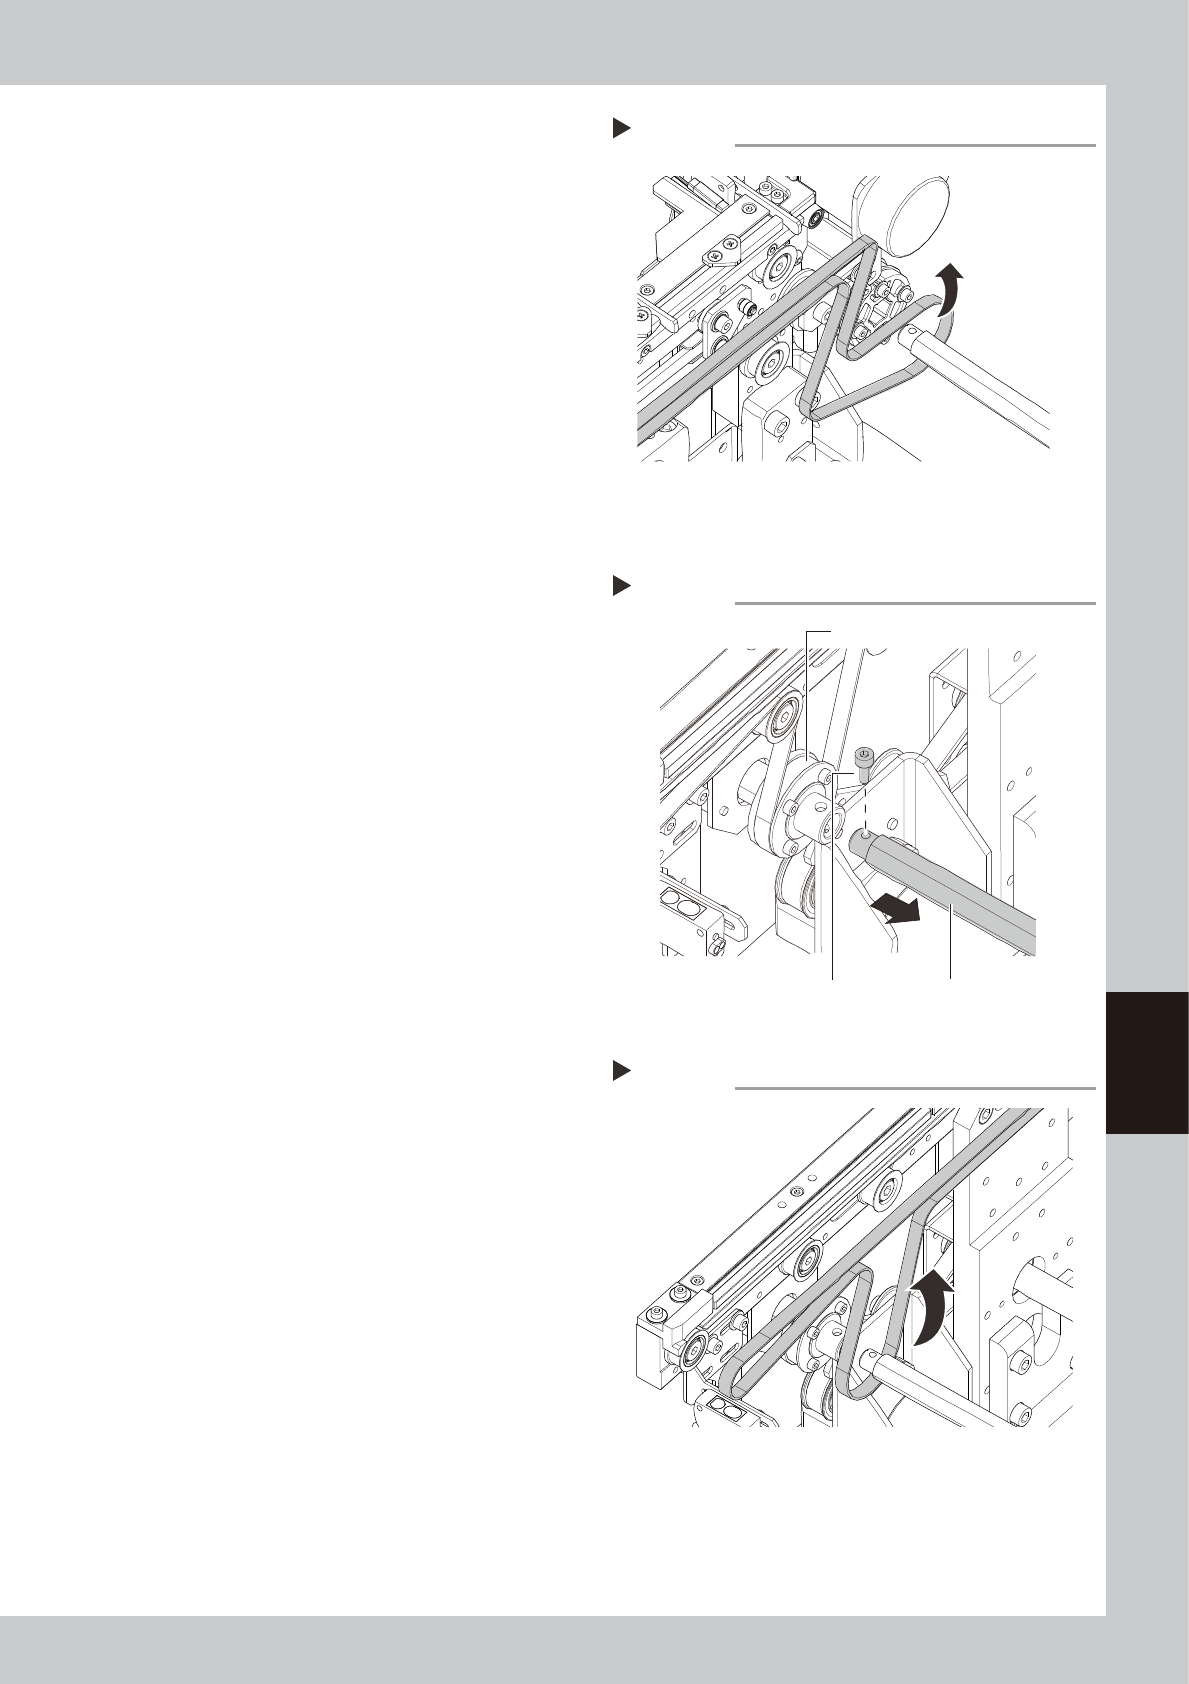
Detach the belt from the conveyor.
Detach the conveyor belt through the
clearance between the shaft and drive
pulley.
Go on to Step 12.
n
Replacing the conveyor belt (Other than YSM20R dual-stage W2/W3)
0
Separate the shaft from the drive
pulley.
Remove the bolt from the belt drive pulley
(for the pulley position, see the figure shown
in Step 4) with a hex wrench (3), and then
pull out the shaft to make a clearance.
q
Detach the belt from the conveyor.
Detach the conveyor belt through the
clearance between the shaft and drive
pulley.
Detaching conveyor belt
Step 9
53623-KMK-00
Removing shaft
Step 10
ShaftBolt
Drive pulley
53624-KMK-00
Detaching conveyor belt
Step 11
53625-KMK-00
6-16
6
How to replace consumable parts
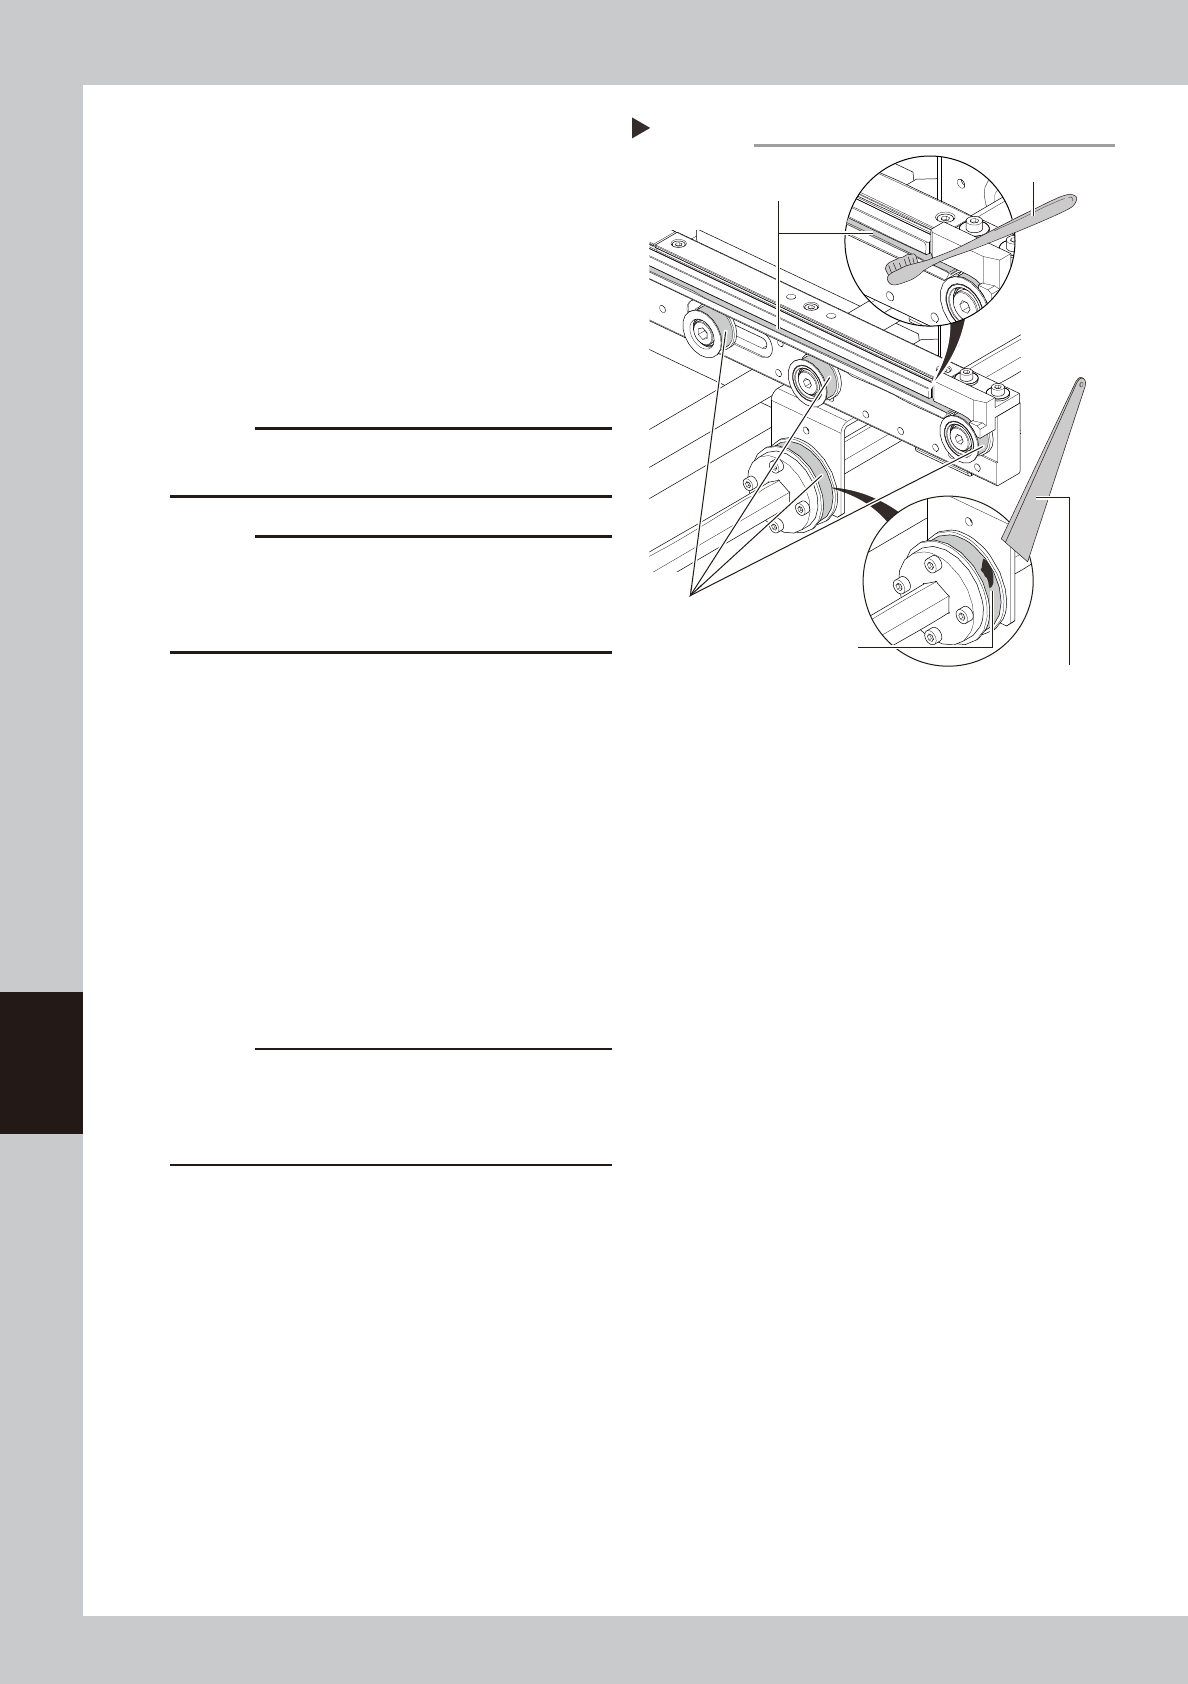
w
Clean the belt guides and pulleys.
1. Use a vacuum assembly (option) to suck
the belt wear debris on the belt guides
and sensors, etc.
2. Use a plastic spatula or similar tool to
remove the belt wear debris adhering to
the outer peripheral surface of the
pulleys.
3. Use a brush or similar tool to remove the
belt wear debris caught in the belt
guides.
c
CAUTION
Use a plastic spatula and brush to avoid scratching the
pulleys and guides.
c
CAUTION
Do not use a solvent (IPA, etc.) unless the guides and
pulleys are excessively dirty. If using ethanol, be careful
not to spill the ethanol on the bearing in the pulleys
during cleaning.
e
Replace the conveyor belt.
1. Reattach a new belt temporarily while
putting it on the pulley.
2. (YSM20R Dual-stage: W2, W3) Pass the
drive pulley through the shaft.
3. Loosen the mounting bolt and connect
the shaft.
4. Move the bracket (YSM20R/YSM20WR
Single-lane/YSM20WR Dual-lane: pulley)
to the position marked in Step 4 and
install the mounting bolts.
5.
If looseness of the belt is found, adjust the
bracket (pulley) position to apply tension.
c
CAUTION
The followings are tightening torques of the tensioner
mounting bolts. Do not tighten the bolt excessively.
Pulley bracket mounting bolt : 3.8 N•m.
Pulley mounting bolt : 5.5 N•m.
Cleaning belt guide and pulley
Step 12
Plastic spatula
Belt guide
Belt wear debris
sticking to pulley
Outer peripheral
surface of pulley
Brush
53626-KMK-00
6-17
6
How to replace consumable parts
n
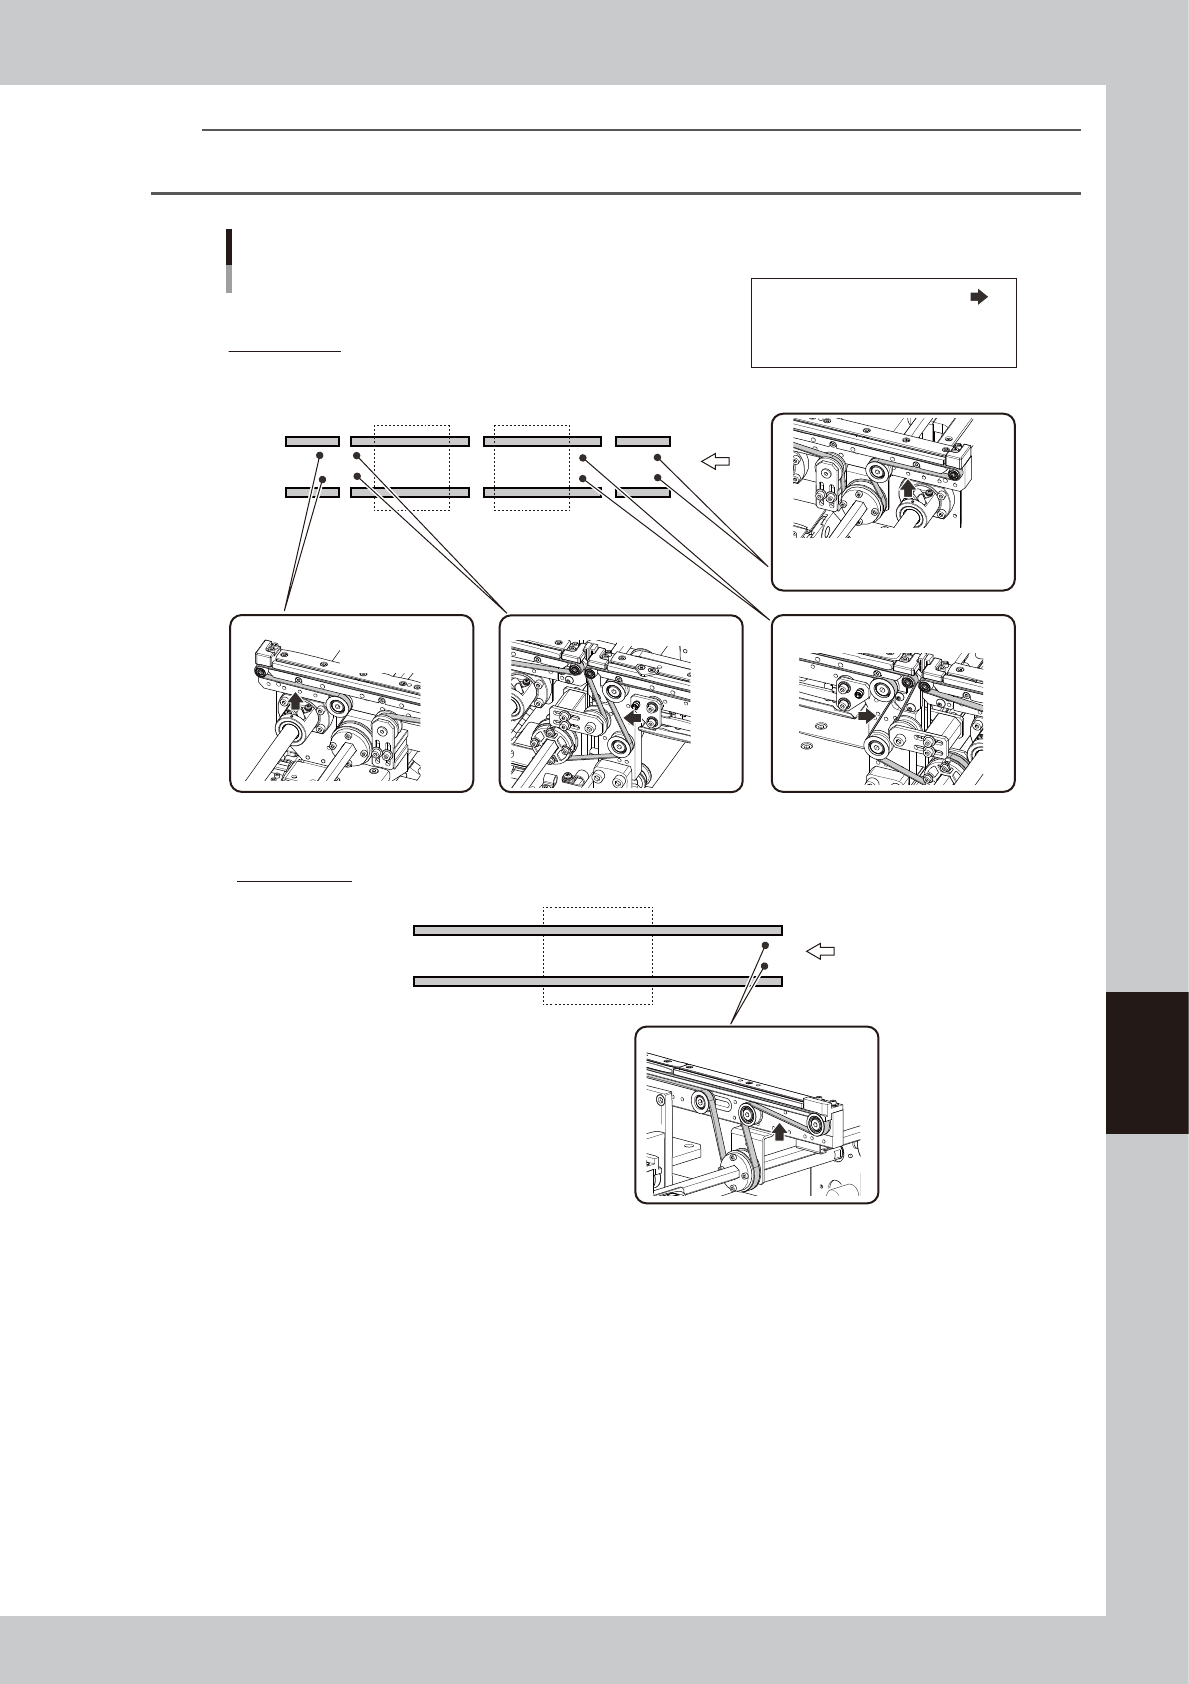
NOTE
The tension measurement positions of this machine and the tension standards are as below.
Adjust with tension meter as needed.
Conveyor belt: Tension measurement locations and tension standards
YSM20R
Transfer
direction
Dual-stage type
STD: 425 - 475 Hz
EXT: 100 - 120 Hz
Single-lane type
STD : 490 - 540 Hz
STD: 490 - 540 Hz
STD: 425 - 475 Hz
EXT: 100 - 120 Hz
STD: 350 - 420 Hz
EXT: 110 - 130 Hz
W1
W2W3
W4
Tension measurement location:
STD: Tension of standard conveyor
EXT: Tension of extended conveyor
Transfer
direction
53627-KMK-00