YSM20R_YSM20WR_Mainte_E.pdf - 第72页
3-1 1 3 Periodic maintenance items 3 Clean nozzles with an ultr asonic cleaner . 1. Put nozzles into a container (such as beaker) in an ultrasonic cleaner . 2. Pour ethanol in a container until nozzles are dipped. 3. Pou…
3-10
3
Periodic maintenance items
1.3 Cleaning and lubricating gripper nozzle (option)
The gripper nozzle that mounts a connector, etc. requires the periodic inspection and lubricating.
n
NOTE
The gripper nozzle is used to pick up a special shape component. Select and special order a gripper nozzle fitting the
component shape.
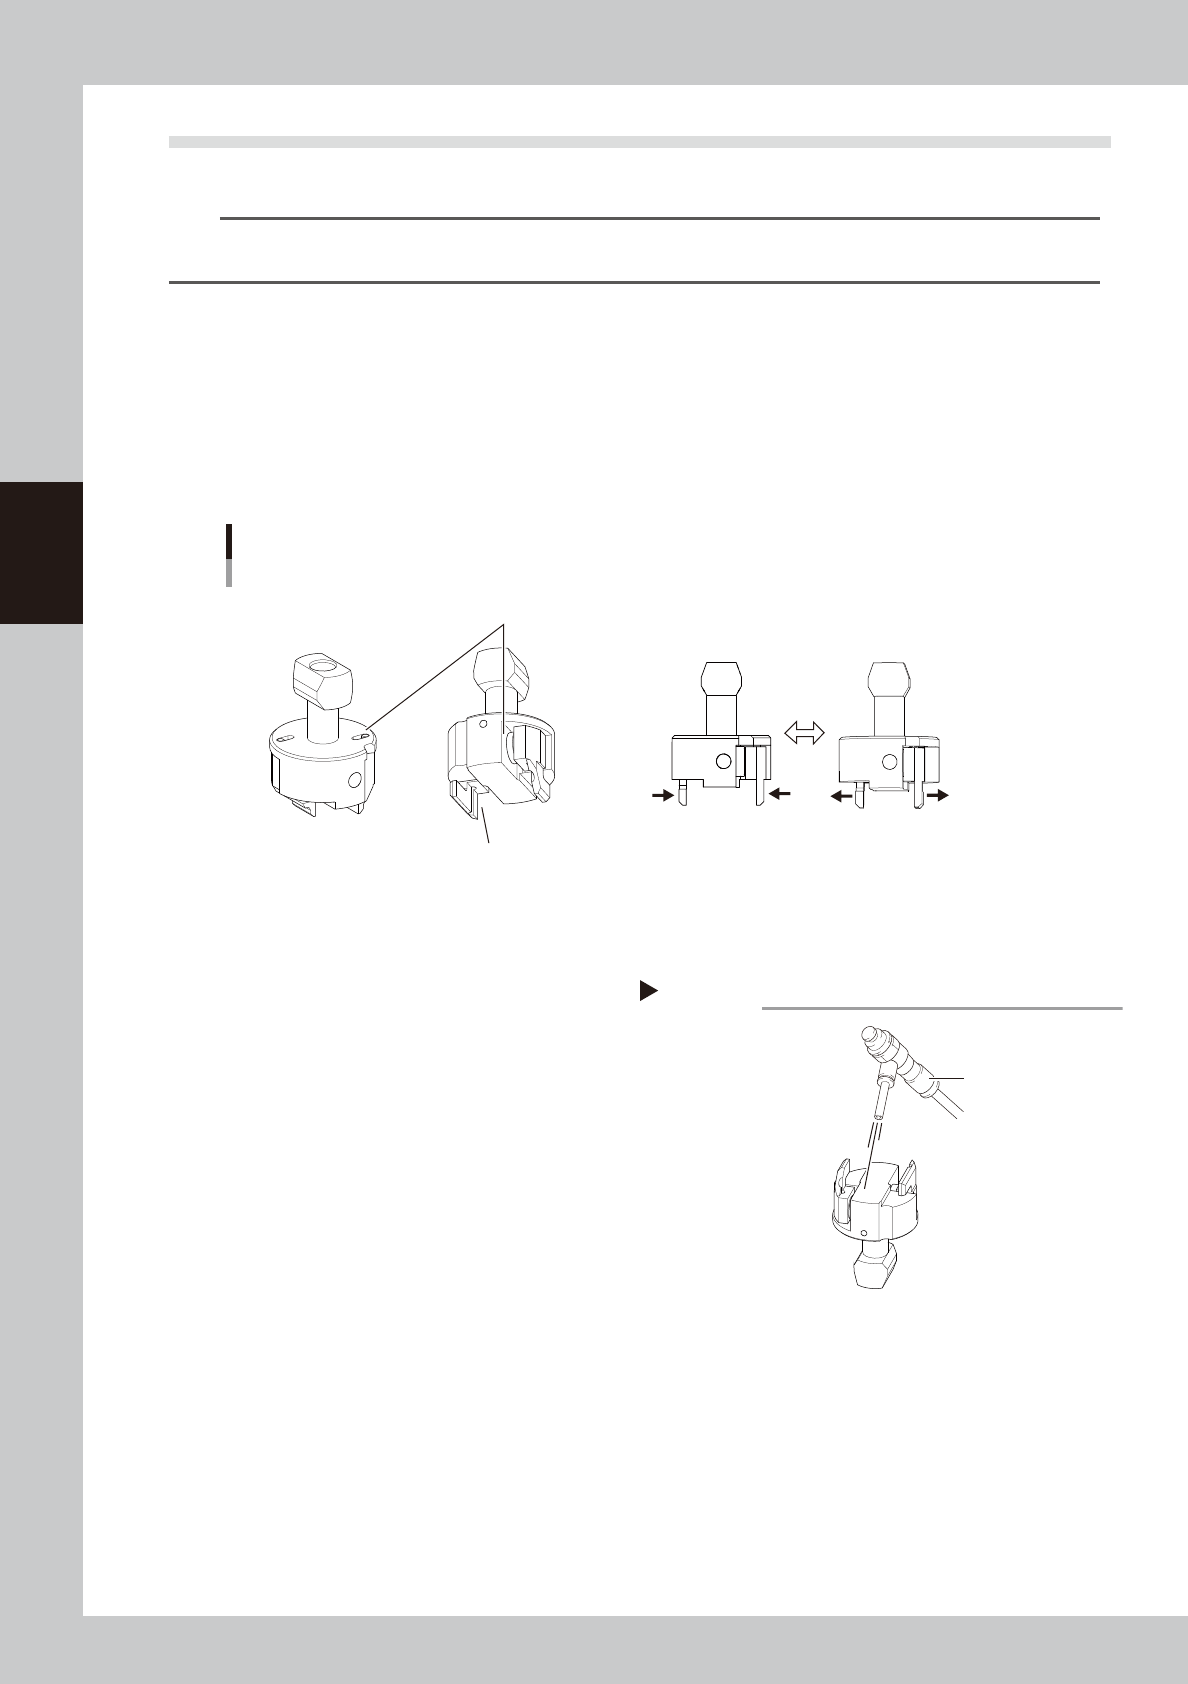
1.3.1 Inspecting gripper nozzle
n
Checking the gripper nozzle condition
Move the grip of the nozzle with a finger. If it moves smoothly, there is no problem. If it moves back unsteadily
or is stuck in, the component pickup error or the recognition error may occur. Clean and lubricate the gripper
nozzle referring to the next page "1.3.2 Cleaning and lubricating gripper nozzle".
Additionally, check that no wear or dirt is found in the grip or operation part. If the grip is worn out, replace
the nozzle.
Inspecting gripper nozzle
Example: Type30ALD nozzle
Grip is not worn out.
No dirt or dust is found.
Grip moves smoothly.
53313-KMK-00
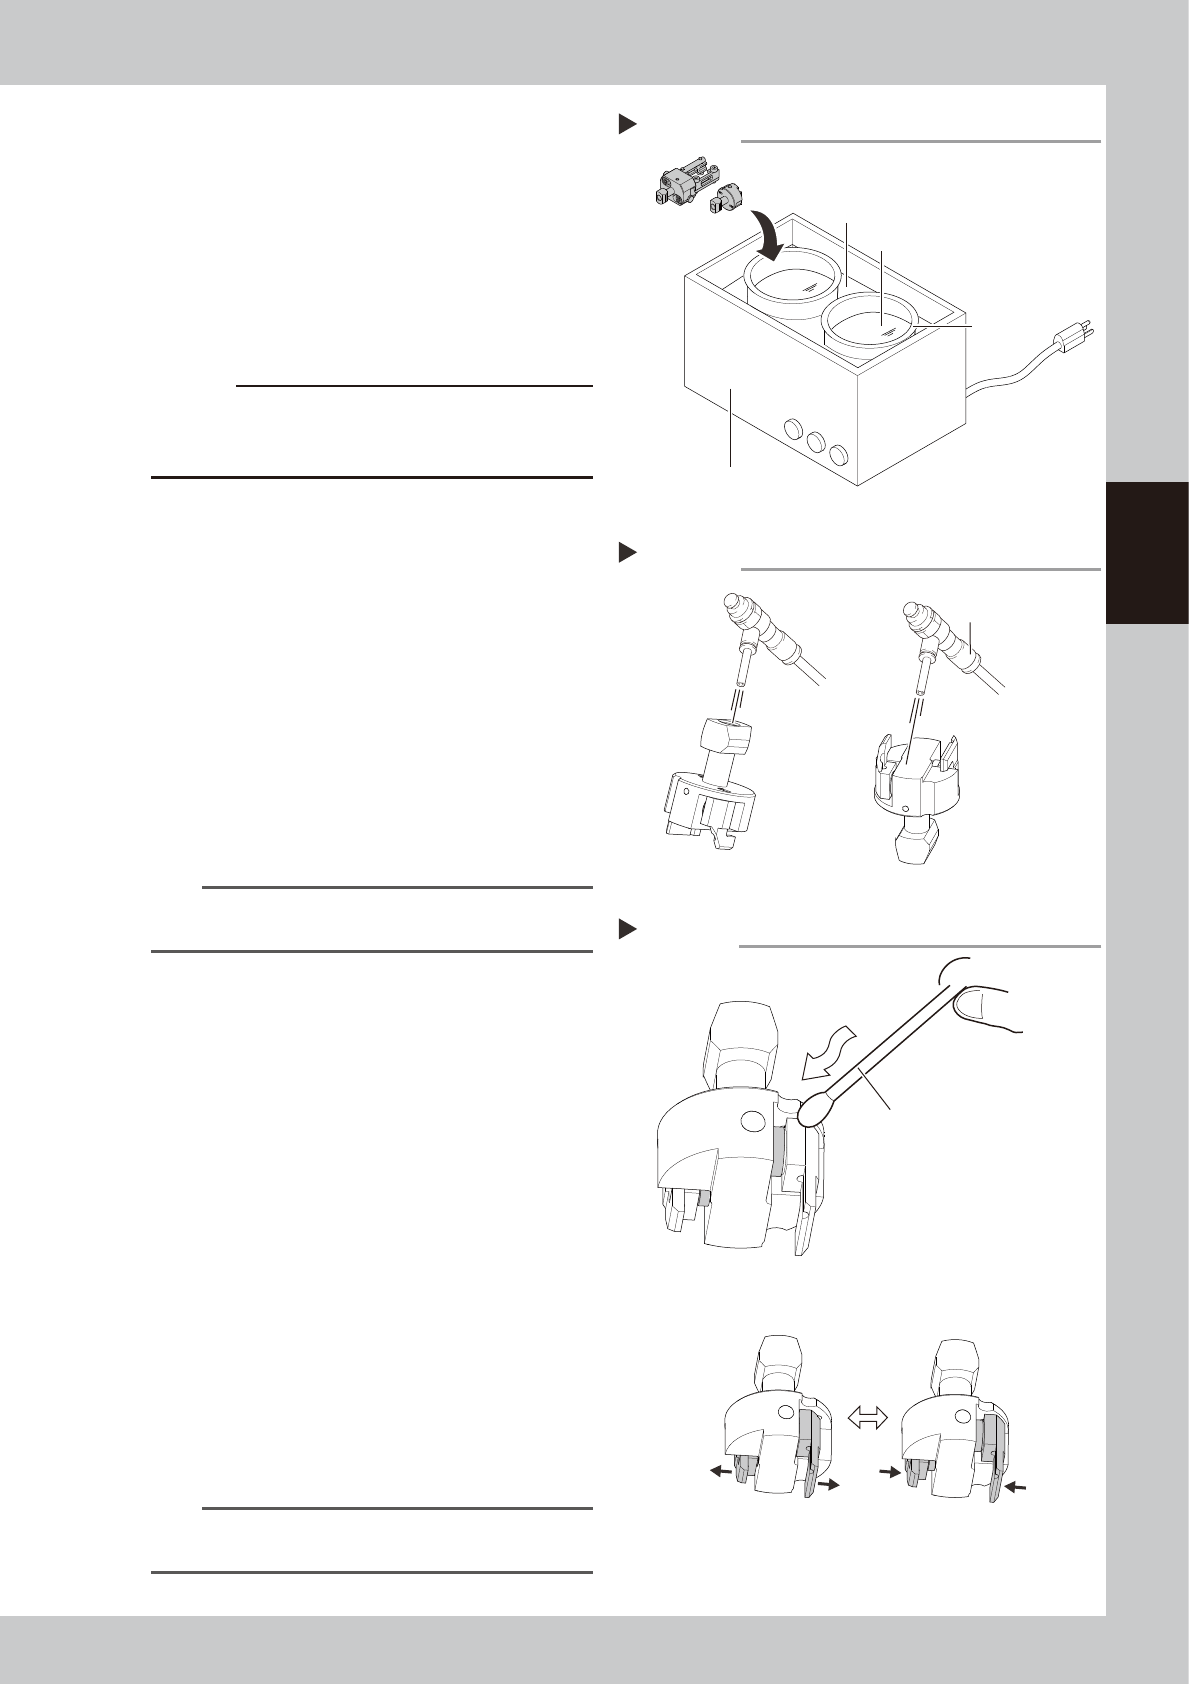
1.3.2 Cleaning and lubricating gripper nozzle
e
1
Remove nozzles.
1. Press the emergency stop button and
then open the machine safety cover.
2. Remove nozzles from the head. If the
machine is equipped with the nozzle
station, press the [Nozzle. Stn Shutter]
button to open the nozzle station shutter
and remove nozzles.
2
Clean the nozzle operation part.
If dust is in the gripper nozzle operation part,
remove it with an air blow tool (option), etc.
Air blow
Step2
Air blow tool
53314-KMK-00
3-11
3
Periodic maintenance items
3
Clean nozzles with an ultrasonic
cleaner.
1. Put nozzles into a container (such as
beaker) in an ultrasonic cleaner.
2. Pour ethanol in a container until nozzles
are dipped.
3. Pour water in an ultrasonic cleaner.
4. Clean nozzles with an ultrasonic cleaner
for about 10 minutes.
c
CAUTION
DO NOT pour ethanol directly into the ultrasonic
cleaner. It must be poured in a beaker or similar
container.
4
Blow nozzles.
1. Take nozzles out from an ultrasonic
cleaner.
2. Air blow entire nozzle to remove ethanol.
Intensively air blow the nozzle operation
part and the air path
5
Lubricate the nozzle.
1. Apply turbine oil to a cotton swab or tip
of a precision screwdriver slightly.
2. Apply turbine oil to the nozzle operation
part.
3. Move the nozzle several times to spread
turbine oil to the nozzle operation part.
n
NOTE
A thin coat of oil is enough to lubricate the operation
part.
6
Remove excess oil.
1. Remove excess oil by blowing the
operation part with an air blow tool.
2. Use a cotton swab or lint-free cloth to
wipe away excess oil around the
operation part.
7
Check the nozzle operation.
1. Return removed nozzles to the head. If
nozzles were removed from the nozzle
station, once return them to the nozzle
station. Press the [Nozzle Change] button
to attach nozzles to the head.
2. Press the [Vacuum] button relevant to
the head on the [Unit] - [Head] screen.
Check that the gripper nozzle closes
smoothly.
3. Press the [Vacuum] button again to
cancel vacuuming. Check that the
gripper nozzle opens smoothly.
n
NOTE
If removed nozzles from the nozzle station (option),
return them to the original storage positions.
Ultrasonic cleaner
Step3
Ultrasonic cleaner
Beaker
Pour water.
Pour ethanol
53315-KMK-00
Step4
Air blow
Air blow tool
53316-KMK-00
Lubricating gripper nozzle
Step 5
Apply turbine oil slightly with cotton swab
or precision screwdriver.
Spread turbine oil.
53317-KMK-00
3-12
3
Periodic maintenance items
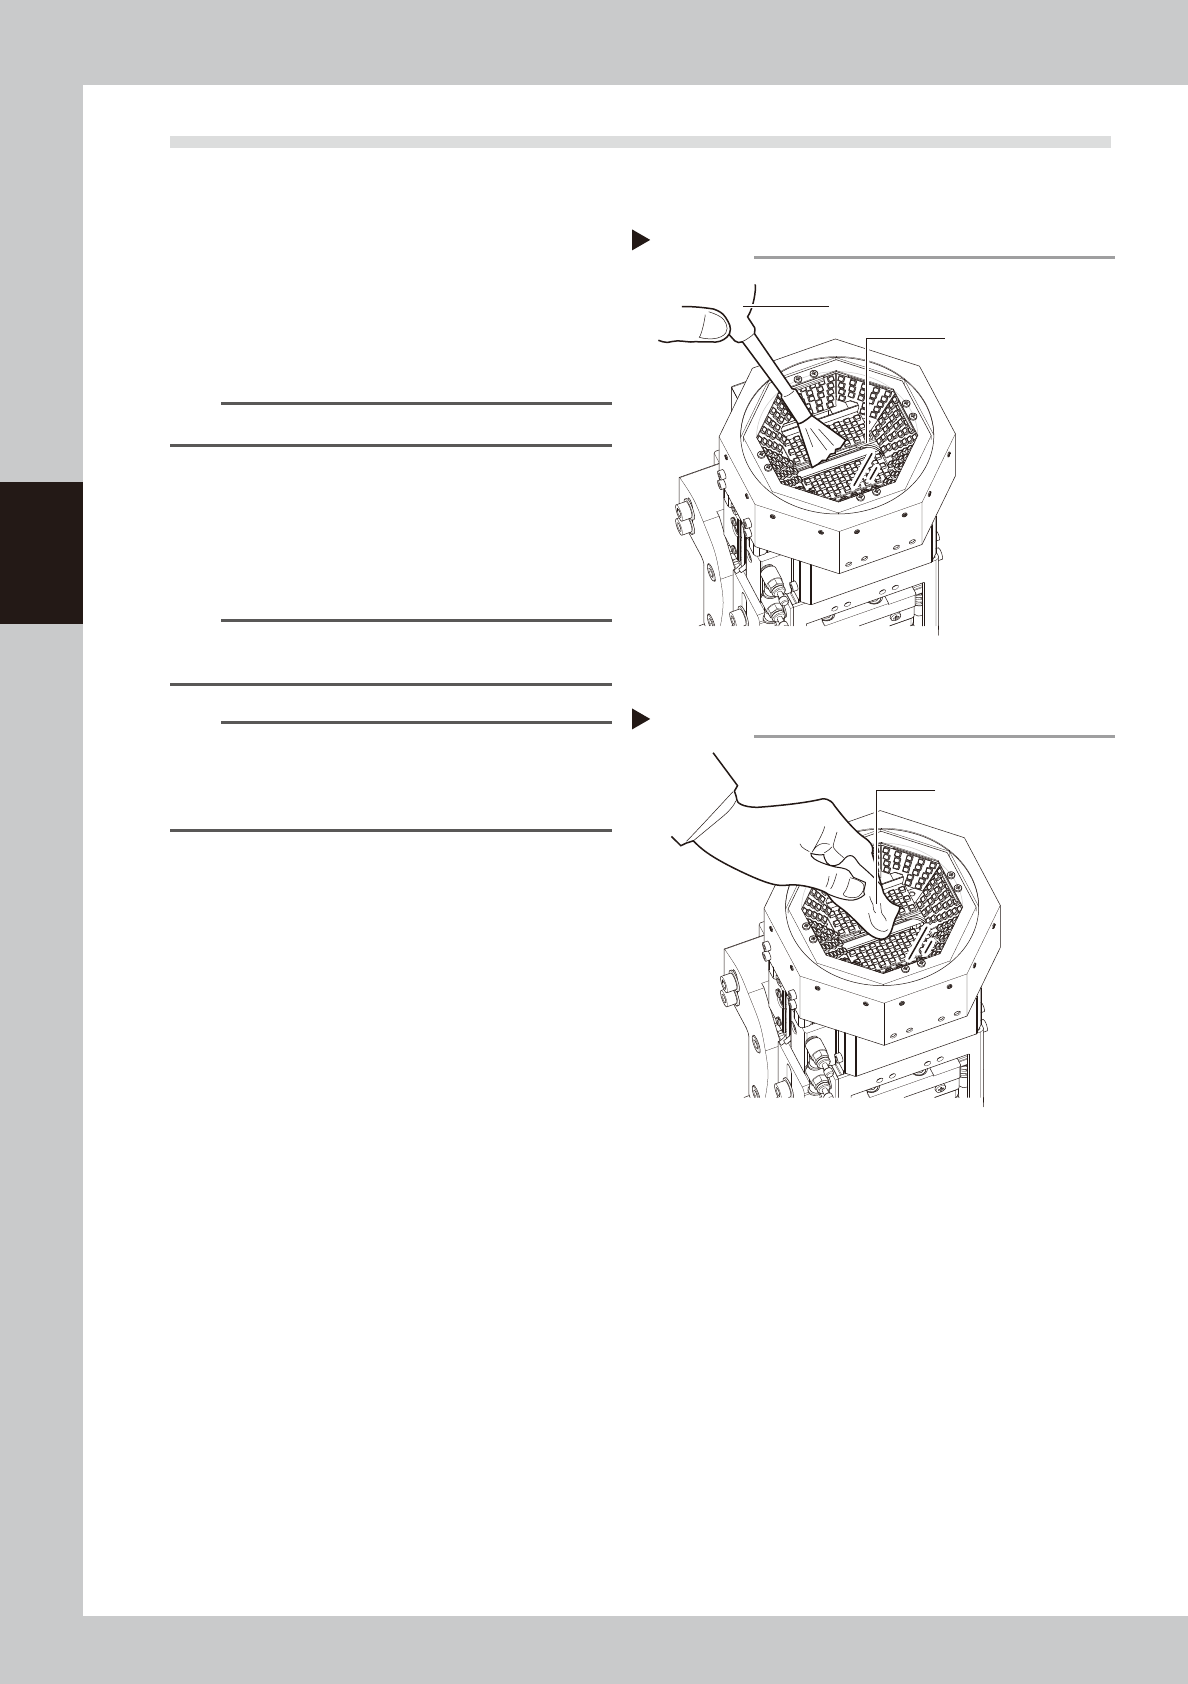
1.4 Cleaning multi-camera lighting's protective glass
Adhered dust, etc., on the multi-camera lighting's protective glass can cause component recognition errors. To
prevent this, it is recommended to inspect and clean in a periodic manner.
e
1
Blow off dust on the lighting's
protective glass.
1. Press the emergency stop button and
then open the machine safety cover.
2. Remove the dust on the lighting's
protective glass with a blower brush.
TIP
A blower brush is optional purchase item.
2
Wipe the lighting's protective glass
with a cloth or cleaning paper.
Wipe the lighting's protective glass with
lint-free cloth or cleaning paper with a small
amount of lens cleaner.
n
NOTE
A lens cleaner and cleaning paper are optional
purchase items.
n
NOTE
If dirt cannot be removed completely even after
performing the work stated above, clean the backside
of the protective glass or the lighting referring to "4.1.2
Cleaning multi-camera" in this chapter.
Blowing off dust with blower brush
Step 1
Protective glass
Blower brush
53318-KMK-00
Wiping protective glass
Step 2
Lint-free cloth or
cleaning paper
53319-KMK-00