00197498-03_UM_SiplaceCA-Serie_EN.pdf - 第247页
User Manual SIPLACE CA-Series 4 SIPLACE Wafer System (SWS) From software version SC.708.0 Edition 12/20 14 4.5 SIPLACE SWS Wafer Stretcher 247 Loosening the clamp 4 Fig. 4.5 - 8 Wafer support - loosening the clamp Remo…
4 SIPLACE Wafer System (SWS) User Manual SIPLACE CA-Series
4.5 SIPLACE SWS Wafer Stretcher From software version SC.708.0 Edition 12/2014
246
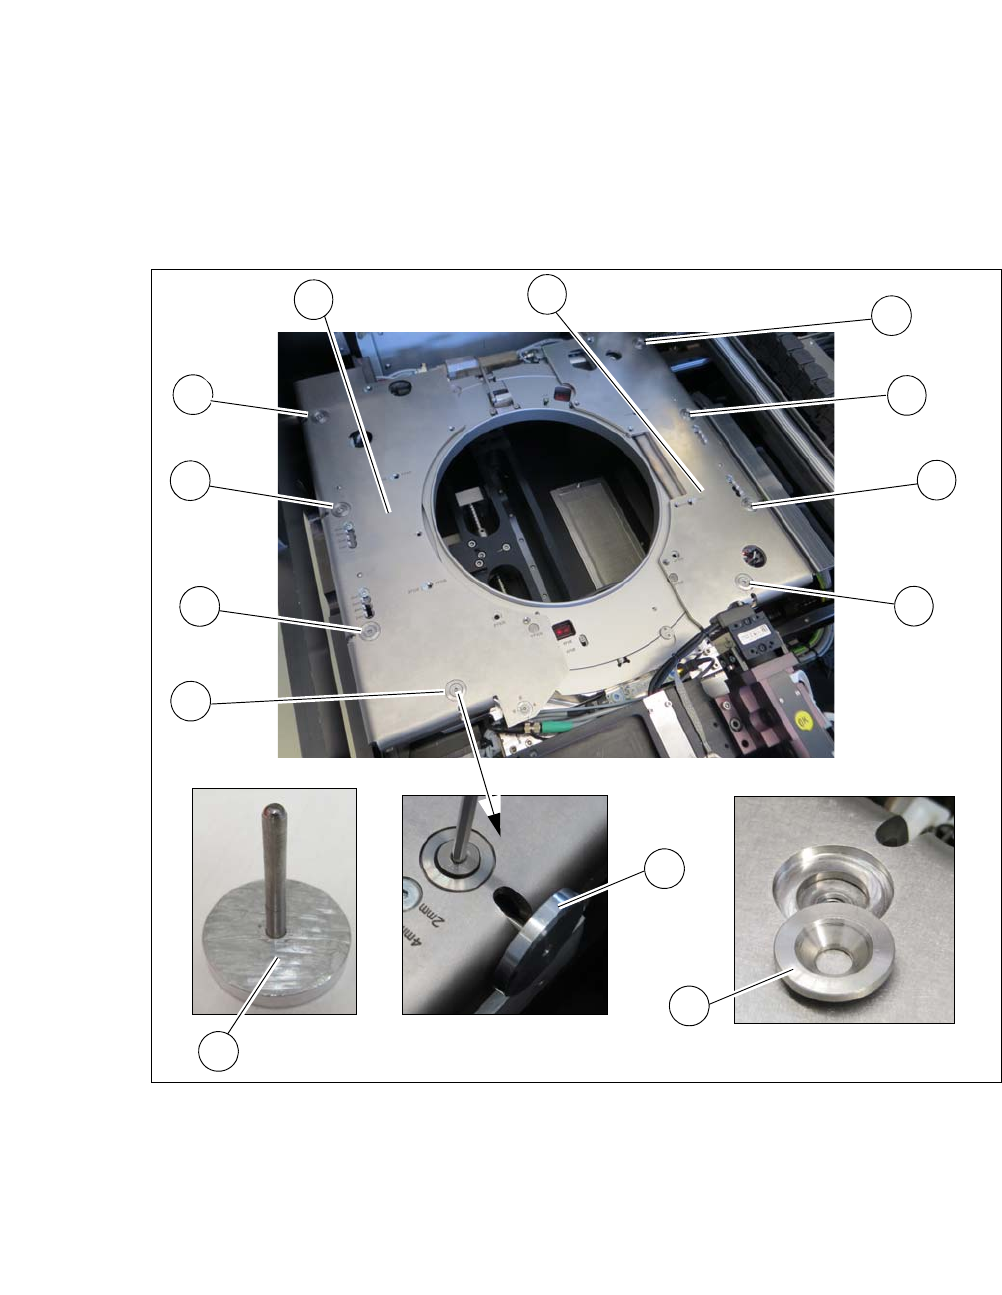
4.5.7.3 Removing the 8" wafer support
Removing the downholder plate 4
You need to replace the downholder plate for the relevant wafer support.
Fig. 4.5 - 7 Wafer support - removing the downholder plate
Insert the auxiliary tool for fixing the lifting piston (2) into the opening and fix the piston inside.
One after the other, loosen all 4 screws (1) on the two downholder plates (5).
Remove the conical fixing disc (3). Make sure that you keep these safe for installation later
on.
Remove the two downholder plates (4).
1
1
1
1
1
1
1
1
2
2
4
4
3
User Manual SIPLACE CA-Series 4 SIPLACE Wafer System (SWS)
From software version SC.708.0 Edition 12/2014 4.5 SIPLACE SWS Wafer Stretcher
247
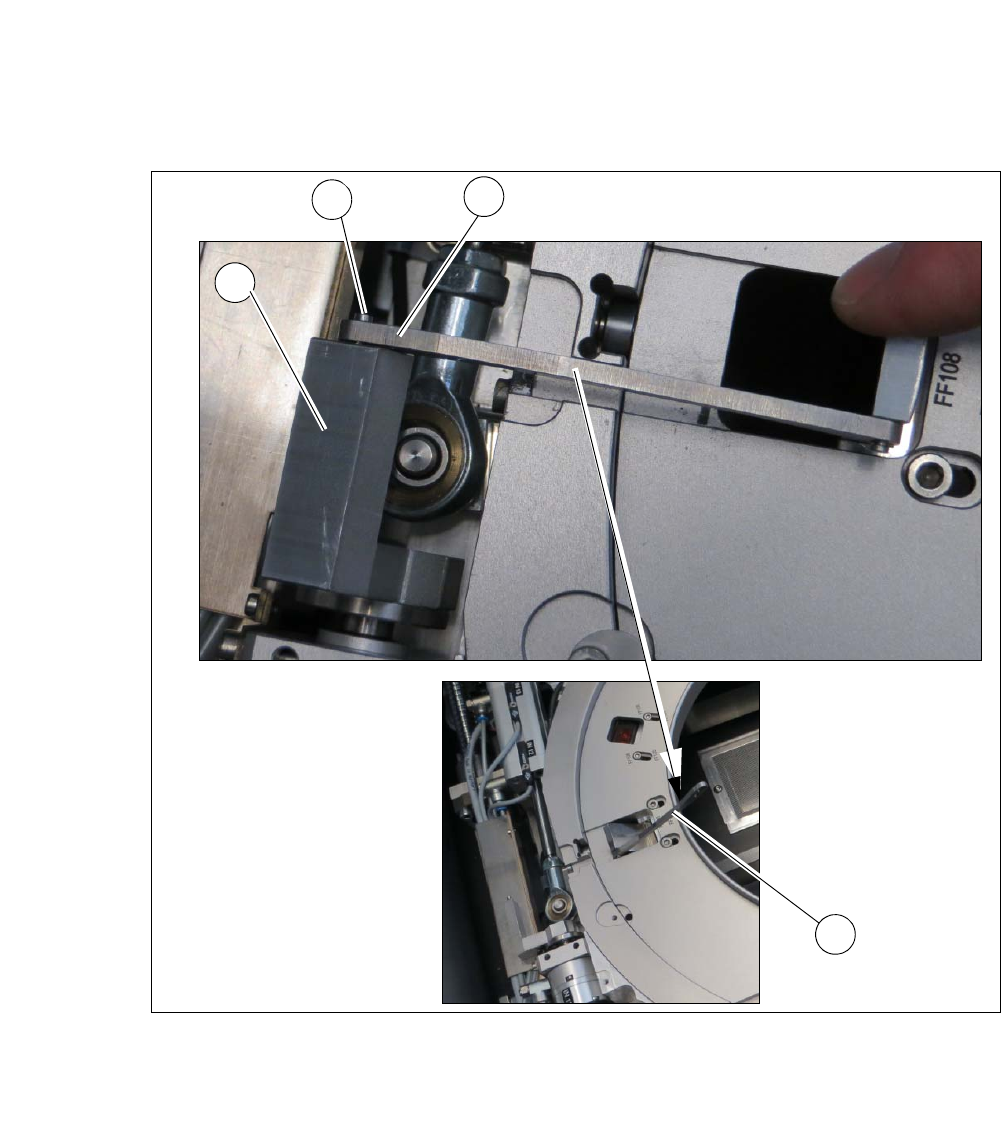
Loosening the clamp 4
Fig. 4.5 - 8 Wafer support - loosening the clamp
Remove the circlip on the shaft (2) of the clamp (1).
Unhook the clamp so that the clamping lever (3) is free (4).
1
2
4
3
4 SIPLACE Wafer System (SWS) User Manual SIPLACE CA-Series
4.5 SIPLACE SWS Wafer Stretcher From software version SC.708.0 Edition 12/2014
248
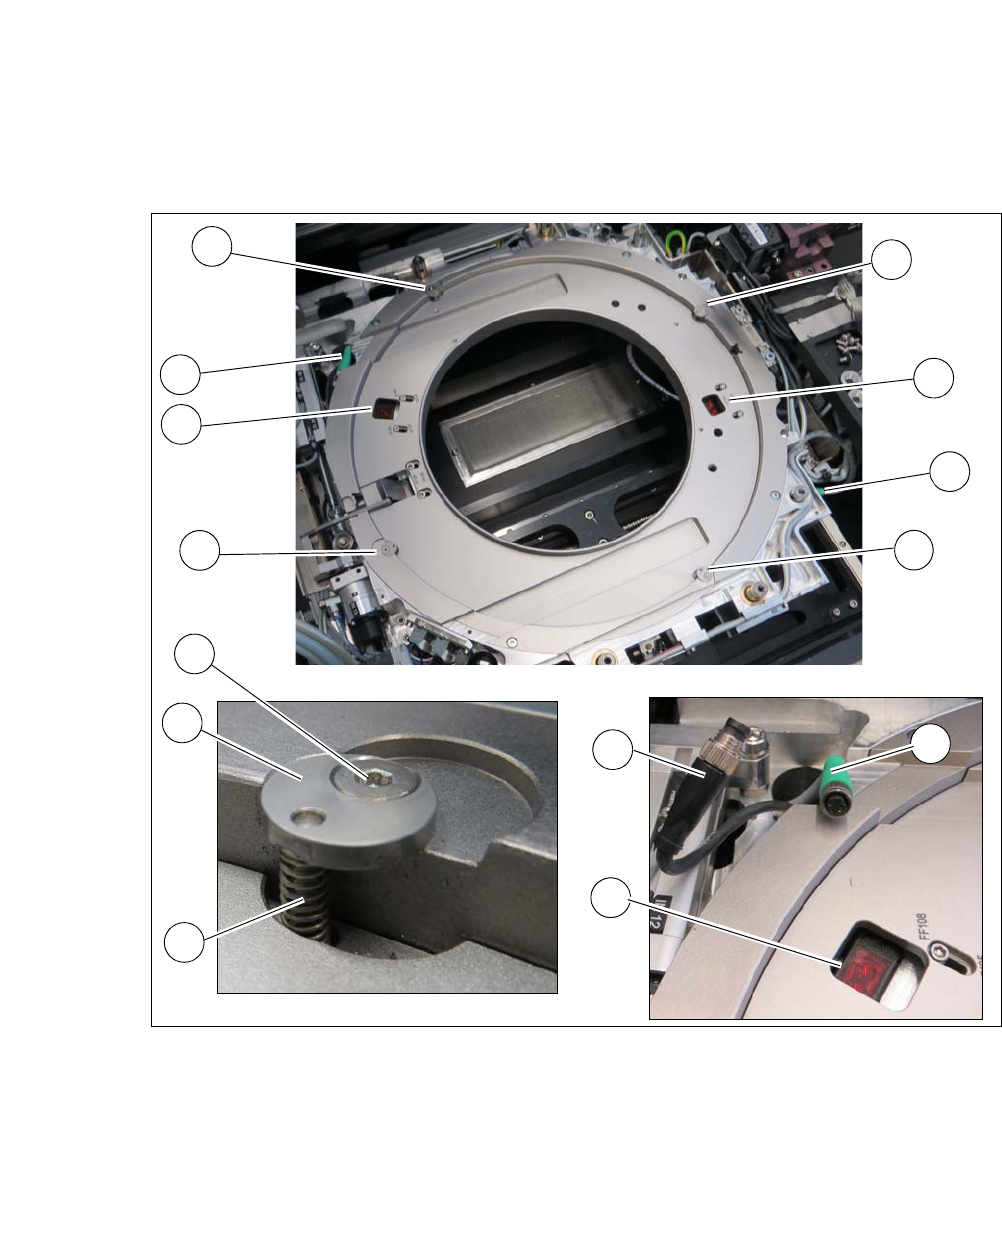
Removing the stroke ring 4
You need to replace the stroke ring for the relevant wafer support.
Fig. 4.5 - 9 Wafer support - removing the stroke ring
Loosen the 4 screws (1) fixing the stroke ring.
Remove th fixing disc (2) and the spring (3). Make sure that the fixing disc (2) and the spring
(3) are kept safe for refitting later on.
Unplug the two sensors (4) from the connector (5) of the cable extension (6).
Remove the stroke ring.
1
1
1
2
3
1
4
4
5
4
5
1
5
6