TS577R-UserGuide - 第15页
15 8. To uch the Voltage icon to set voltage 9. To uch the Up or Down arrows to set input voltage 10. To uch the Check Mark icon to save and exit 5.4 Low Pressure Alarm Setting Note: This controller is equipped with an a…
14
5.3 Setup for Auger Valve with Encoder Motor
Procedure to control encoder motor valve is very similar to non-encoder valve.
The dispense cycle of encoder motor valve is controlled mainly through
encoder counts.
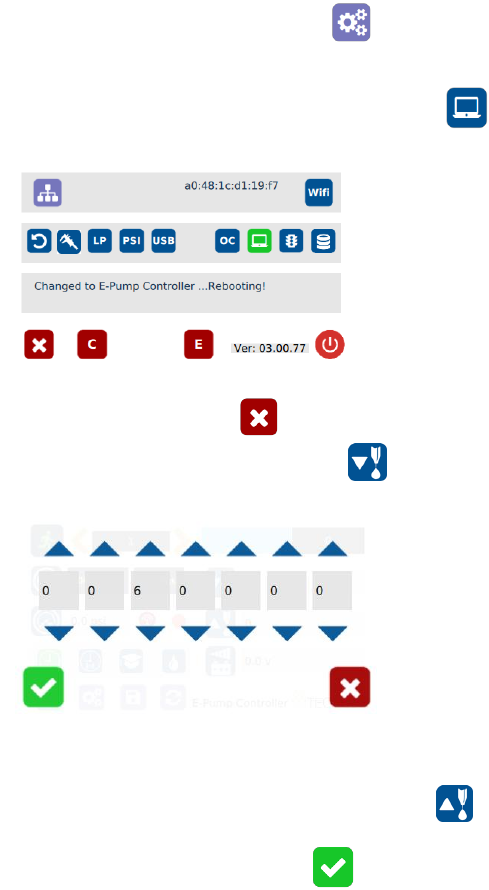
1. Touch the Setup icon to enter the setup screen
2. Touch the Controller type icon to switch to Encoder controller
“E-Pump Controller”
3. Touch the X icon to save and exit
4. Touch the Dispense icon to enter the setup screen
5. Touch the Up or Down arrows to set the dispense encoder count
Note: if suck back is needed, touch the “Reverse” icon to setup
motor reverse encoder count
6. Touch the Check Mark icon to save and exit
7. Select desired dispense mode to continue (Timed, Interrupt, Teach or Purge)
15
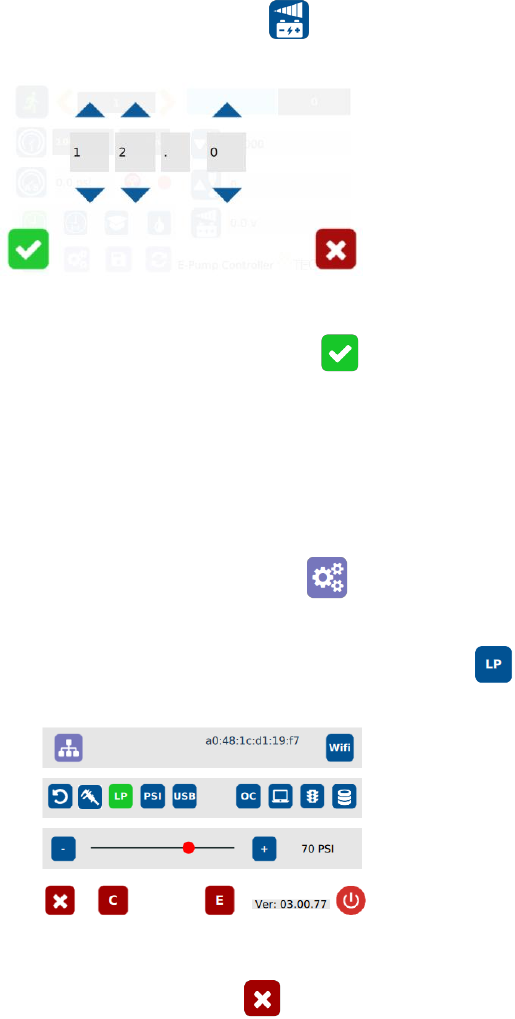
8. Touch the Voltage icon to set voltage
9. Touch the Up or Down arrows to set input voltage
10. Touch the Check Mark icon to save and exit
5.4 Low Pressure Alarm Setting
Note: This controller is equipped with an adjustable “Low Pressure” alarm
function. If the set pressure dropped below the “Low Pressure” setting, the
controller will not activate. The “Low Pressure” setting is pre-set at the factory
to 70 psi (4.8 bars). When the supplied pressure drops below 70 psi (4.8 bars)
the unit will not function. The “Low Pressure” setting can be adjusted. Follow
instruction below:
1. Touch the Setup icon to enter setup screen
2. Touch the Low Pressure (LP) icon to set the desired low pressure
3. Slide the pressure scale to set the desired low pressure threashold
4. Touch the X icon to save and exit
16
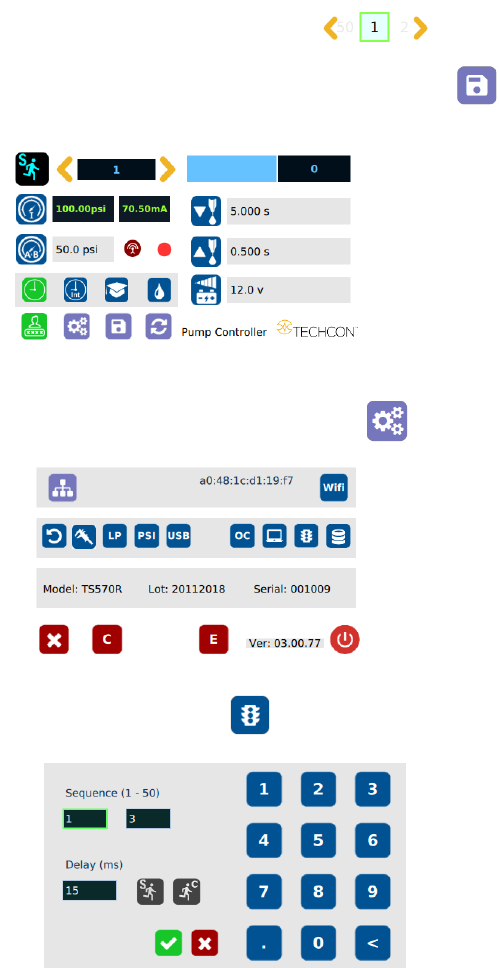
5.5 Stored Program in Memory cell
The unit has 50 memory cells to store all dispense parameters. The controller can
activate all memory cells in sequence mode.
5.5.1 To Store dispense parameters
1. Touch the forward or backward arrow to
select desired memory cell.
2. Enter all desired dispense parameters then touch the “Save”
icon to save the data.
5.5.2 To run in Single Sequence Mode
1. Touch the Setup icon to enter the setup screen
2. Touch the Run Method icon