TS577R-UserGuide - 第32页
32 6.3.3 View Erro r List The web -based application will record errors that occurred from all controllers. To view the error list: 1. Click on the Tools menu 2. Select “Error List” fro m the drop -down menu 3. The error…
31
Email: Enter email address that you want to receive
notification
Phone number: Enter the phone number that you want to
receive text message notification.
Note: use mobile email address (SMS address) format.
Make sure to check your phone carrier for the correct
format
Server: Enter your smtp server address
Port: Enter your smtp port
From Email: This is the sender email
Note: Your IT staff will need to setup the sender email
account. This email account can be used for multiple
controllers.
Password: Enter the password for the sender email
4. After the form is completely filled out, Click “Create
User”
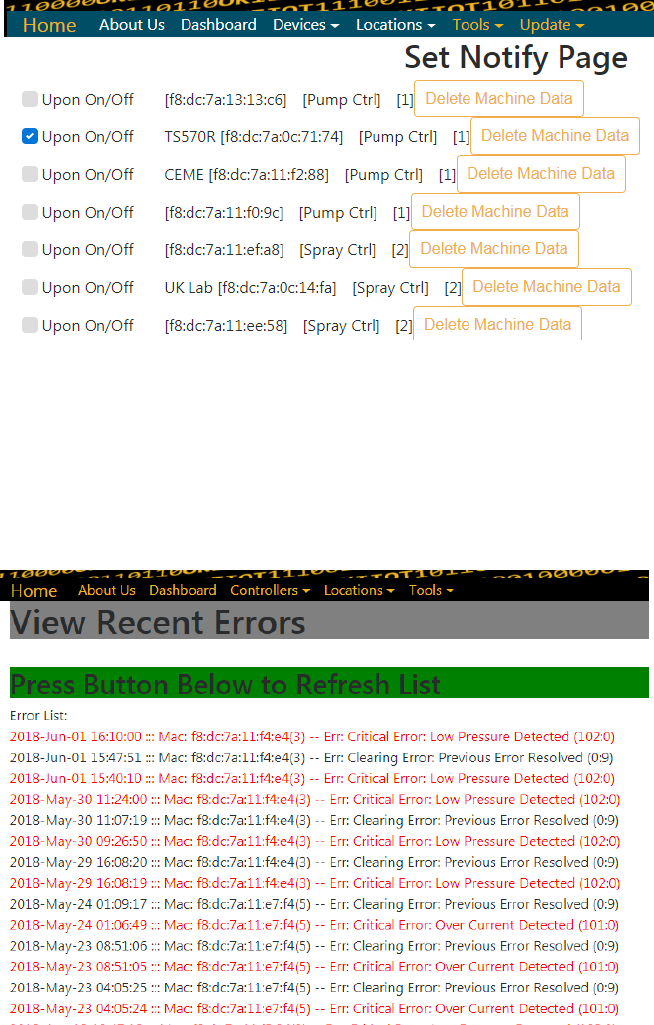
6.3.2 Select controller to receive notification
1. Click on the Tools menu
2. Select “Set Notification” from the drop-down menu
3. Select desired controllers to receive notification from by
checking the box next to “Upon On/Off” (make sure the Mac
address on the controller matches the Mac address on the Set
Notification page)
4. Click “Update Notifications” box
5. Selected controllers will send error notifications to the
registered phone or email that set in previous steps
32
6.3.3 View Error List
The web-based application will record errors that occurred from
all controllers. To view the error list:
1. Click on the Tools menu
2. Select “Error List” from the drop-down menu
3. The error list will appear
33
7. SOFTWARE UPGRADE
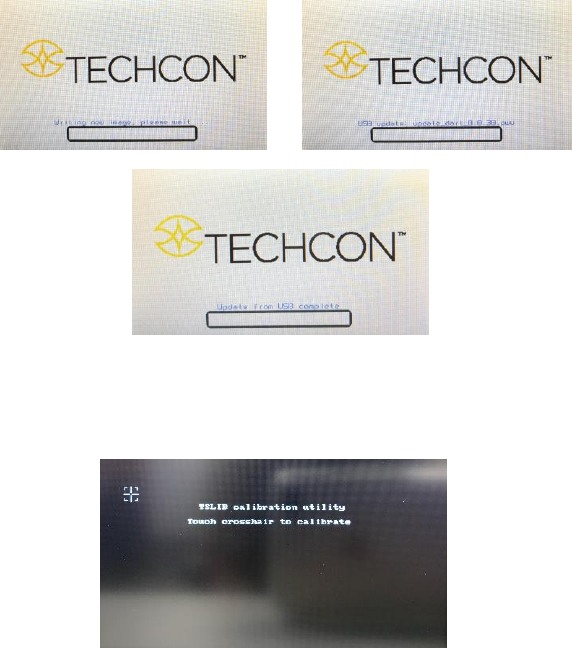
Note: For future software upgrade, follow the instructions below.
20. Download the latest software version from Techcon website and copy it to
a blank USB thumb drive. Note: Do not put the software file inside a
folder
21. Make sure that the unit is turned off
22. Insert the USB drive to the USB port located in the back of the unit
23. Turn on the unit
24. Wait while the system is loading the new software. This process can take
a few minutes
25. Wait until the system completes the software update from the USB drive
and the first touch-screen calibration is displayed
26. Remove the USB drive from the USB port before proceeding to the next
step
27. Follow the instructions on the display to calibrate the touch screen by
touching the crosshair at five different points. Note: In order to
accurately calibrate the touch screen, it’s recommended that the stylus
pen is used