80S-20贴片机.pdf - 第167页
SIPLACE 80S-20/F4 Service Manual 6 PCB Handling Edition 01/96 6.2 Geared Motors of the PCB Transportation Systems 6 - 11 ● Undo and remov e the 4 mo unting screws ( 4 M3 slot ted head screws) of the geared motor (D). Til…
6 PCB Handling SIPLACE 80S-20/F4 Service Manual
6.2 Geared Motors of the PCB Transportation Systems Edition 01/96
6 - 10
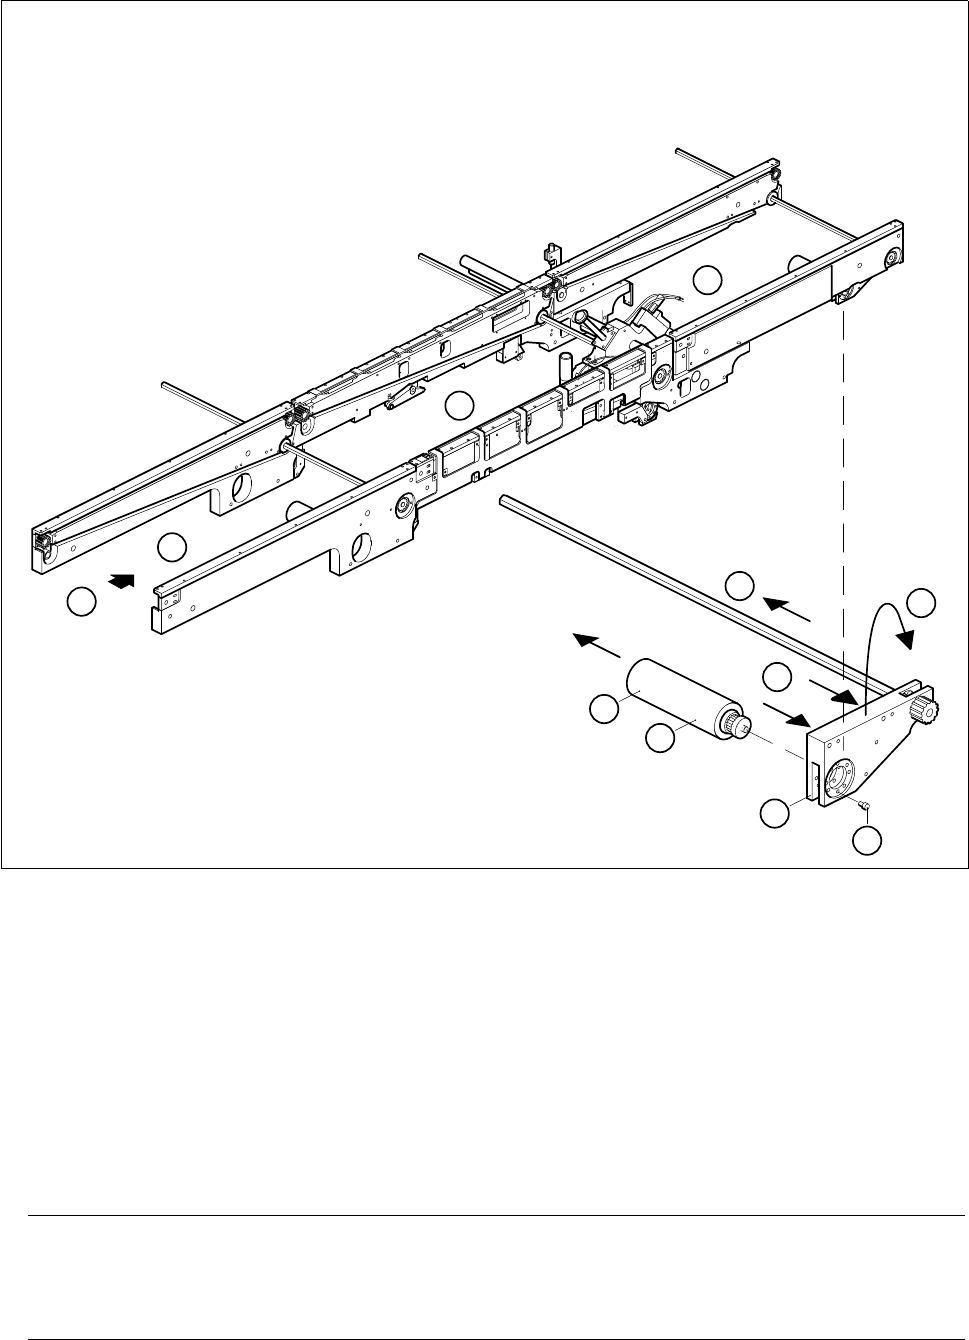
Fig. 6.2.2 Removing the geared motor of the output conveyor
Key to Fig. 6.2.2
● Unscrew and remove the two mounting screws (M4 hexagon socket screws) of the motor mount on the
inside of the output conveyor (A).
● Lift the motor mount off the parallel pins in the direction of the movable side of the conveyor belt (B).
● Swing up the motor mount upwards until the mounting screws of the geared motor are accessible (C).
ATTENTION O
Hold onto the motor mount to prevent it dropping. If you do not, there is the risk of the rod bending or the
sonar BERO cable kinking or bending too tightly.
1 Input conveyor 2 Center conveyor
3 Output conveyor 4 Output conveyor geared motor
5 Motor mount
3
A
1
2
4
B
D
E
5
A
C

SIPLACE 80S-20/F4 Service Manual 6 PCB Handling
Edition 01/96 6.2 Geared Motors of the PCB Transportation Systems
6 - 11
● Undo and remove the 4 mounting screws (4 M3 slotted head screws) of the geared motor (D). Tilt the
motor slightly and remove it from the toothed belt (E).
6.2.2.2 Fitting and testing the output conveyor geared motor
● Insert the new geared motor. Make sure that the toothed belt is positioned correctly around the synchroniz-
ing disk.
● Mount the geared motor using the 4 M3 slotted head screws.
● Carefully swing the motor mount back into its original position while watching out for the rod and the sonar
BERO.
● Slide the motor mount onto the parallel pins.
● Fasten the motor mount using the two M4 hexagon socket screws.
● Plug the cable shoes onto the motor terminals and refer to the circuit diagram folder to make sure that you
have connected the motor up correctly.
● Slide the heat-shrinkable sleeve rings onto the motor to fasten the motor cable.
● Referring to the adjustment instructions, carry out a function test of the conveyor.
NOTE OOO
While carrying out the function test do not fail to observe the safety instructions in Chapter 1.
● Unlock the key-operated switch before performing function testing and making adjustments. This will allow
you to take measurements at the motors with the protective cover open. However the gantry axis systems
will be in a de-energized state.
NOTE OO
When you have finished the function test do not forget to lock the key-operated switch again, stowing the
key in a place where unauthorized persons have no access to it.
6 PCB Handling SIPLACE 80S-20/F4 Service Manual
6.2 Geared Motors of the PCB Transportation Systems Edition 01/96
6 - 12