00194798-01.pdf - 第48页
Installation Manual, Station Software Version 602.01 Edition 06/2006 → Confirm your selection with <RETURN> . The installation is then continued. → You are now requested to insert the fl oppy MCRMOS Disk -1/2- into…
Installation Manual, Station Software Version 602.01 Edition 06/2006
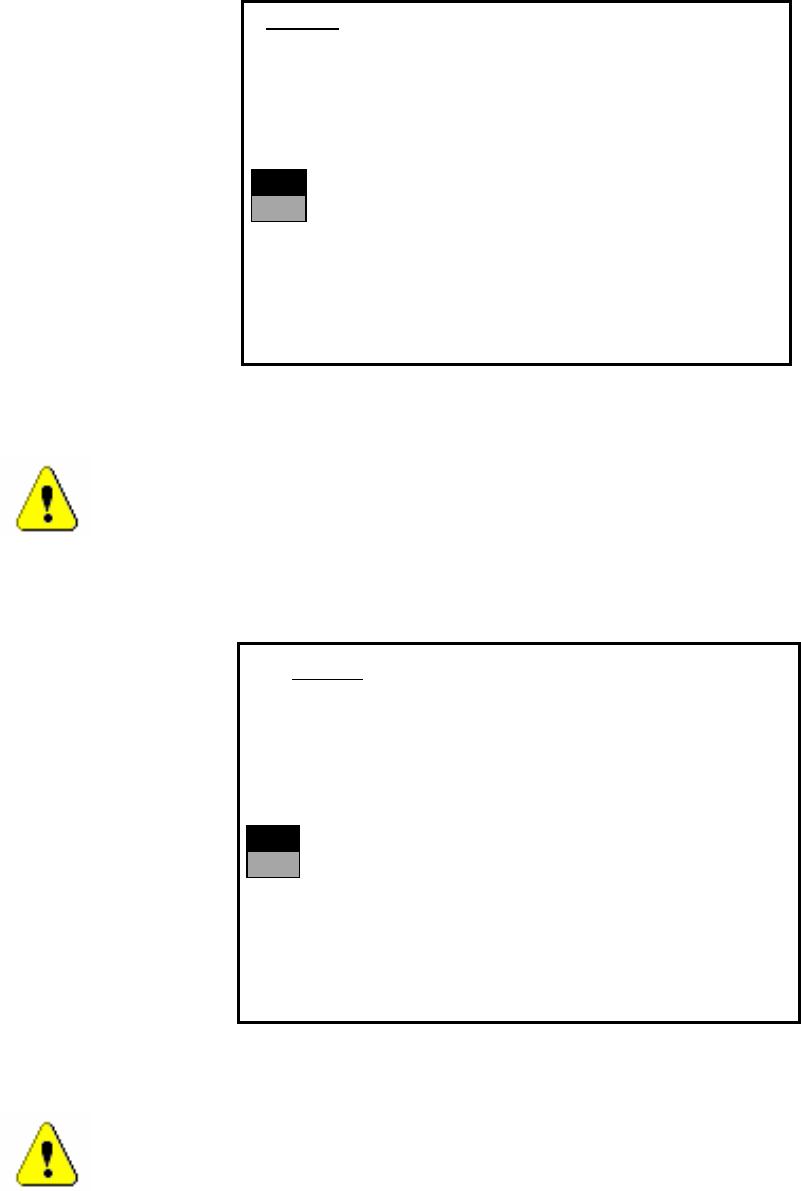
The installation is started. The following query appears:
>>>
>>>
-----No
-----Yes
1. WARNING
installation of SIPLACE operating system will only save files keeping machine data.
A
ll other files of user’s interrest have to be saved on floppy disc by user manually.
Otherwise these files will bedeleted.
Continue SIPLACE Installation Job?
Use the [Up Arrow] [Down Arrow] [Pg Up] [Pg Dn] keys to move the highlight bar to select the
button you prefer.
Press [Enter] to activate your selection
→ Use the cursor keys to select the option to continue.
Warning:
Only machine data is saved. All user data is deleted. If necessary, save your user data to
floppy.
→ Confirm your selection with <RETURN>.
→ If you have selected “Yes“, the installation is continued and the following screen display appears.
>>>
>>>
-----No
-----Yes
2. WARNING
Partition “C:“ of your hard disc will be formatted:
⇒
all files will be deleted.
Continue SIPLACE Installation Job?
Use the [Up Arrow] [Down Arrow] [Pg Up] [Pg Dn] keys to move the highlight bar to select the
button you prefer.
Press [Enter] to activate your selection
→ Use the cursor keys to select whether to continue ("Yes") or cancel ("No").
Warning:
The C: partition will be formatted. All data which has not been saved will now be deleted.
47 of 60

Installation Manual, Station Software Version 602.01 Edition 06/2006
→ Confirm your selection with <RETURN>. The installation is then continued.
→ You are now requested to insert the floppy MCRMOS Disk -1/2- into the drive.
→ After both floppies have been installed, the message "Installation finished" appears.
The operating system has been completely installed.
→ Now remove the floppy from the drive and switch the machine off and then on again.
4.6.2 Troubleshooting
→ If the installation program terminates prematurely due to an error, remove the floppy from the drive and
switch the machine off.
→ Insert floppy #1 into the drive and switch the machine on again.
→ Try installing the machine controller operating system again.
Note:
If the software can still not be installed on the second attempt, contact your
Service center.
4.7 Manual installation of the machine controller software
If it is necessary to install the machine controller software after installation has been completed, do so as
follows:
→ Open the Start menu and select Programs Æ Siplace Æ MC Distributor. The installation is started.
→ Follow the instructions on screen.
48 of 60

Installation Manual, Station Software Version 602.01 Edition 06/2006
4.8 Installing the machine controller on a CPU086 (SIPLACE X-series)
Unlike the CPU076, the CPU086 has no floppy drive. For this reason, BIOS updates, automatic BIOS
settings and installation of the RMOS have to be carried out with a CD using the USB CD drive.
4.8.1 Installing the RMOS machine controller operating system
Note:
The following description refers to the "Phoenix FirstBIOS(tm)1.06" version of the BIOS.
Depending on the current version, it is possible that the structure of the BIOS menus, the
names of the submenus and the names of the settings may change.
The CDs mentioned below (RMOS installation, BIOS update and BIOS settings) can be created from ISO
images located on the installation CD for the station software. These images can be used to create
bootable CDs with suitable CD writing software on a PC with a CD writer. You should do this before
proceeding (see section
4.2).
4.8.1.1 Creating an RMOS installation CD
→ Start a CD writing program on any computer equipped with a CD writer and an additional CD ROM drive.
→ Insert an empty CD-R in the CD writer.
→ Insert the CD “SW-Version 602.01” in the CD-ROM drive.
→ Start the option for writing an image in the CD writing program.
→ Select the file “BootCD_Install.iso” from the “RMOS-Images” folder on the CD and follow the on-screen
instructions.
→ Once the CD has been written, remove the CDs from the drives.
4.8.1.2 Preparing to install the RMOS on the machine controller
→ Disconnect the keyboard from the station computer and connect it to the machine controller on the
machine.
→ Switch the video multiplexer to SR2/MC.
→ Insert the CD in the USB CD drive and connect the drive to the machine controller using a USB cable.
→ Press <Ctrl><Alt><Del> to warm start the machine controller.
→ During the warm start, press <Del>. The main BIOS Setup menu appears.
49 of 60