HS50_advance_level 1_20200522_221201 (1).pdf - 第194页
06/2002 E dition Studen t Guide H S-50 Advance d I 6 Operati ng the S IT ES T Softwa r e 10 6.3. 6 M en u Bar: S e ttings 6 Save machin e data Any newly det ermi ned cal ibratio n data or modi fied ma chine dat a are sav…
Student Guide HS-50 Advanced I 06/2002 Edition
6 Operating the SITEST Software
9
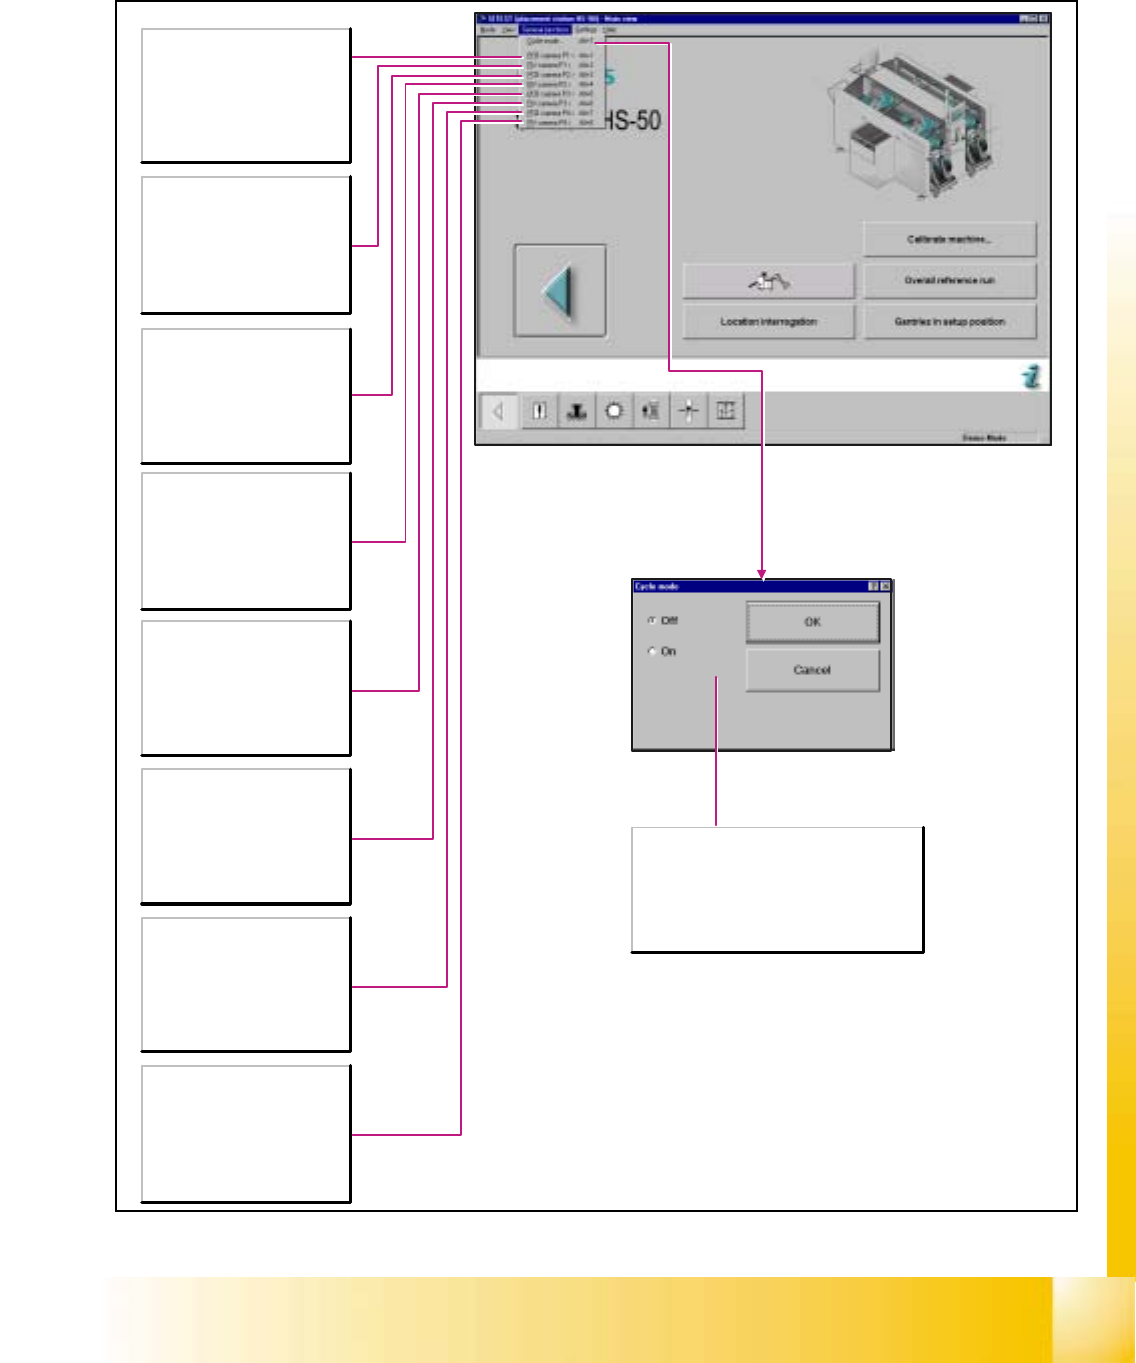
6.3.5 Menu Bar: General Functions
6
Alt+1
Switches the screen display to
the PCB camera fitted to gantry
1.
Press the ESC button to switch
the screen display back to the
normal test program mode.
Alt+2
Switches the screen display to
the camera fitted to revolver
head 1.
Press the ESC button to switch
the screen display back to the
normal test program mode.
Alt+3
Switches the screen display to
the PCB camera fitted to gantry
2.
Press the ESC button to switch
the screen display back to the
normal test program mode.
Alt+4
Switches the screen display to
the camera fitted to revolver
head 2.
Press the ESC button to switch
the screen display back to the
normal test program mode.
Alt+5
Switches the screen display to
the PCB camera fitted to gantry
3.
Press the ESC button to switch
the screen display back to the
normal test program mode.
Alt+6
Switches the screen display to
the camera fitted to revolver
head 3.
Press the ESC button to switch
the screen display back to the
normal test program mode.
Alt+7
Switches the screen display to
the PCB camera fitted to gantry
4.
Press the ESC button to switch
the screen display back to the
normal test program mode.
Alt+8
Switches the screen display to
the camera fitted to revolver
head 4.
Press the ESC button to switch
the screen display back to the
normal test program mode.
Off
Deactivates the cycle mode.
On
Activates the cycle mode. The Start button on
the machine must be pressed for each step of
the placement process.
06/2002 Edition Student Guide HS-50 Advanced I
6 Operating the SITEST Software
10
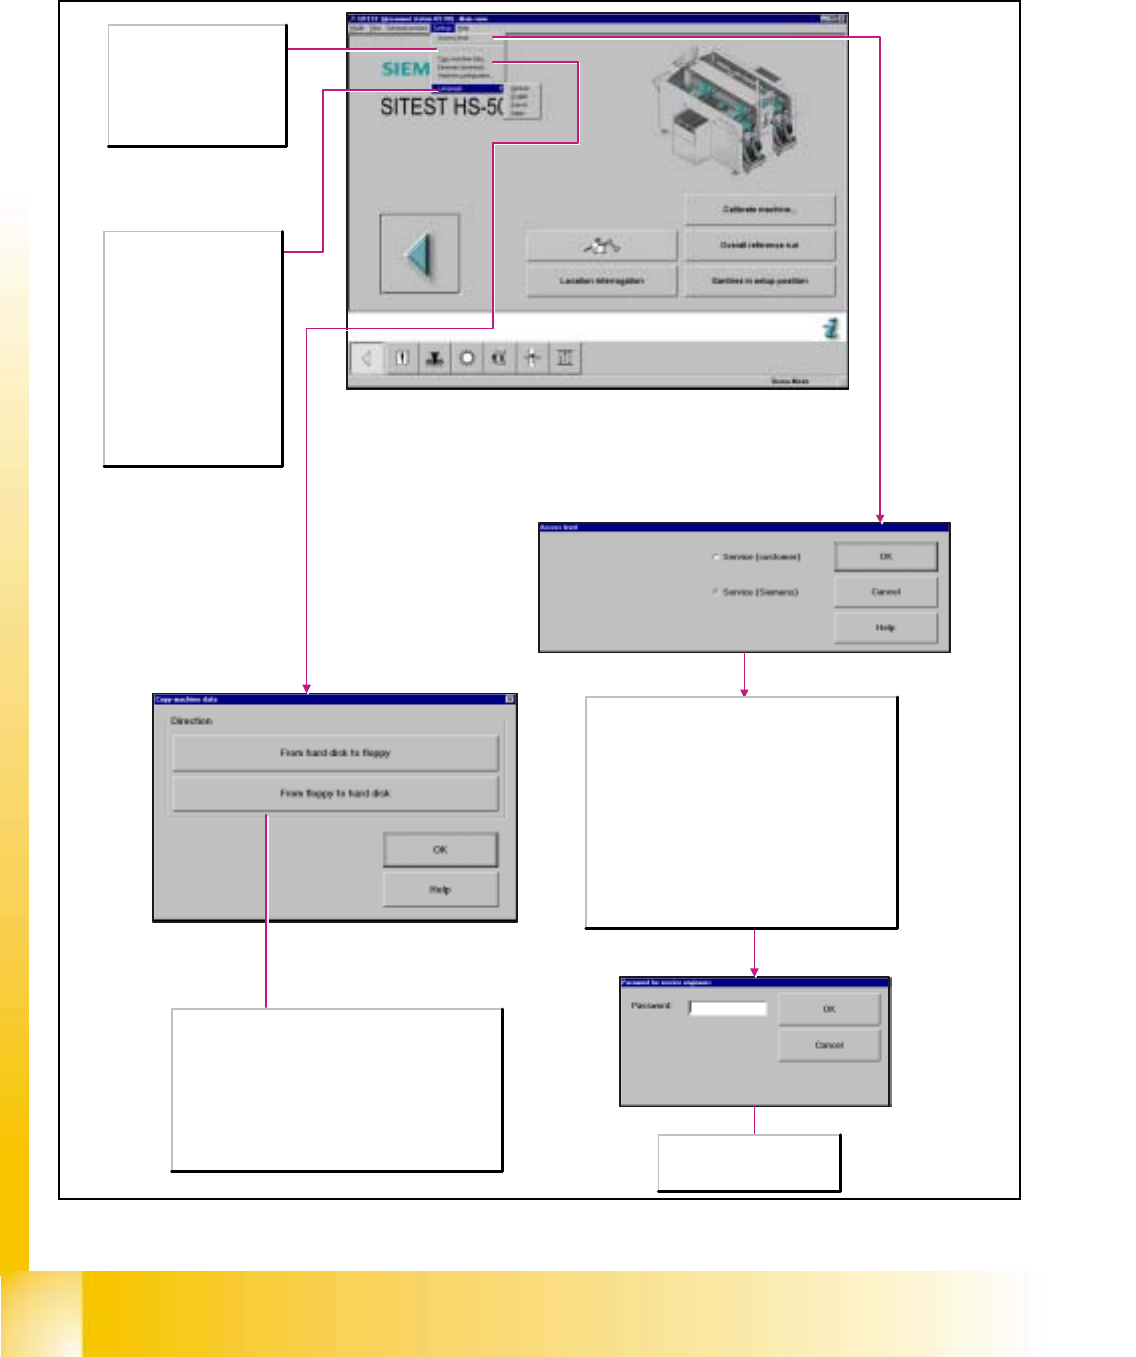
6.3.6 Menu Bar: Settings
6
Save machine data
Any newly determined
calibration data or modified
machine data are saved.
Note:This menu command can
only be executed if data were
newly determined or changed.
Language
Selects the language in which
the texts of the user interface
are to be displayed.
German
Display of all texts in German.
English
Display of all texts in English.
French
Display of all texts in French.
Italian
Display of all texts in Italian.
Direction
From hard disk to floppy
Copies the machine data into a ZIP archive
(MaschDaten.zip) on an empty, formatted floppy which has
already been inserted in the station computer.
From floppy to hard disk
The machine data is extracted to the hard disk of the station
computer from a ZIP archive (MaschDaten.zip) on a floppy in
the station computer. To be able to activate the machine
data copied it is necessary to restart the machine.
Password
Field for entering the password
specified by "SIEMENS".
Some functions of the test program can be protected
against unqualified operation by an appropriate setting of
the access level and the assignment of passwords.
Functions that cannot be accessed at a given access
level cannot be executed as the applicable buttons, radio
buttons or menu commands cannot be selected or are
not available.
Service (customer)
Sets the access level for trained staff at the customer's
site.
Service (Siemens)
Sets the access level for Siemens service engineers and
opens the dialog box Password for service engineers for
entering the password.
Student Guide HS-50 Advanced I 06/2002 Edition
6 Operating the SITEST Software
11
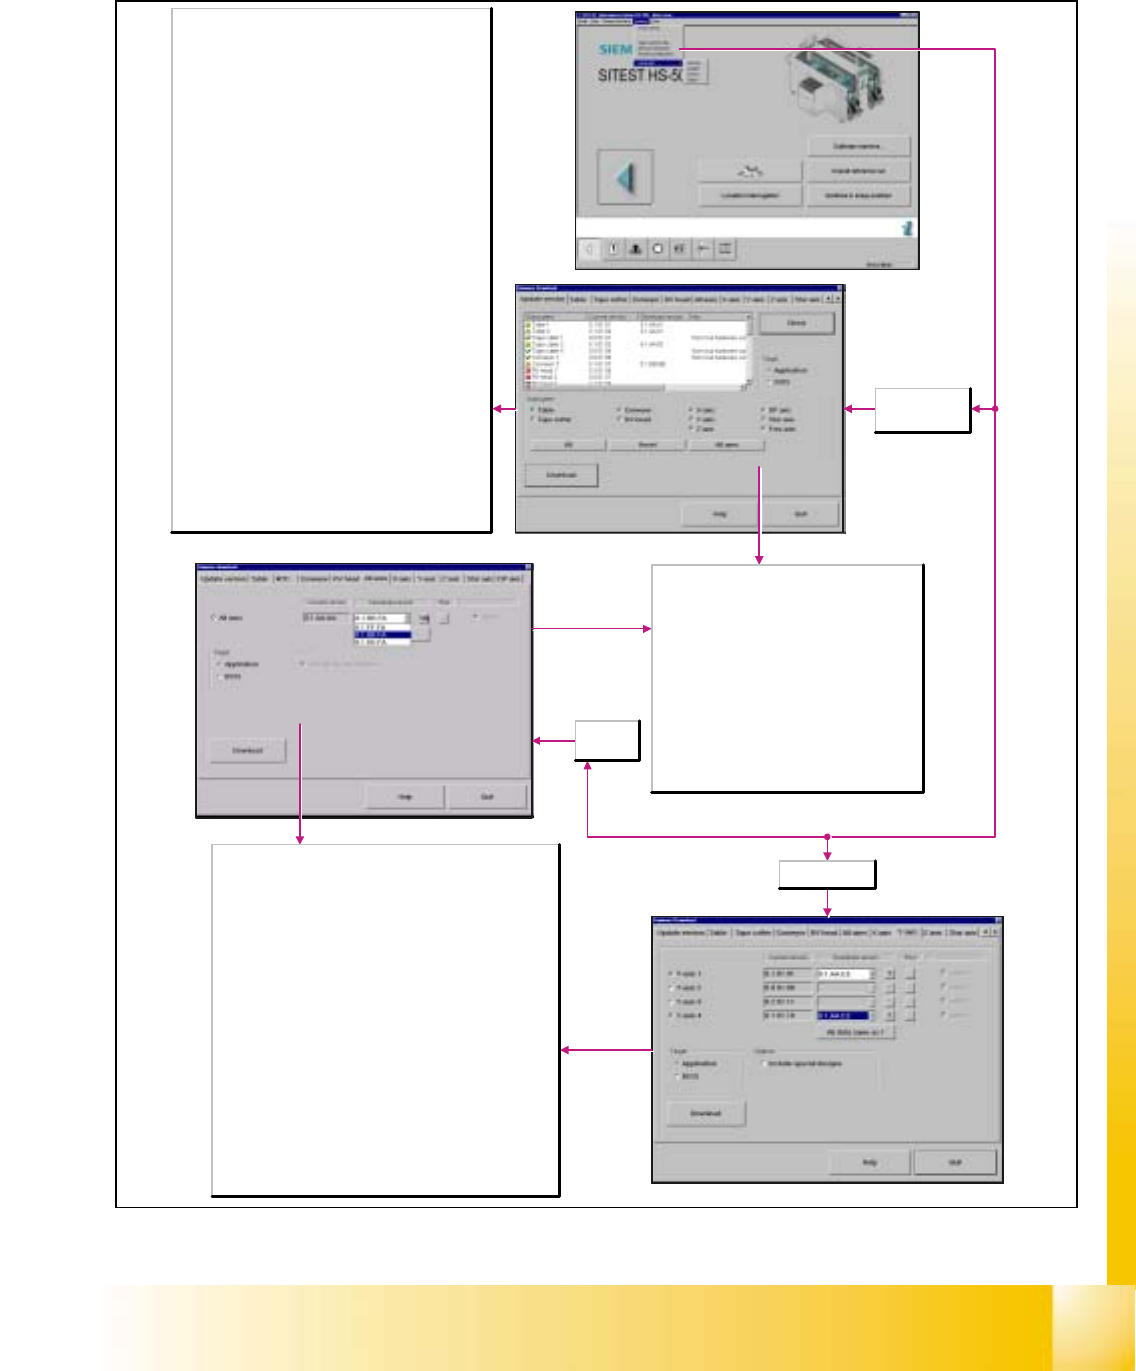
6.3.6.1 Firmware Download
6
Here, it is possible to perform an update of new axis firmware for
all axes simultaneously.
All axes
Activate/deactivate
Current version
Firmware version installed in the individual machine options.
Download version
Version that may be loaded and which is located in the directory
C:\SRProgramme\CanFW.
Auto Download
Active: When this function is activated, the automatic download is
performed.
All data same as under 1
The same download version is used for individual subsystems
with the same hardware revision level.
Options
Include special designs
Activating the special design solutions will increase your choice of
download versions.
All axes
selected
Y-axis selected
Download
The download is started with all selected settings.
The old firmware files are moved to the directory
C:\SRProgramme\CanFWPool; the firmware files
that are currently loaded are now located in the
directory C:\SRProgramme\CanFW.
Target
Application
When this function is activated, the firmware
controlling the actions of the subsystems will be
loaded.
BIOS
When this function is activated, the operating
system for the subsystems will be loaded.
Update version
selected
Subsystem
Machine options
Current version
Firmware version installed in the individual machine
options.
Download version
Version that can be loaded; it is stored in the directory
C:\SRProgramme\CanFW.
Info
Additional information, e.g. on the hardware revision level of
the relevant machine option.
Check
Reads the current firmware version from the subsystems.
These versions are stored in the directory
C:\SRProgramme\CanFW. This directory is allowed to
contain only one version per subsystem. If there are several
versions for one and the same subsystem, one version
must be moved to the directory
C:\SRProgramme\CanFWPool, as otherwise a version
conflict error message will be displayed, and the download
cannot be performed.
Subsystem
Here, you can select the subsystems. Select the desired
subsystems for which the download is to be performed.
All
All subsystems are activated.
Reset
All machine options are deactivated.
All axes
All axes are activated.