HS50_advance_level 1_20200522_221201 (1).pdf - 第459页
06/2002 E dition S tudent Guide HS-50 Advance d I 12 Preve ntive Maintenance 26 12.7 Mainten ance w ork ev ery m onth 12

Student Guide HS-50 Advanced I 06/2002 Edition
12 Preventive Maintenance
25
Empty the component drawer or flap on the 8 mm S feeder
: Unplug the 8mm feeders and lift them off the component table.
a Use a brush or the vacuum cleaner to remove loose components from the component table.
s Empty the component drawer of the 2x8mm S feeder (if one exists).
d Open the flap of the 3x8 mm S feeder (if present) and remove the components.
f Wipe the base of the feeder to remove any dirt.
g Cut off any used tape flush with the feeder.
: Return the feeder to its original (correct) location.
12
Make sure that the feeder is seated firmly on the component table and is inserted in the correct
position.
12
: Close the protective cover.
: Repeat these tasks in every feeder area.
06/2002 Edition Student Guide HS-50 Advanced I
12 Preventive Maintenance
26
12.7 Maintenance work every month
12

Student Guide HS-50 Advanced I 06/2002 Edition
12 Preventive Maintenance
27
You will need the following tools, consumables and equipment for the monthly maintenance tasks:
– Laboratory gloves
– Lint-free cloths
– Lens cleaning cloth (e.g. Kodak)
– Lint-free cottonwool buds
– SIPLACE cleaning cloth (Item no. 00315253-01)
– Ethyl alcohol
– Set of cleaned sleeves
– Set of cleaned and slightly greased valve plungers.
Replace the sleeves and the valve plungers
The sleeves may be replaced at the same time as the cleaned ceramic nozzles. The procedure is
as follows:
: Use the "Single Functions" menu to place the nozzles of the Collect&Place head in the nozzle
changer.
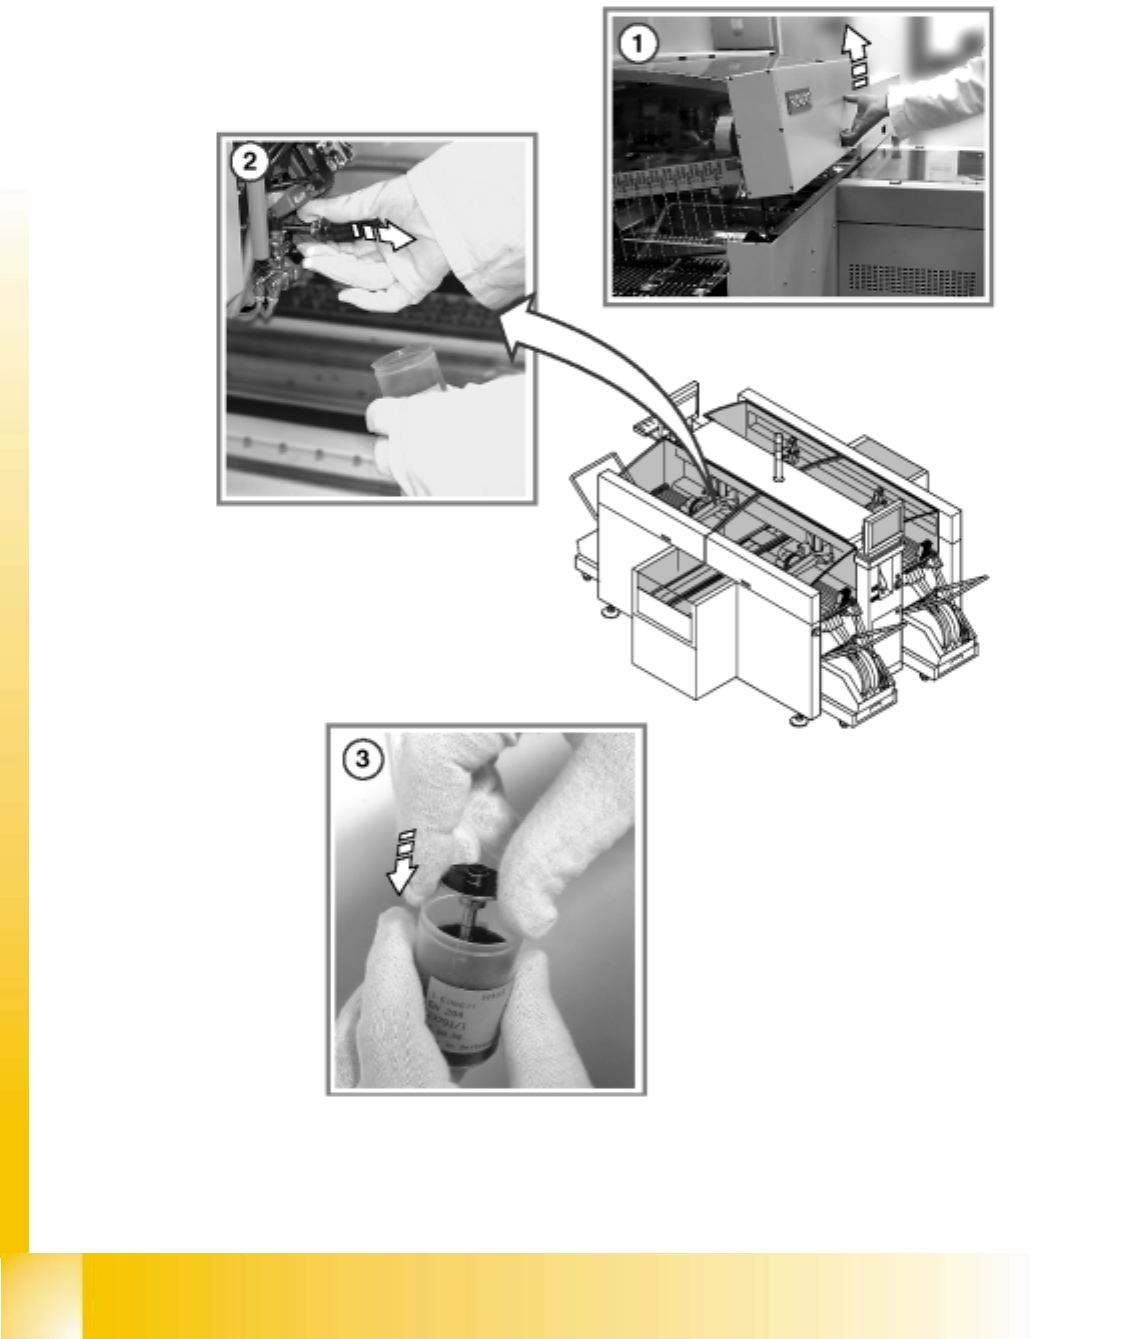
a Open the protective cover.
Do not hold the sleeves with your bare hands. Always wear laboratory gloves when carrying out
maintenance work on the sleeve. In this way you will avoid dirtying the glass disk and the
12
friction wheel unnecessarily, which could cause malfunctions (counting errors and overswing).
s Remove the sleeves from the head.
Pull out the sleeves as shown in the diagram.
12
d Put them into the containers provided.
Use the "Single Functions" menu to pace the star.