HS50_advance_level 1_20200522_221201 (1).pdf - 第475页
06/2002 E dition S tudent Guide HS-50 Advance d I 12 Preve ntive Maintenance 42

Student Guide HS-50 Advanced I 06/2002 Edition
12 Preventive Maintenance
41
You will need the following tools, consumables and spare parts for the maintenance tasks every
4 months:
– Pliers in service box (Item no. 00346929-01)
– Brush with short bristles
– Set of Allen keys
– Cottonwool buds, lint-free (Item no. 00352931-01)
– Ethyl alcohol
– Cloths, lint-free
– ISOFLEX TOPAS NCA52 (Item no. 00328369-01can 1kg, 00330850-01 tube 50 g)
– Unisilkon L250L (Item no. 00310259-01)
– Syringe with Klüber Structovis GHD (Item no. 00367071-01)
– Set of cleaned sleeves
– Set of cleaned / new valve plungers
– Toothed belt of Z axis (Item no. 00334936-01)
– Distributor block (Item no. 00319827-02)
– O-ring of turning station (Item no. 00320043-01)
– Toothed belt of turning station (Item no. 00320041-01).
06/2002 Edition Student Guide HS-50 Advanced I
12 Preventive Maintenance
42

Student Guide HS-50 Advanced I 06/2002 Edition
12 Preventive Maintenance
43
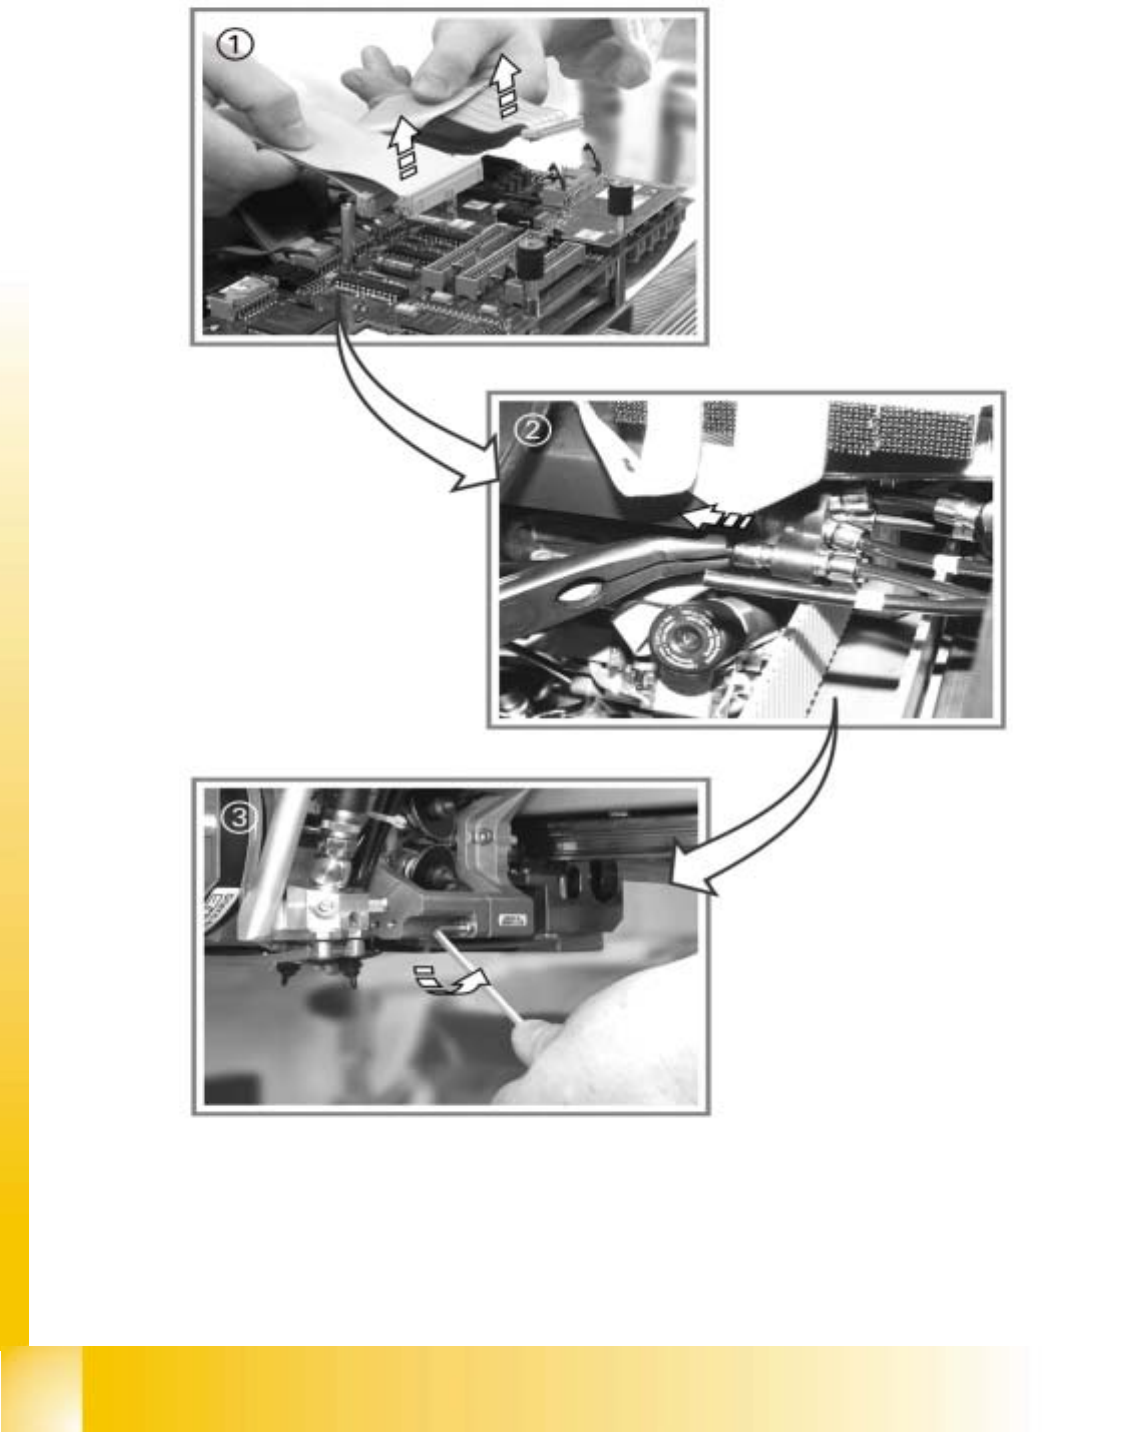
Remove the front part of the head
: Use the ‘Single Functions’ menu to return the nozzles from all Collect & Place heads to the
nozzle changer.
: Switch the placement system off at the main switch.
Follow the correct shut-down routine.
12
Remember to follow the ESD regulations!
12
12
: Cover the feeding area so as not to damage the component feeder modules and front part of
the head.
a Detach the ribbon cables for the front part of the head from the conversion board.
s Detach the compressed air hose.
(Use the pliers provided in the service box for the DLM 1 and DLM 1-6 heads).
12
12
d Loosen the 3 (10,000 / 8000 head) or 4 (DLM1 / DLM1-6) screws in the front part of the head
(using the 3 mm hexagon socket spanner) and remove the front part.
Hold the front part of the head securely while you remove the screws.
Be careful not to damage the white plastic distributor disk and the distributor block.
12
Turn the star half a revolution to avoid damaging the valve plunger drive with the valve plunger.
: Place the front part of the head on a soft ESD surface (with the valve plungers underneath) or
place it on a suitable stand.
: Remove the sleeves and store them in the containers provided.