HS50_advance_level 1_20200522_221201 (1).pdf - 第479页
06/2002 E dition S tudent Guide HS-50 Advance d I 12 Preve ntive Maintenance 46

Student Guide HS-50 Advanced I 06/2002 Edition
12 Preventive Maintenance
45
Z axis (front part of the head)
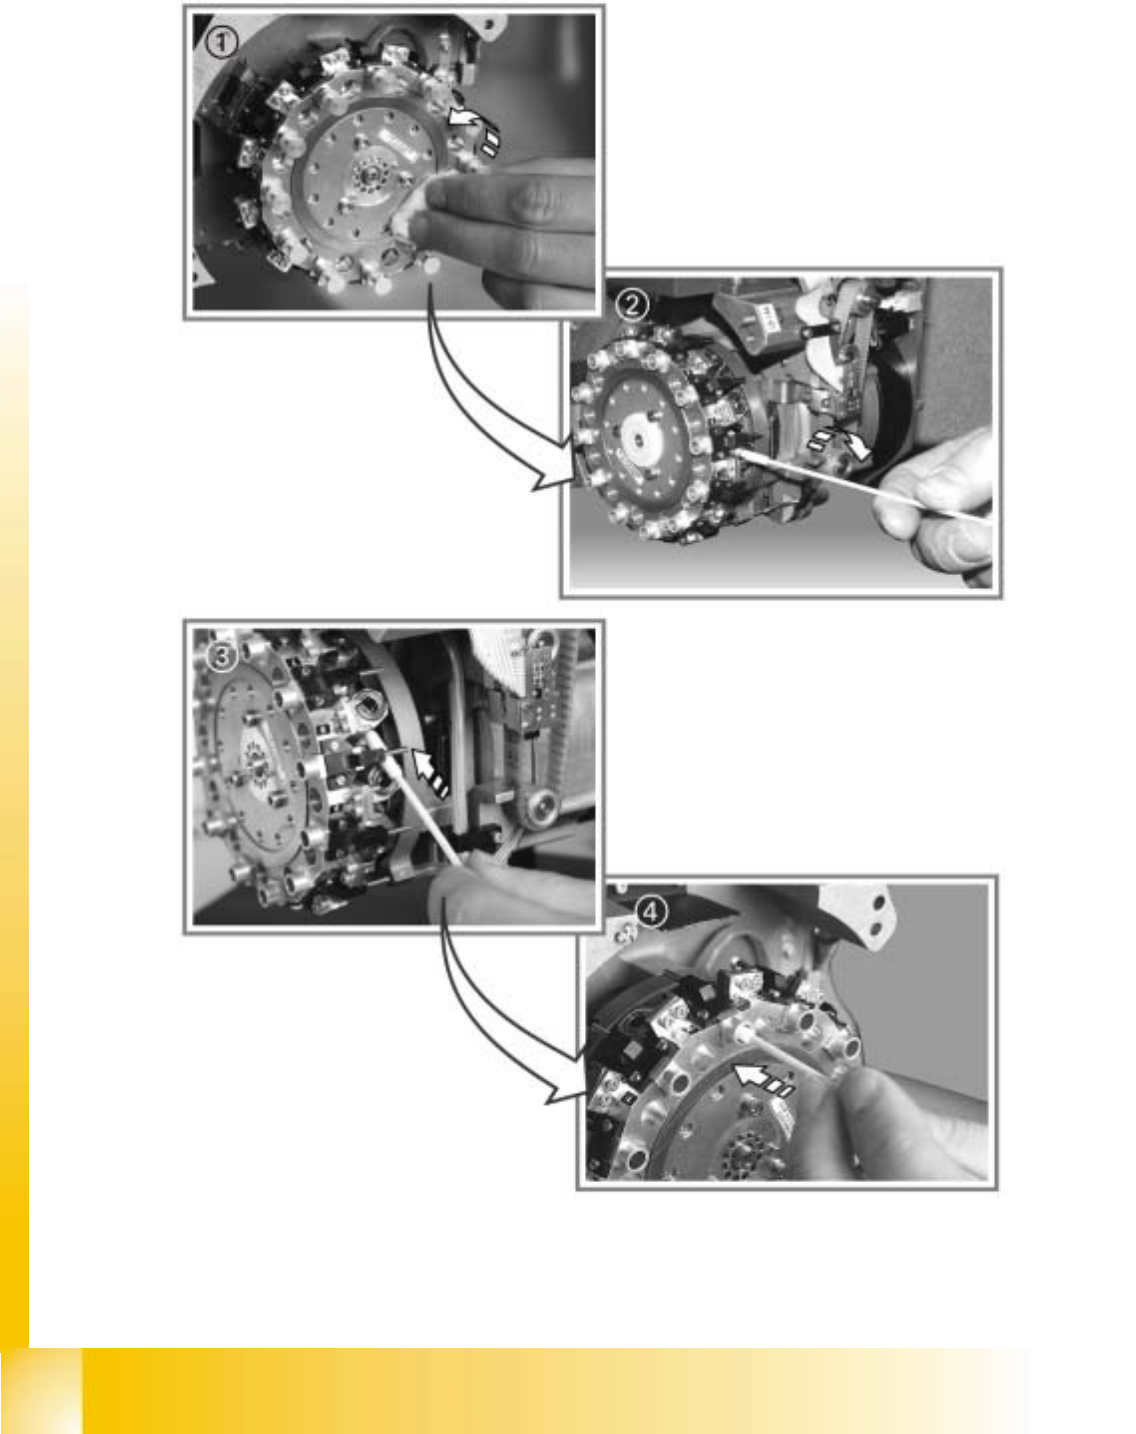
a Use a brush or cottonwool buds to remove dirt from the toothed belt for the Z-axis.
: Clean the rollers, cogs and the toothed belt using a cottonwool bud or lint-free cloth moistened
with ethyl alcohol.
: Check the toothed belt for wear.
If the toothed belt shows signs of wear, replace it with a new belt (see
Service Manual).
: Grease the toothed belt sparingly with ISOFLEX TOPAS NCA 52, then remove any excess
grease.
s Check that the Z axis guide runs easily and without backlash.
: Check the jaws for wear.
If you find any defects in the Z axis or jaws, return the placement head to Munich for repair.
Oiling the miniature roller table
: Move the Z axis into its bottom position.
: Wipe off the needle of the syringe.
Don't press oil out of the syringe. A visible drop would be too much oil.
12
d Place the needle on the grooves of the miniature roller table. By placing it enough oil gets into
the grooves (by capillary attraction).
: Move the Z axis up and down several times to distribute the film of oil.
Distributor disk
f Remove the distributor disk.
: Blow it through with compressed air.
g Clean it using a lint-free cloth moistened with ethyl alcohol.
: Grease it very sparingly on the back with ISOFLEX TOPAS NCA 52 to ensure that it remains
sealed with respect to the star.
Remove any visible excess grease.
12
There must NOT be any grease in the holes.
: Place the distributor disk on a clean surface.
06/2002 Edition Student Guide HS-50 Advanced I
12 Preventive Maintenance
46

Student Guide HS-50 Advanced I 06/2002 Edition
12 Preventive Maintenance
47
Star
a Wipe the star and the distributor disk seat using a lint-free cloth.
: Apply a thin film of ISOFLEX TOPAS NCA 52 grease to the running surface of the star brake.
Remove any visible excess grease.
12
Make sure that no dirt or grease enters the vacuum ducts.
Segments
12
During cleaning, be careful not to damage the sleeve retaining springs in the segments.
s Carefully clean the segments using a cottonwool bud moistened with ethyl alcohol.
d Remove any visible dirt from around the segments.
Valve ports
: Remove the 12 valve plungers.
f Clean the valve ports using a cottonwool bud moistened with ethyl alcohol.
: Clean all around the valve ports.
Assembling the front part
: Insert cleaned or new sleeves into the segments.
: Insert cleaned or new valve plungers into the valve ports.