HS50_advance_level 1_20200522_221201 (1).pdf - 第493页
06/2002 E dition S tudent Guide HS-50 Advance d I 12 Preve ntive Maintenance 60

Student Guide HS-50 Advanced I 06/2002 Edition
12 Preventive Maintenance
59
: Carefully clean the venturi nozzles using a lint-free cloth moistened with ethyl alcohol.
: Blow them through with compressed air.
: Grease the O-rings of the vacuum generator sparingly with Unisilkon L250L.
: Clean the vacuum generator block using a cottonwool bud moistened with ethyl alcohol and
blow through with compressed air.
: Place the cleaned parts of the vacuum generator on a clean surface.
06/2002 Edition Student Guide HS-50 Advanced I
12 Preventive Maintenance
60

Student Guide HS-50 Advanced I 06/2002 Edition
12 Preventive Maintenance
61
Silencer
: Turn the silencer counterclockwise to remove.
a Clean the holes leading to the venturi nozzles using a cottonwool bud lightly moistened with
ethyl alcohol.
: Check the silencer for dirt.
If the silencer is discolored, replace it with a new one, and reverse the order described above
to fit.
12
Be careful not to damage the O-ring.
: Check the plastic mount for the silencer to ensure that it is not broken (10,000 head).
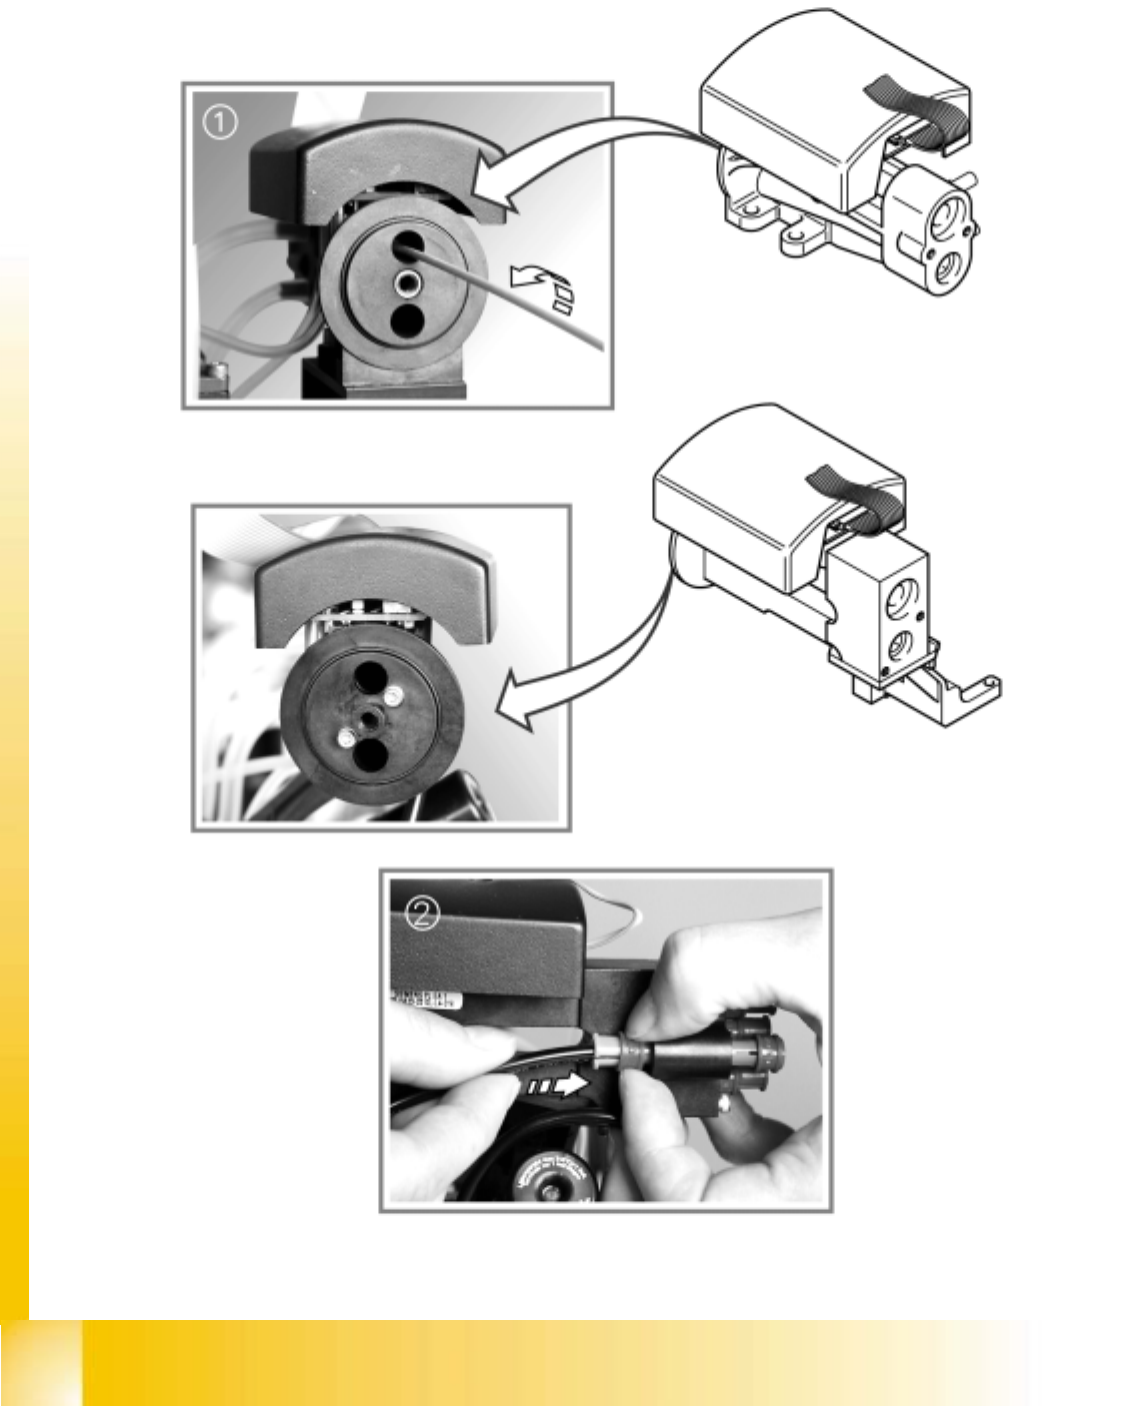
Assembling the vacuum generator
: Assemble the block and venturi nozzles and carefully tighten the screws.
s Reattach the compressed air hoses.
Use the pliers provided in the service box for the DLM 1 and DLM 1-6 heads.
Make sure that the right hose is attached to the right connection.
12
The hoses must latch firmly into the couplings.
12
: Refit the head cover (if necessary).
: Use the “Single Functions” menu to pick up the nozzles once more.
Trial placement run
Separating the front and back parts of the head can change the distance between the component
camera and the PCB camera.
: Carry out a trial component placement run to test whether the placement accuracy is still the
same.
: If the placement accuracy cannot be guaranteed, remeasure the placement head.