HS50_advance_level 1_20200522_221201 (1).pdf - 第562页
Studen t Guide HS-50 A dvanced I 06/200 2 Edition 20 App endix 35 Outputs 20 – In the "Inputs" di splay click on the ico n to s w it ch to the "Outputs" displ ay . Fig . 20.4 - 9 "O utp uts"…

06/2002 Edition Student Guide HS-50 Advanced I
20 Appendix
34
– If you wish to inform yourself of the state of the bits of a given input port group, activate the
corresponding radio button associated with the desired port by clicking on it.
The function of each bit contained in the selected port is displayed next to the "Port" field.
Next to each function the symbol of an LED is displayed whose color changes from gray to
red once the state(s) of the individual bit(s) has (have) been read and displayed in the "Hex
state" field.
NOTE
The uppermost LED symbol applies to bit "0", the lowermost to bit "7".
If the LED symbol is displayed in red, the state of the bit is "1" (active).
If the LED symbol is displayed in gray, the state of the bit is "0" (inactive). 20
Student Guide HS-50 Advanced I 06/2002 Edition
20 Appendix
35
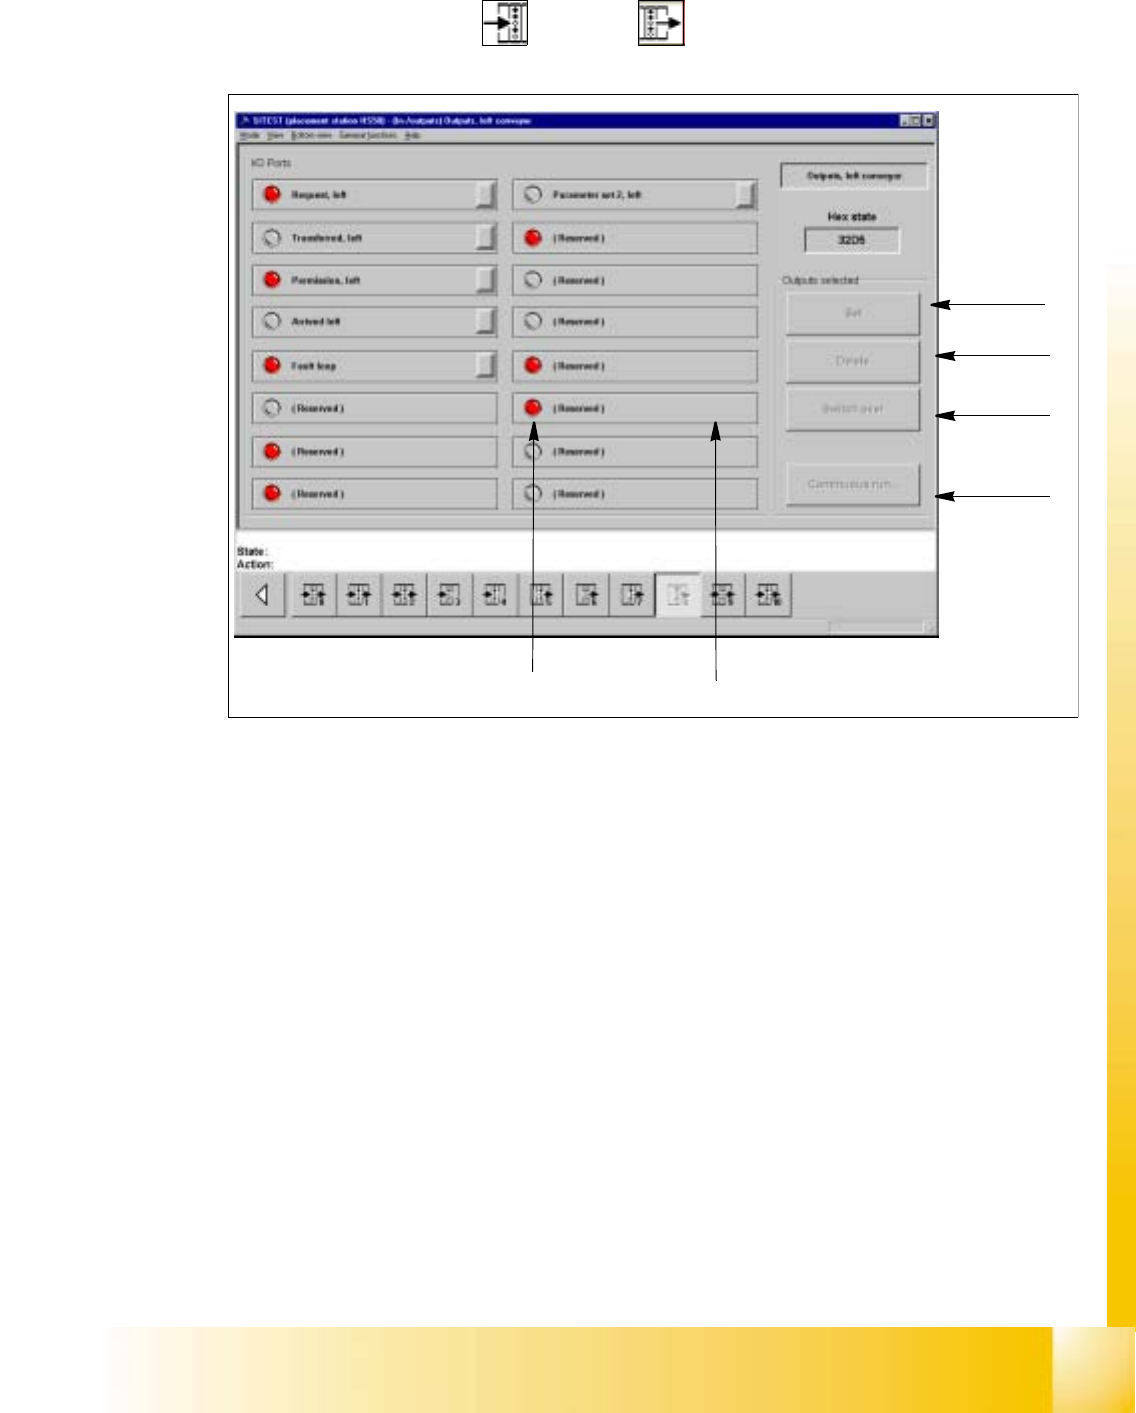
Outputs 20
– In the "Inputs" display click on the icon to switch to the "Outputs" display.
Fig. 20.4 - 9 "Outputs" Display
Key:
a to set the selected bits
s to reset the selected bits
d to invert the current state
f to convert the state of the selected bits in the continuous run
g selected bit (output)
h LED symbol
– Activate the appropriate radio button of the port containing the output group you wish to test.
– Click on the check boxes next to the function descriptions of the outputs you wish to test,
or click directly on the function descriptions.
– Click on the button indicating the desired function. The selected function will be carried out.
1
2
3
4
5
6

06/2002 Edition Student Guide HS-50 Advanced I
20 Appendix
36
NOTE
The current state of a bit can also be inverted if the corresponding LED symbol is selected
by double-clicking on it. 20
NOTE
Please note that a waiting time needs to be entered prior to the execution of the continuous
run. 20
– Click on the Continuous run button.
A dialog box for entering the waiting time opens.
– Enter the desired waiting time and then start the continuous run by clicking on the Start but-
ton.
– Terminate the continuous run by clicking on the Cancel button in the "Continuous run" dia-
log box.