00197973-10_SM_MaterialTower.pdf - 第116页
Z Axis 001 97973 - 10 / 02 , 20 16 6- 34 © ASM SIPLACE Mat. Tower St ora ge Ser vice Manu al Connect hybrid cab le to terminal The following c onnectors have to be pl ug ged in: • Sl ot 1 X 1 • Sl ot 4 X 1 an d X2 • Sl o…
00197973-10 / 02 , 2016 Z Axis
SIPLACE Mat. Tower Storage Service Manual © ASM 6-33
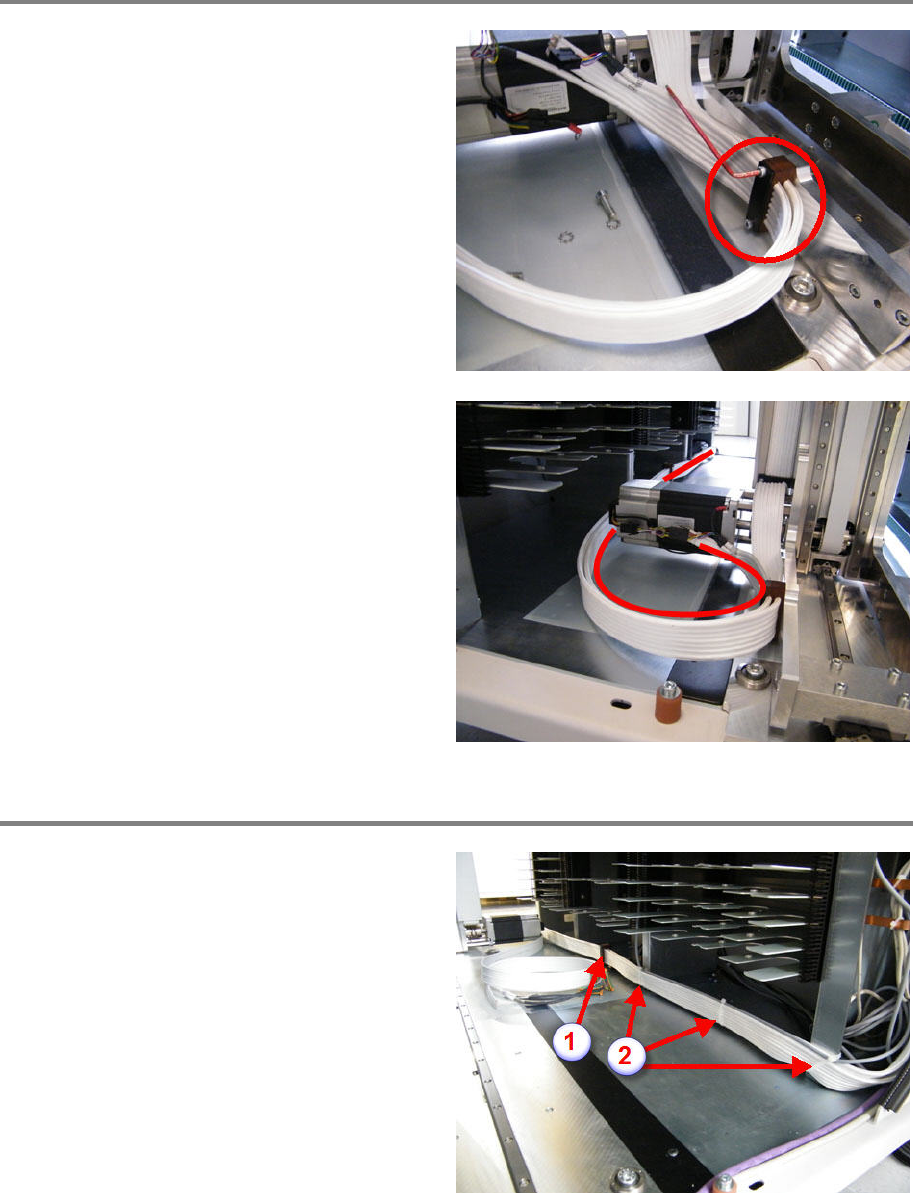
Mount hybrid cable at Z motor
Bring the new hybrid cable into correct position.
Mount the cable clamp, make sure the notches
of the form clamping parts correspond to the
hybrid cable diameter. Do not tighten the
clamping screws.
Check for proper cable routing illustrated on the
picture.
Tighten the screws of the cable clamping, do not
overtighten.
Tie
together the two hybrid cables by using
cable ties.
Make sure the hybrid cables do not touch the
chassis.
Mount hybrid cable along X axis
Bring the new hybrid cable into correct position
(behind the X hybrid cable).
Mount the cable clamp (1), make sure the
notches of the form clamping parts correspond
to the hybrid cable diameter. Check again for
proper cable routing and tighten the clampin
g
screws, do not overtighten.
Fix the cable by using cable ties (2).
Z Axis 00197973-10 / 02 , 2016
6-34 © ASM SIPLACE Mat. Tower Storage Service Manual
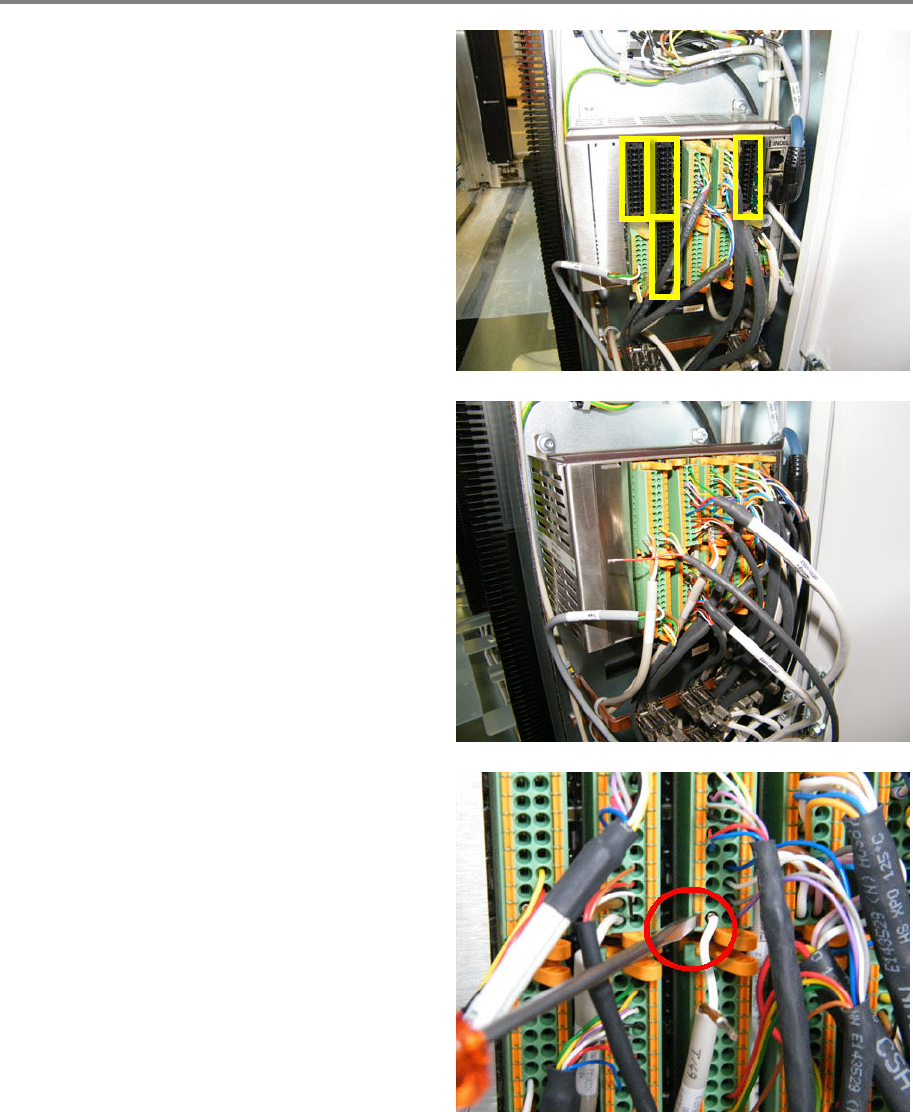
Connect hybrid cable to terminal
The following connectors have to be plug
ged in:
• Slot 1 X1
• Slot 4 X1 and X2
• Slot 5 X1
Plug in all four connectors (connectors and plug
in locations are labelled).
Re
-mount all cables of the plugged in
connectors, which are not part of the hybrid
cable (watch out for the correct pin position).
Mark the cables for easy re
-mounting after the
exchange of the hybrid cable.
Re
-mount all the power cables (48 V)
(brown/white) by means of a screwdriver (same
position as power cables of adjacent connector,
pin 22 and 24).
00197973-10 / 02 , 2016 Z Axis
SIPLACE Mat. Tower Storage Service Manual © ASM 6-35
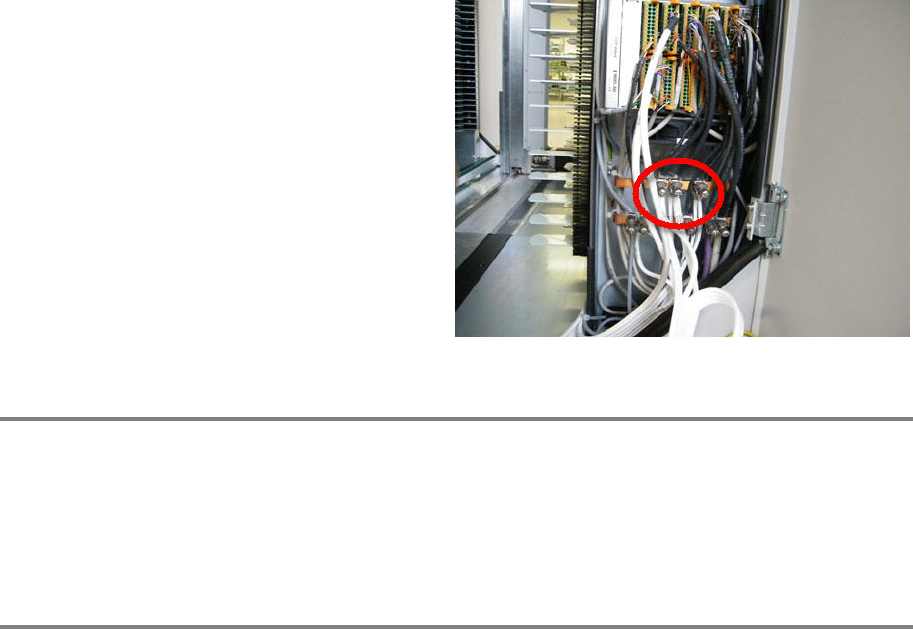
Clamp the cables of the new hybrid cable with
the shield terminals and tighten the screws by
hand. It is possible that other cables use the
same
shield terminal, if so re-connect them as
well.
Closing tasks
• Make sure all the cables are fitted correctly. They should not touch the door if closed.
• Make sure free movement is allowed for the hybrid cables along the whole driving range of
the X axis and the Z axis (no collision, no touching the chassis, no stretching of the hybrid
cable).
Finalize exchange steps
Remove all tools, attach all previously removed covers and close the doors of the machine.
Plug in the power connector and switch on the machine.
Initialize the machine by means of the software.