00197973-10_SM_MaterialTower.pdf - 第163页
0019797 3 - 10 / 02 , 2016 Gripper SIPLACE Mat. Towe r St ora ge Serv ice Manual © ASM 7- 45 Step 4 Reconnect the sensor ca ble and apply the cable tie (1). Take care that the direction of the cable is simil ar as shown …
Gripper 00197973-10 / 02 , 2016
7-44 © ASM SIPLACE Mat. Tower Storage Service Manual
7.8.4 Exchange and setup steps
Step 1
Open the sensor cover.
P
ush down the clip marked in the picture. Now
both connectors with the fibre
-optic cables can
be pulled out.
Step 2
Cut the cable tie (1) marked on the photo.
Cut also the cable tie (2) if existing.
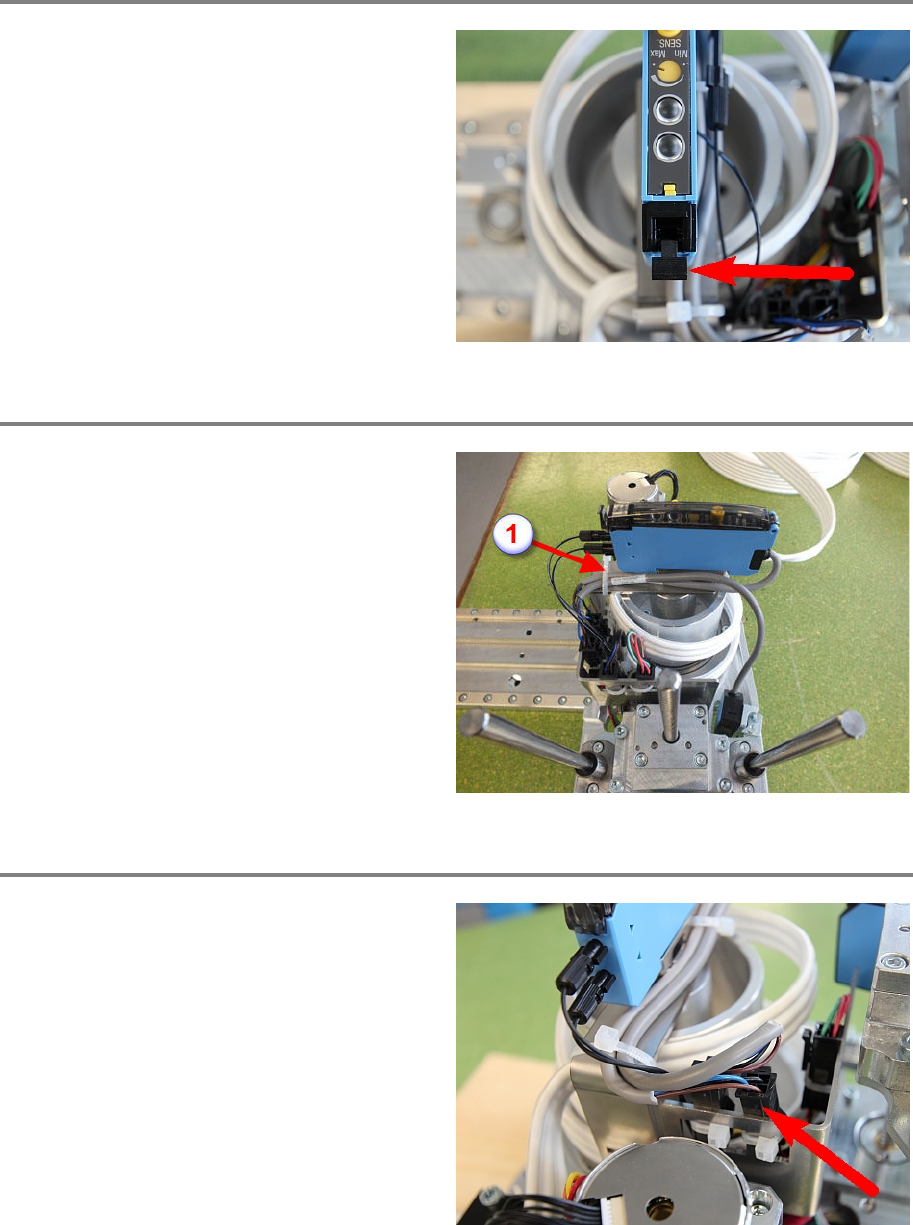
Step 3
Disconnect the sensor cable. Check if the
marked
connector in the picture is the correct
one, as they can be mixed.
Now the sensor can be removed by pulling up
on the rear side.
Fit the new sensor and reconnect the sensor
cable.
00197973-10 / 02 , 2016 Gripper
SIPLACE Mat. Tower Storage Service Manual © ASM 7-45
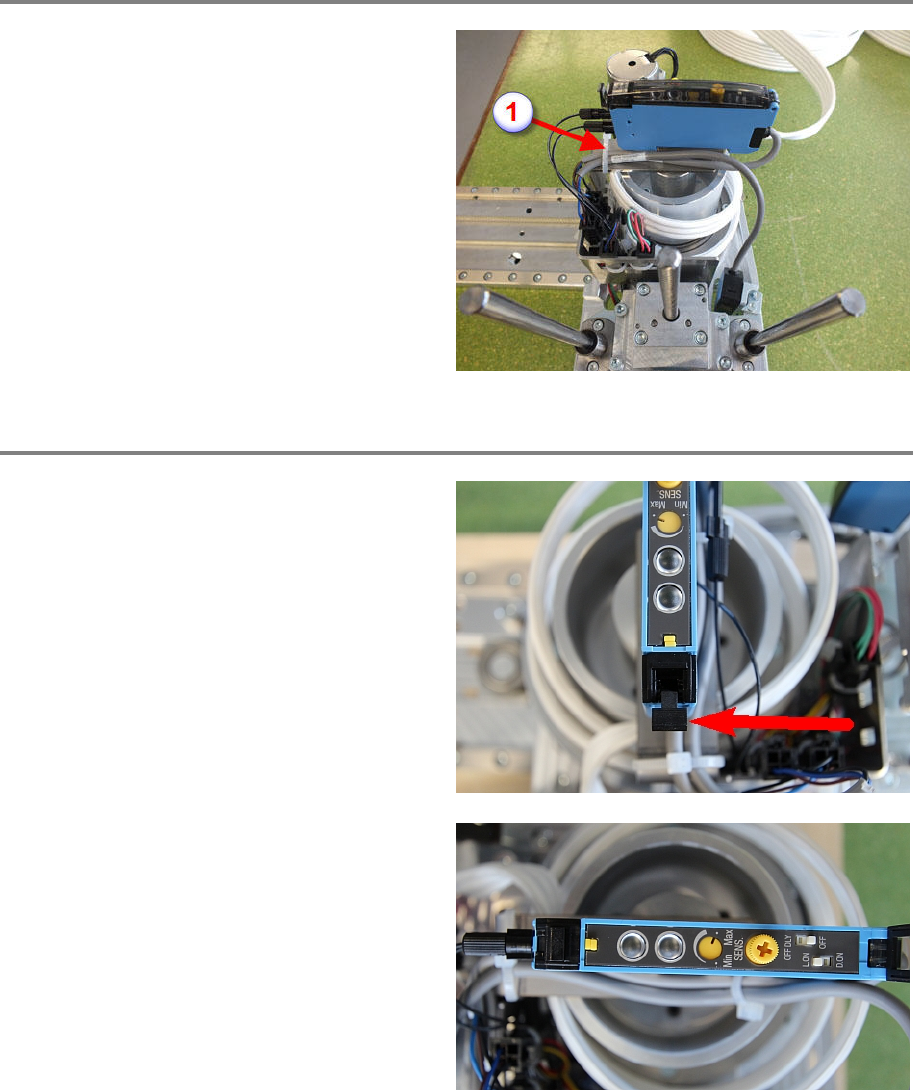
Step 4
Reconnect the sensor cable and apply the cable
tie (1). Take care that the direction of the cable is
similar as shown in the picture.
Do not apply the second cable tie (2), the cable
of the H sensor will be d
amaged.
Step 5
Push in both fibre
-optic connectors and pull up
the clip marked in the picture to fixate them.
Check the sensor configuration is similar as
shown in the picture.
Gripper 00197973-10 / 02 , 2016
7-46 © ASM SIPLACE Mat. Tower Storage Service Manual
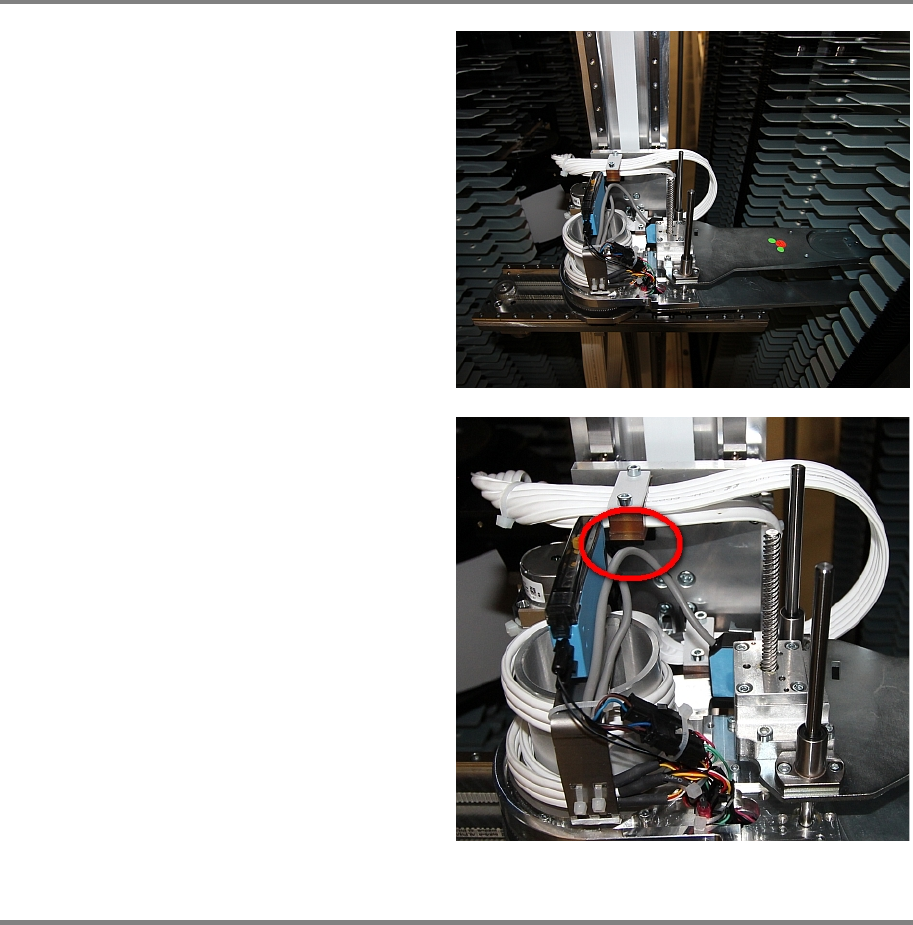
Step 6
The cable should be in a certain position over
the whole move range of the gripper. To test the
correct alignment, move the gripper into the
position shown on the picture.
The sensor cable should not touch the Leoni
cable holder at any move of the gripper.
Step 7
Remove all tools and close the doors of the machine.
Plug in the power connector and switch on the machine.
Initialize the machine by means of the software.