00197973-10_SM_MaterialTower.pdf - 第98页
Z Axis 001 97973 - 10 / 02 , 20 16 6- 16 © ASM SIPLACE Mat. Tower St ora ge Ser vice Manu al Step 8 Fasten the screw of the coupling usi ng a torque key adjusted on 7 Newton. Step 9 Use Lo ctite on all screws. Strongly f…
00197973-10 / 02 , 2016 Z Axis
SIPLACE Mat. Tower Storage Service Manual © ASM 6-15
Step 7
The holding with the thread is for the belt
ending at the bottom and the one with the
smooth drill hole is for the belt ending at the
top.
Use Loctite on all screws.
Softly fasten the screws on both belt holdings as
far as the belt is secured but still has small
movement. The holdings won't be fastened
before the belt is in soft tension. This procedure
is important to assure the belt
endings lay
straight in the holdings and the force is spread
over the whole width and not only on one side.
Additionally, check that the belt is fully inside
the holdings.
Connect both holdings with the belt tensioner
screw. Tension the belt softly, meaning that you
can pull the tens
ioner to a distance of around
20mm away from the axis.
Now, strongly fasten all 8 screws of the belt
holdings.
Insert the deflection pulley
at the back of the Z
axis and make sure the belt is centered. Use
Loctite on all screws and fasten them.
If the tension of the belt is too strong to insert
the pulley, loosen it a bit.
Z Axis 00197973-10 / 02 , 2016
6-16 © ASM SIPLACE Mat. Tower Storage Service Manual
Step 8
Fasten the screw of the coupling using a torque
key adjusted on 7 Newton.
Step 9
Use Loctite on all screws.
Strongly fasten the 4 upper screws (red
rectangle) that connect the Y axis to the Z belt.
Loosely fasten the 4 lower screws (green
rectangle). They still must be movable during
setup of the belt tension.
00197973-10 / 02 , 2016 Z Axis
SIPLACE Mat. Tower Storage Service Manual © ASM 6-17
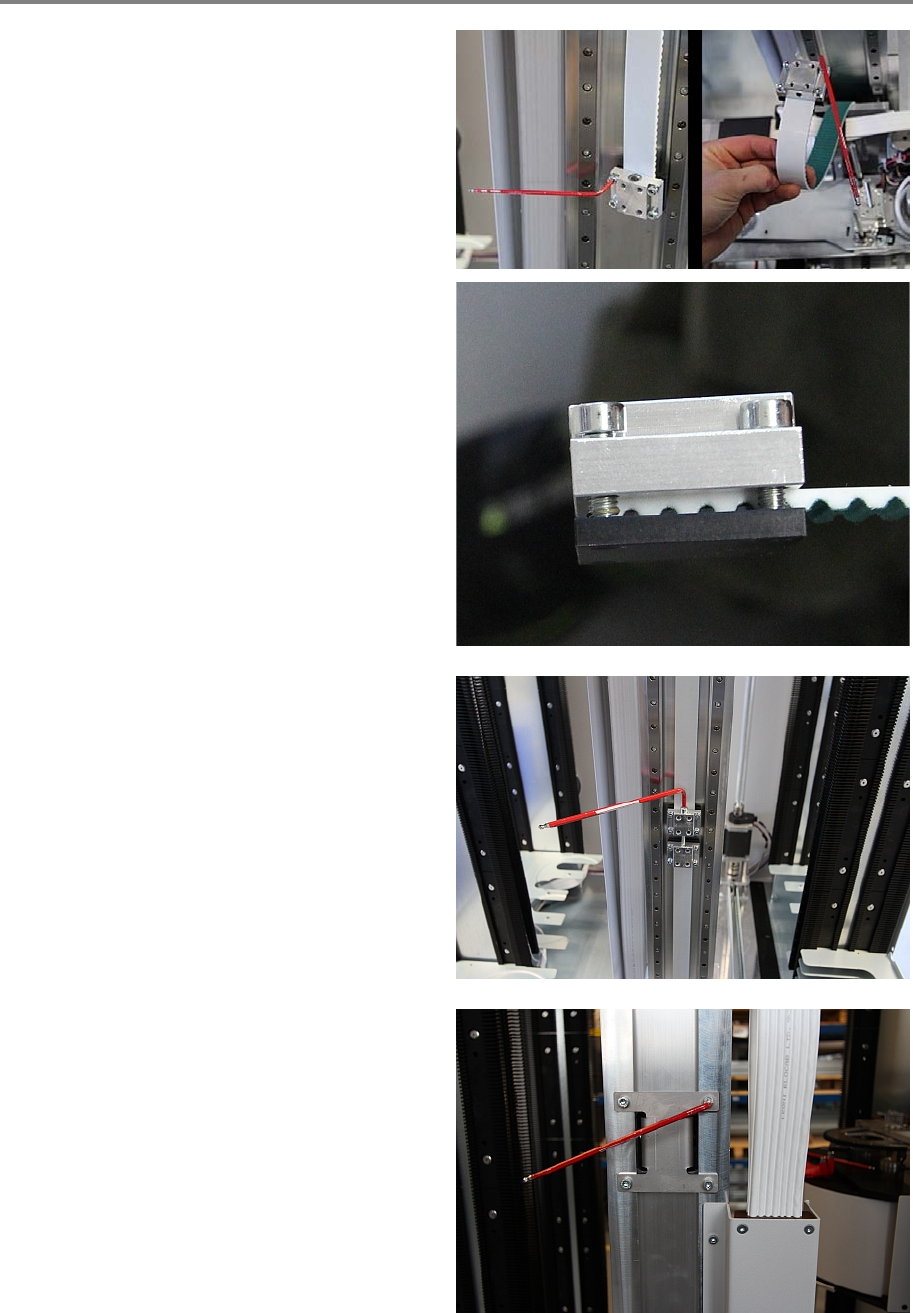
Step 10
Lift the Y axis to the height where you can
measure 1m between the beginning of the belt
holding and the middle of the lower pulley.
Required tension for the Z belt is
35 Hz ± 1 Hz
Measure the belt tension approximately in the
middle of the measuring distance. Turn the belt
tension screw accordingly to achieve the correct
tension, as shown in the picture.