OM-1241-005_w.pdf - 第124页
3-17 AIX-ML T-ID For example : The tray is in the condition as shown in Fig. C12. (Tray in Middle of Process) 1 1 2 99 2 3 99 X Y : No Component (T aken Out) : Component Existing . . . . . . . . . Fig. C12 • The rst com…
3-16
AIX-MLT-ID
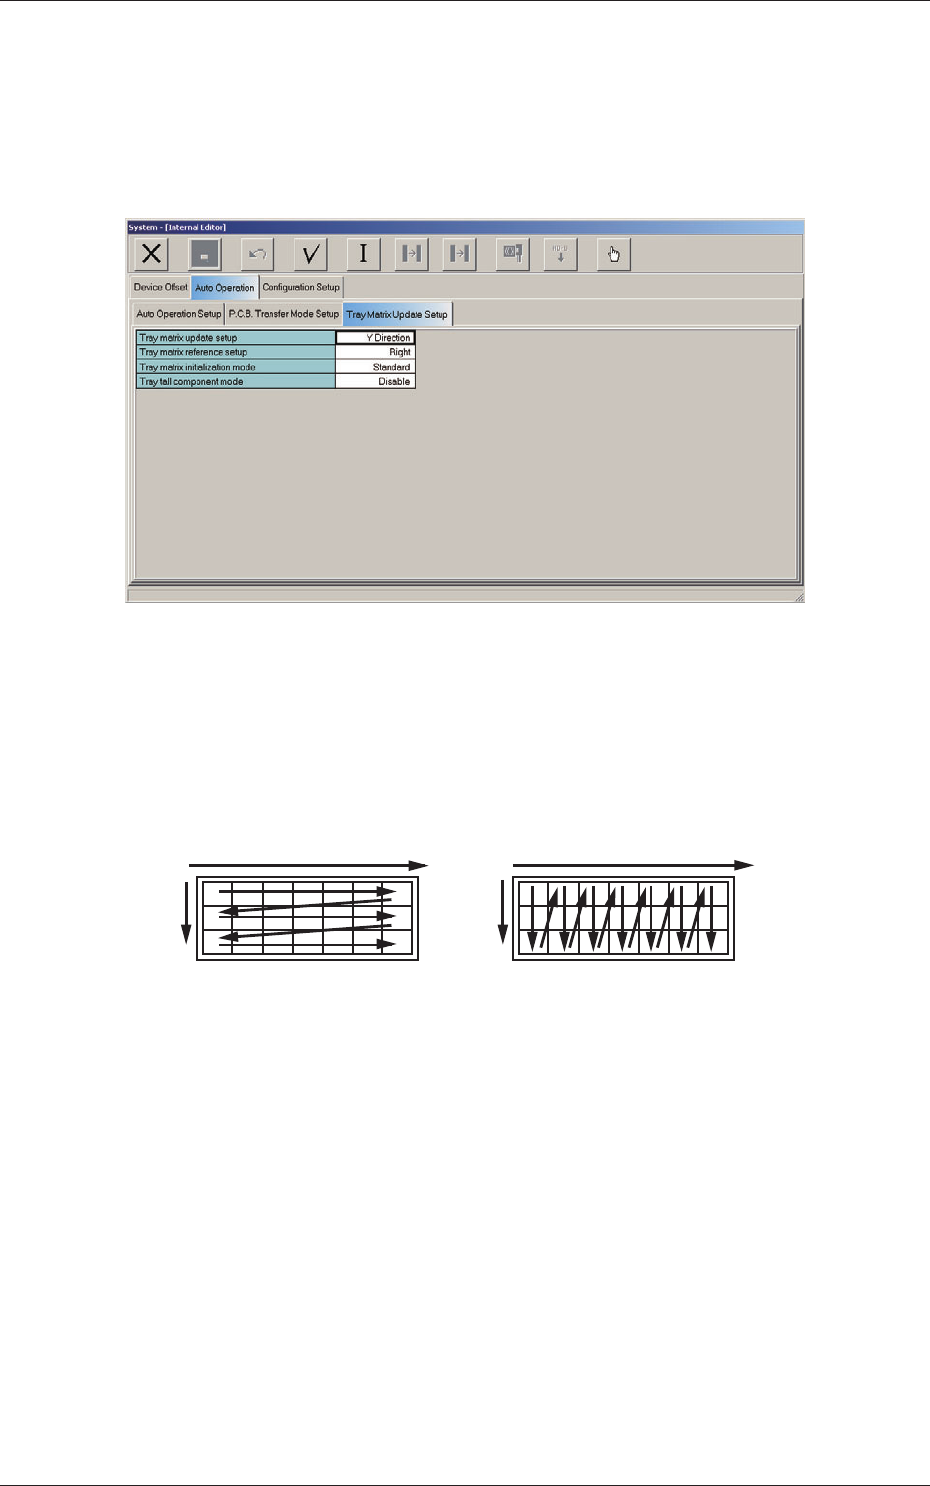
4.2 Auto Operation
4.2.1 Tray matrix update setup
When the "Tray Matrix Update Setup" subtab is pressed in the "Auto
Operation" tab sheet, the following subtab sheet appears.
Fig. C10 "Tray Matrix Update Setup" Subtab Sheet
(1) Tray matrix update setup
Select "X Direction" or "Y Direction" (direction in which components
should be taken out) in the text box.
In normal cases, "Y Direction" should be selected.
X
Y
Y
Selection of "Y Direction"Selection of "X Direction"
X
Fig. C11
4.2 Auto Operation
0804-004
3-17
AIX-MLT-ID
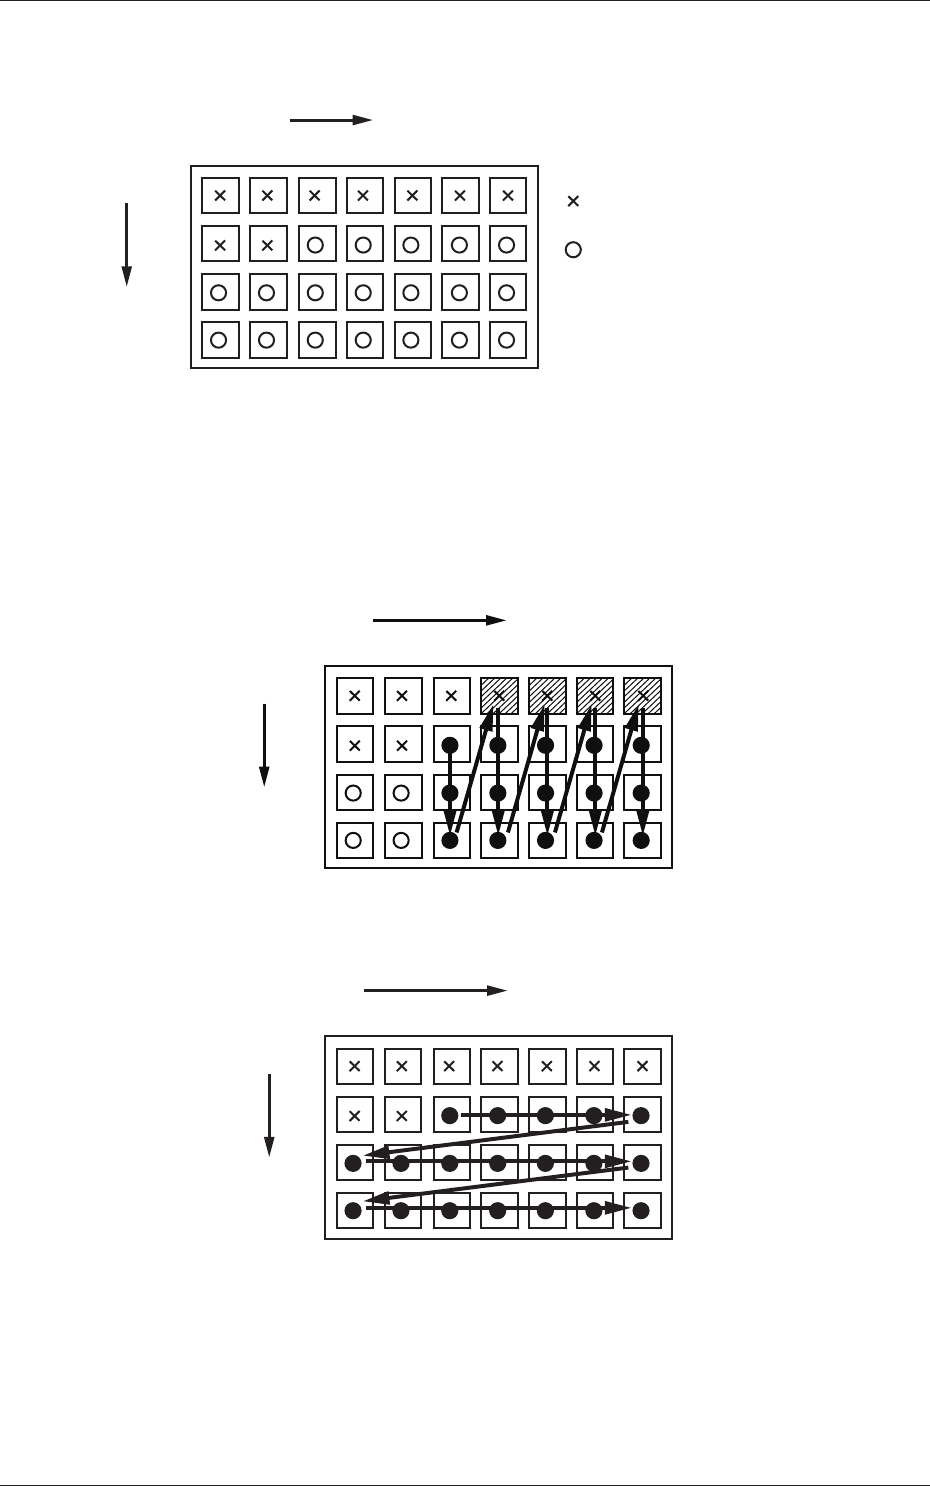
For example :
The tray is in the condition as shown in Fig. C12.
(Tray in Middle of Process)
1
1
2
99
2 3 99
X
Y
: No Component
(Taken Out)
: Component Existing
.
.
.
. . . . . .
Fig. C12
• The rst component pick-up position is assumed to be "X: 3, Y: 2".
: Component Picked Normally
: Component Left Behind
Shadowed : Mispick
1
1
2
99
2 3 99
X
Y
.
.
.
. . . . . .
Selection of "Y Direction"
Fig. C13
1
1
2
99
2 3 99
X
Y
.
.
.
. . . . . .
Selection of "Y Direction"
Fig. C14
4.2 Auto Operation
0705-003

3-18
AIX-MLT-ID
(2) Tray matrix reference setup
Select "Right" or "Left" in the text box.
(3) Tray matrix initialization mode
Select "Standard", "Hold", or "Initialize" in the text box.
Standard :
When the tray matrix data is identical in its type or is not
used after a program change, it is not initialized.
When the ID is changed to a different one, the tray matrix
data is initialized to "0, 0".
Hold :
When the tray matrix data is identical in its type or is not
used after a program change, it is not initialized.
When the ID is changed to a different one, the tray matrix
data is initialized to "1, 1".
Initialize :
The tray matrix data used for the production model is all
initialized to "1, 1".
(4) T
ray tall component mode
Set "Disable" or "Enable" in this text box.
4.2 Auto Operation
0705-003