M2series_ServiceManual_e.pdf - 第49页
3 Mechanical Section 3-17 Cleaning Nozzle Recognition Stickers Dirt on nozzle ID/presence stickers can be a cause of visi on recognition failure. Regularl y clean the nozzle ID/presence stickers. ACTION: ① Clean the stic…
3 Mechanical Section
3-16
Nozzle Recognition Stickers
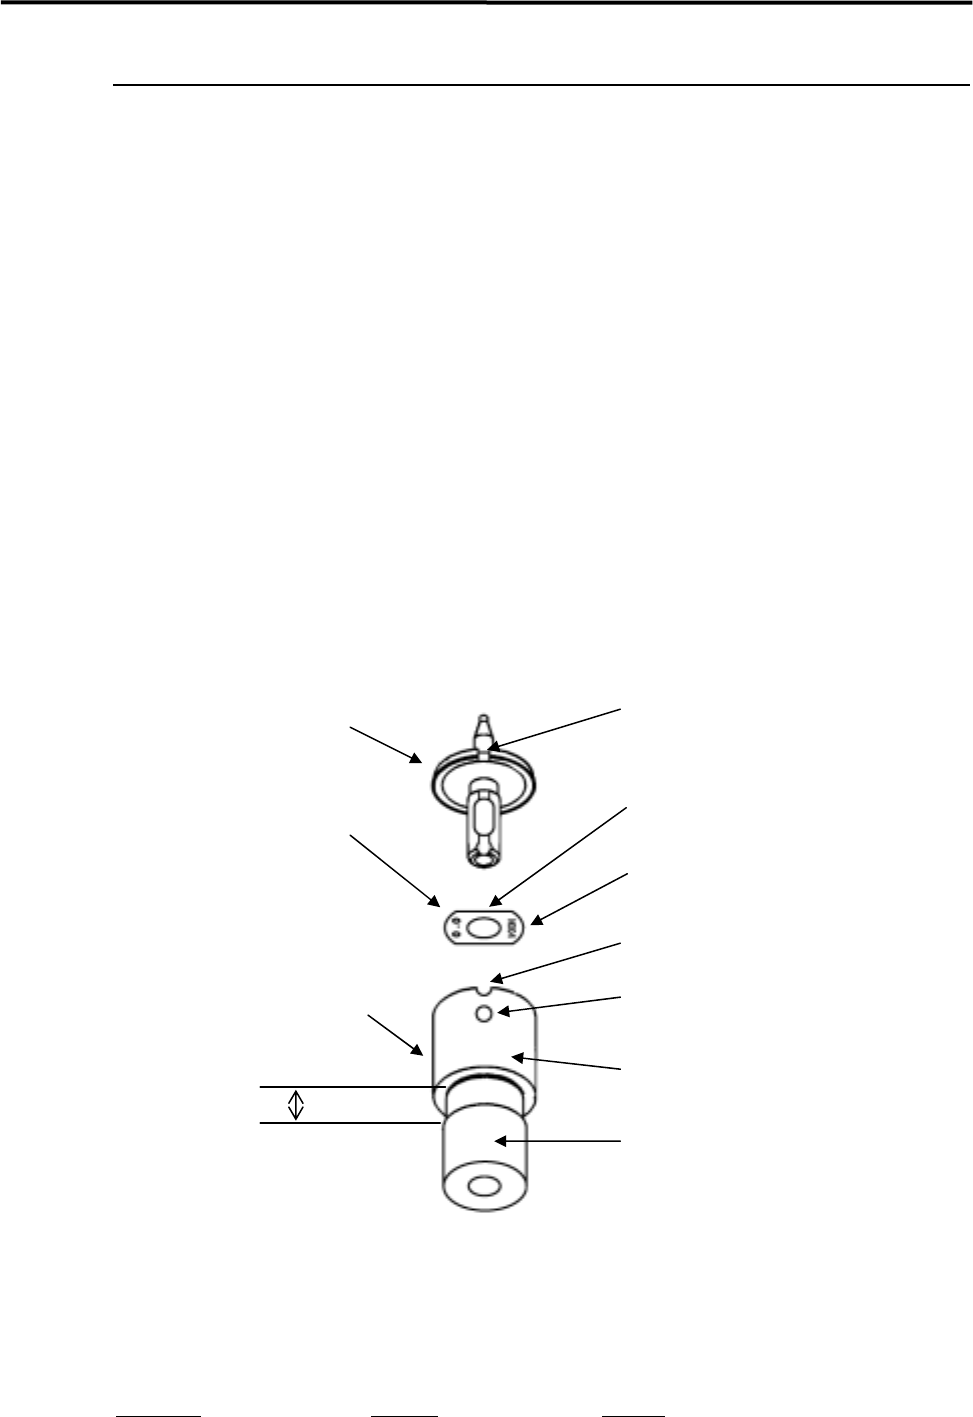
Labeling a Nozzle ID Sticker to a Nozzle
ACTION:
① From the surface to which the sticker is to be affixed, remove oil, dust and water content
completely using industrial alcohol.
② Pull out the shaft of the nozzle sticker tool approx. 3mm from the ring.
③ Peel the sticker from the paper using tweezers.
④ Place the sticker with its adhesive side up, and then put it in the jig (make sure that the D-cut on
the sticker is aligned with that on the ring). (The sticker must be angled so that the nozzle ID no.
is oriented as illustrated below.) Take care not to touch the adhesive surface with fingers.
⑤ Push the nozzle into the shaft. Make sure that the nozzle’s notch is aligned with the positioning
slot on the ring.
⑥ While pressing the nozzle’s rim, push the shaft into the ring so that the sticker is affixed onto the
nozzle.
⑦ Check that the sticker touches the bottom of the ring.
Notch
Nozzle
D-cut
Nozzle ID sticker
ID No. (N***)
Positioning slot
Positioning pin
Nozzle ID sticker tool
Ring
Shaft
3mm
NOTE: If the shaft is pulled out of the ring too much, it may come off. If it comes off, align the shaft’s slot with the
ring’s positioning pin and then insert the shaft into the ring slowly.
Part Name
Part No. Remark
ID SEAL TOOL, ASSY. LC1-M8903-00X ID sticker tool

3 Mechanical Section
3-17
Cleaning Nozzle Recognition Stickers
Dirt on nozzle ID/presence stickers can be a cause of vision recognition failure. Regularly clean the nozzle
ID/presence stickers.
ACTION:
① Clean the sticker with cotton swab soaked with alcohol.
② Wipe off the remaining alcohol on the sticker with dry cotton swab.
NOTE: Particularly the nozzle ID stickers are liable to get dirty. If a nozzle ID sticker becomes too dirty to be
cleaned, replace it with new one.
For the part No. for the nozzle ID sticker, refer to “5. Materials”.
NOTE: The nozzle ID/presence stickers are easily peeled off when they get wet. Be sure to dry them with cotton
swab whenever they get wet.
3 Mechanical Section
3-18
Camera
Mirror and lens of camera
If the surface of half mirror/lens/lens filter of fixed camera or mirror/ lens of scan camera is dirty by grease
or dirt, and if any obstacles such as dropped components or deposits are remained on those parts, wrong
recognition problem or recognition error may be caused. Check mirror and lens every day and clean them
if dirty. Be sure to keep them always clean without any obstacles or deposits.
NOTE: Clean the proper part for each camera type. (See the chart below. O: Should be cleaned, X: No need to be
cleaned)
Fixed Camera Use of liquid cleaner
Scan
Camera
FC05 FC03 FC02
Industrial
alcohol
Lens cleaner
(Note 1)
Half mirror X O O X OK OK (Note 2)
lens O O O X OK OK
Lens filter X X X O OK OK
mirror O X X X OK OK
Note 1: It is contained in the Lens Cleaner Set, one of the standard accessories attached with a mounter.
Note 2: Apply it only on the top surface of the half mirror.
■ Lens Cleaner Set
Part Name
Part No. Remark
LENS CLEANER SET LG0-M89A4-00X Lens Cleaner Set
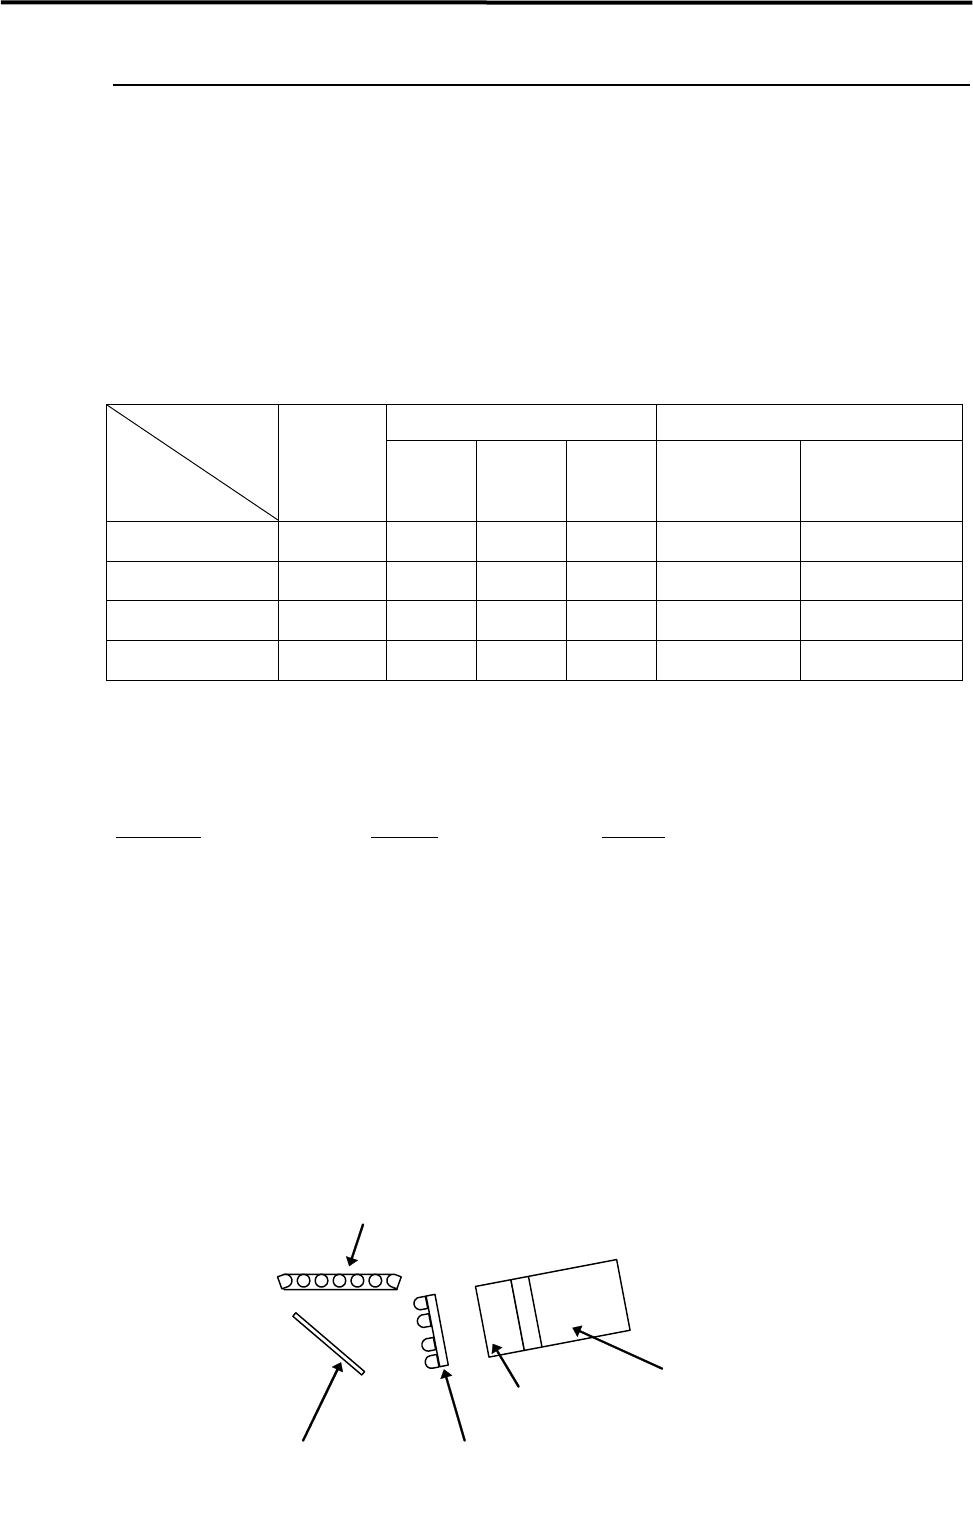
Cleaning of Scan Camera
Remove dirt/dust in a gentle way from the lens and mirror of the scan camera, blowing air with a blower
brush or wiping with a dry thing like a cotton swab. Avoid applying your finger pressure directly to the lens
and mirror through the use of such things as tissues. For stubborn and sticky dirt such as grease, which
cannot be cleaned away by air blow or wiping with dry cotton swab, wipe it off with a moistened cotton
swab with little amount of liquid cleaner, and finally with dry one to remove the liquid cleaner and dirt
completely. Do not apply the liquid cleaner directly on the lens and mirror.
Mirror
LED lighting
LED lighting
Scan camera body
Lens
Cross-sectional view of scan camera