ThermoFlex-Manual.pdf - 第104页
Section 8 8-2 ThermoFlex Thermo Scientific W ater-Cooled Draining Ther moFlex1400 - 2500 water -cooled chillers is accomplished by removing the right side panel. Use a Phillips head screw driv er to remove the v e screws…
ThermoFlex 8-1
Thermo Scientific
Draining
Section 8 Additional Information
Before using any uid or performing maintenance where contact with
the uid is likely refer to the manufacturer’s MSDS.
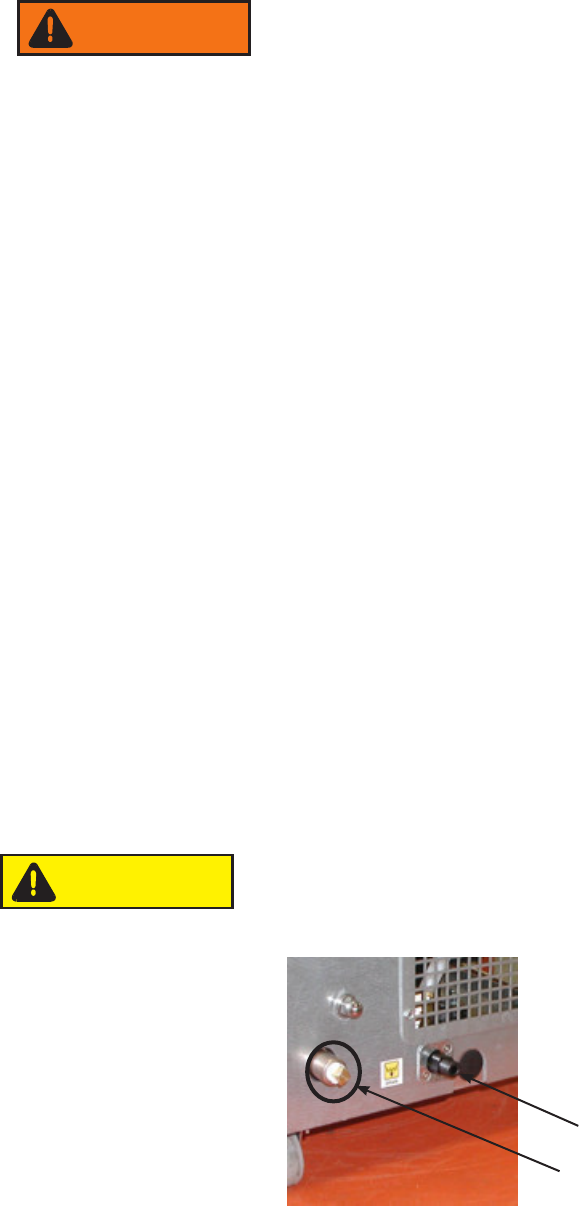
There are two different types of drain port, a ¼" brass Male NPT pipe plug
or a ¼" MPT Riton tting. If your chiller has both use the Riton tting.
Position a suitable pan beneath the drain port at the rear of the chiller. The
drain pan must be shallow (under 3½” in height) and have a volume of
approximately 3 gallons (6 gallons for ThermoFlex7500 - 24000). Remove
the ¼” Male NPT pipe plug from drain port or open the Riton tting by
turning either counter clock wise. For ThermoFlex7500-24000, open the
drain valve. This will drain the return line, reservoir, plate exchanger, and the
suction side of the pump.
To drain the discharge side of the pump disconnect the Female NPT outlet
connection on the rear of the chiller.
Note Internally the chiller does not contain a large quantity of uid on the
discharge side however take care to contain what uid does drain, a wet-vac
can be employed to minimize the potential for spillage.
If the chiller is equipped with the ow control or pressure relief with ow
control option, open the valve or remove the drain plug in order to drain the
discharge line, see Section 5.
If the chiller is equipped with the anti drainback option, enter the Setup
Loop and utilize the drAin display to open the valve, see Section 4. Opening
the valve allows the uid to drain out of the chiller.
Reinstall ¼” Male NPT pipe plug using a sealant suitable for the wetted
materials or close the Riton lling prior to relling.
Do not overtighten the tting.
For ThermoFlex7500-24000, close the drain valve.
WARNING
Figure 8-1 Drains
Brass plug (typical)
Riton connector
CAUTION
Section 8
8-2 ThermoFlex
Thermo Scientific
Water-Cooled
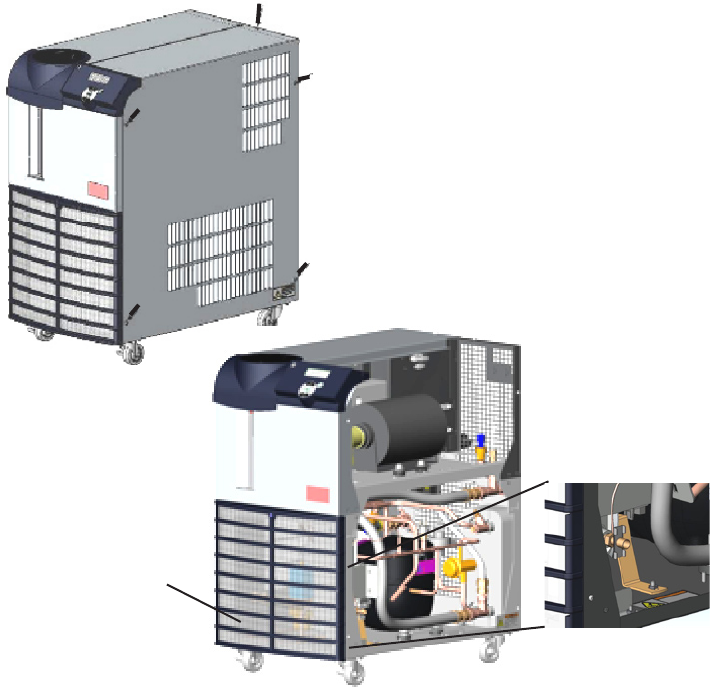
Draining ThermoFlex1400 - 2500 water-cooled chillers is accomplished by
removing the right side panel. Use a Phillips head screwdriver to remove
the ve screws indicated in the illustration below. Slide the panel back
approximately one inch, then lift slightly from the rear to disengage the
panel's two tabs from their slots.
Petcock Valve
The drain for ThermoFlex3500 and 5000 is
located behind the condenser filter.
The drain for ThermoFlex7500 and 10000
is located behind the access panel on the
lower left front of the chiller. The panel has
two ¼ turn fasteners (cross head).
The drain for Thermoflex15000 - 24000 is a
¼" plug located on the rear of the chiller.
Figure 8-2 Water-Cooled
Install a
7
/
16
" ID tube on the drain petcock valve located on the lower end
of the exchanger. Open the valve to allow uid to drain into an external
device. When draining is complete close the valve and replace the panel.
A wet-vac is needed on the facility water inlet connection to thoroughly
drain any remaining uid from the lines.
Section 8
ThermoFlex 8-3
Thermo Scientific
Wetted Materials
P 1, P 2, MD 1 and MD 2 Pumps
300 Series Stainless Steel
Bronze
Carbon Graphite
Ceramic
Fluorocarbon (Viton
®
)
Polysulfone
Tank
Polyethylene
Brass
EPDM
Pyrex
®
Plumbing
300 Series Stainless Steel
Bronze
Fluorocarbon (Viton
®
)
Nickel
Polypropylene
EPDM
Brass
Copper
Teon
®
PPS (ow transducer)
Nitrile (Buna-n
®
)
Riton
®
(optional drain tting)
Viton® (optional drain tting o-rings)
Filter bag
Polypropylene
Mono-lament nylon
Cap and Funnel
Acetal Copolymer
P 3, P 4 and P 5 Pumps
316 Series Stainless Steel
Carbon
Silicon Carbide
Fluorocarbon (Viton
®
)
T 0 and T 1 Pumps
Stainless Steel AISI 304
Bronze ASTM B62
Bronze ASTM B16
Buna N
Buna/Ceramic
Buna/Carbon
T 5 Pumps
Stainless Steel AISI 304
Bronze w/monel
Carbon
Buna N
Ceramic
Buna/Carbon