ThermoFlex-Manual.pdf - 第84页
6-4 ThermoFlex Section 6 Thermo Scientific Condenser Filter F ailure to clean/replace the condenser lter will cause a loss of cooling capacity and lead to premature f ailure of the cooling system. Ther moF lex900 - 500…

Section 6
ThermoFlex 6-3
Thermo Scientific
Reservoir
Cleaning
The user is responsible for maintaining reservoir uid quality. Check the
uid on a regular interval. Start with frequent checks until a regular interval
(based on your application) is established.
If cleaning is necessary, ush the reservoir with a uid compatible with the
process uid and the chiller's wetted parts, see Section 8.
Before using any uid or performing maintenance where contact
with the uid is likely refer to the manufacturer’s MSDS for handling
precautions.
Reservoir Sight Tube
Clean the sight tube by gently pulling up on the plastic funnel housing to
remove it (see illustration on previous page) and then gently pulling out the
black sight ball stopper from the tube. Use a long soft-bristle ¼" brush.
Use caution not to scratch the glass.
Before replacing the reservoir housing ensure the reservoir sight tube
ball stopper is securely in place.
For easier replacement, wet the stopper rst and then use a twisting motion
to install it in the sight tube.
Wire Mesh Fluid Diffuser
(ThermoFlex900-5000)
Sight Tube
Ball Stopper
Figure 6-2 Reservoir Cleaning and Diffuser
An effective recommended maintenance plan would include changing
the uid every six months to optimize chiller reliability, see Section 3 for
additional information.
Fluid Maintenance
WARNING
CAUTION
6-4 ThermoFlex
Section 6
Thermo Scientific
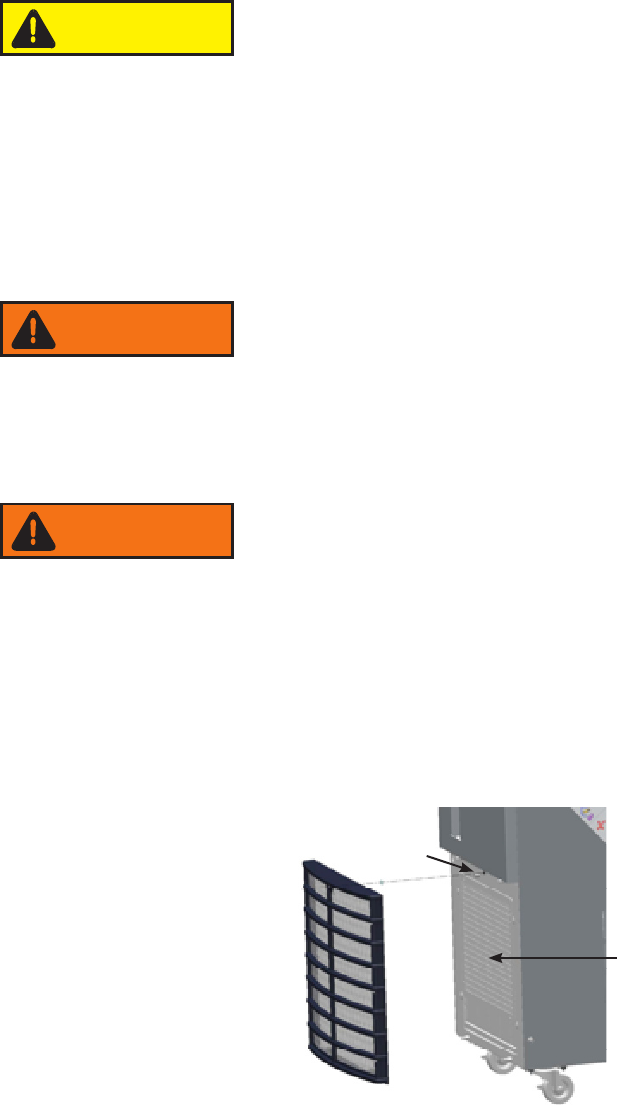
Condenser Filter
Failure to clean/replace the condenser lter will cause a loss of
cooling capacity and lead to premature failure of the cooling
system.
ThermoFlex900 - 5000
Clean the lter through the grill using a vacuum with a soft-bristle brush.
When it is time for a more thorough cleaning, remove the one-piece grill
assembly by rst pulling the bottom of the assembly away from the chiller
and then pulling it away from the top.
The condenser framing and ns located behind the grill assembly
are very sharp. Use caution when removing the assembly.
Note ThermoFlex900 - 5000 water-cooled chillers have an embedded
screw(s) located at the top (and bottom) of the grill. Loosen the screw(s)
to remove the grill.
Water-cooled chillers also have a fan with sharp blades, ensure the
chiller is off before removing the assembly.
Shake off as much of the excess water as possible before reinstalling. Press
the grill back into place.
For water-cooled chillers, tighten the screw(s) at the top (and bottom) of
the grill.
Replacement grill assemblies are available from Thermo Fisher.
Screw
(Water-cooled chillers)
CAUTION - Sharp edges
Figure 6-3 ThermoFlex900 - 5000 Condenser Grill Removal
ThermoFlex3500 - 5000 water-cooled chillers
have two screws securing the condenser. One
screw on the top and one on the bottom.
WARNING
WARNING
CAUTION
Section 6
ThermoFlex 6-5
Thermo Scientific
Chiller Surface
Hoses
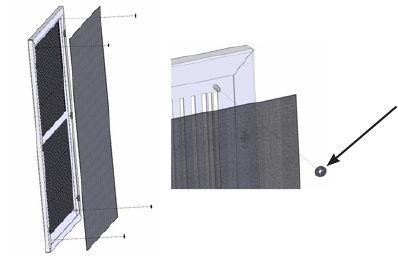
ThermoFlex7500 - 10000
For air-cooled chillers, remove the one-piece grill assembly by pulling the
assembly away from the chiller.
Water-cooled chillers do not have a lter.
The lter goes over four studs and plastic "fast nuts" hold it in place.
Replace it or vacuum the old lter with a soft-bristle brush, or wash it.
Shake off as much of the excess water as possible before reinstalling.
Tuck the lter around the perimeter of the grill and over the four studs,
use the plastic "fast nuts" to hold it in place.
Replacement grills are available from Thermo Fisher.
Figure 6-4 Filter Removal/Replacement ThermoFlex7500 - 10000 Air-Cooled
"fast nut"
Clean the chiller's surface with a soft cloth and warm water only.
Inspect he chiller's external hoses and clamps on a regular basis.
ThermoFlex15000 - 24000
The air-cooled chillers do not have lters but the condenser ns can be
cleaned by removing the eight screws securing the lower-front panel.