PSV7000_ Owners Manual_096-0460-001B - 第145页
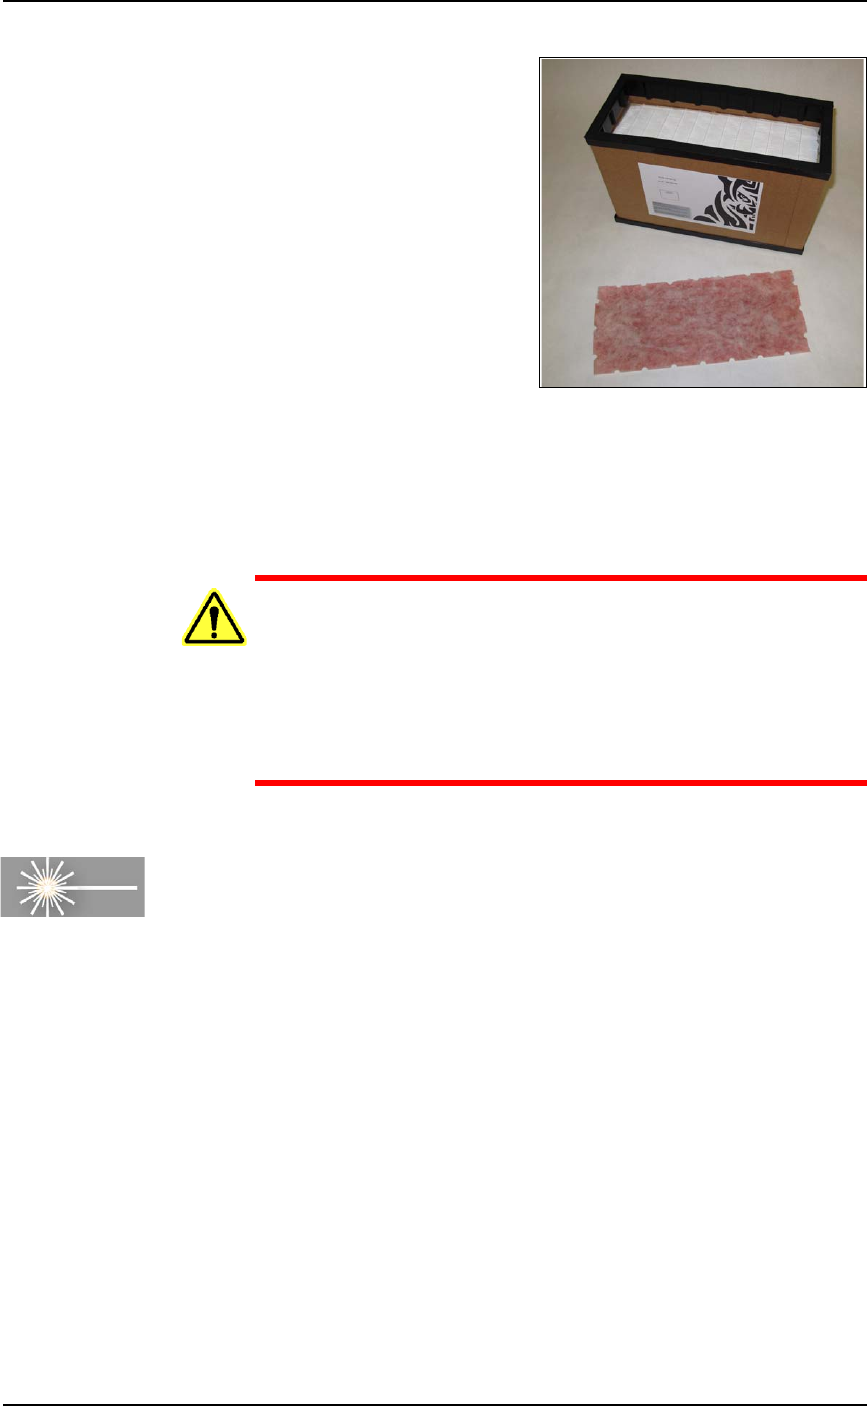
■ The Laser Module ◘ Laser Marking Fume Extractor PSV7000 Owner’s Manual 4—39 back Figure 4-24: The Pre-Filter is remo ved from the Main Filter . T o finish, place the filters and y our glov es in the bag and seal the ba…
Maintenance ■ The Laser Module
4—38 Data I/O • 096-0640-001B
back
• a particle (dust) mask
• access door key that came with your PSV7000
1. Turn OFF the subsystems and PSV7000 System power and
ensure the main power switch is in the OFF position. See Shutting
Down the PSV7000 System on page 2-7.
2. Open the rear access door on the PSV7000.
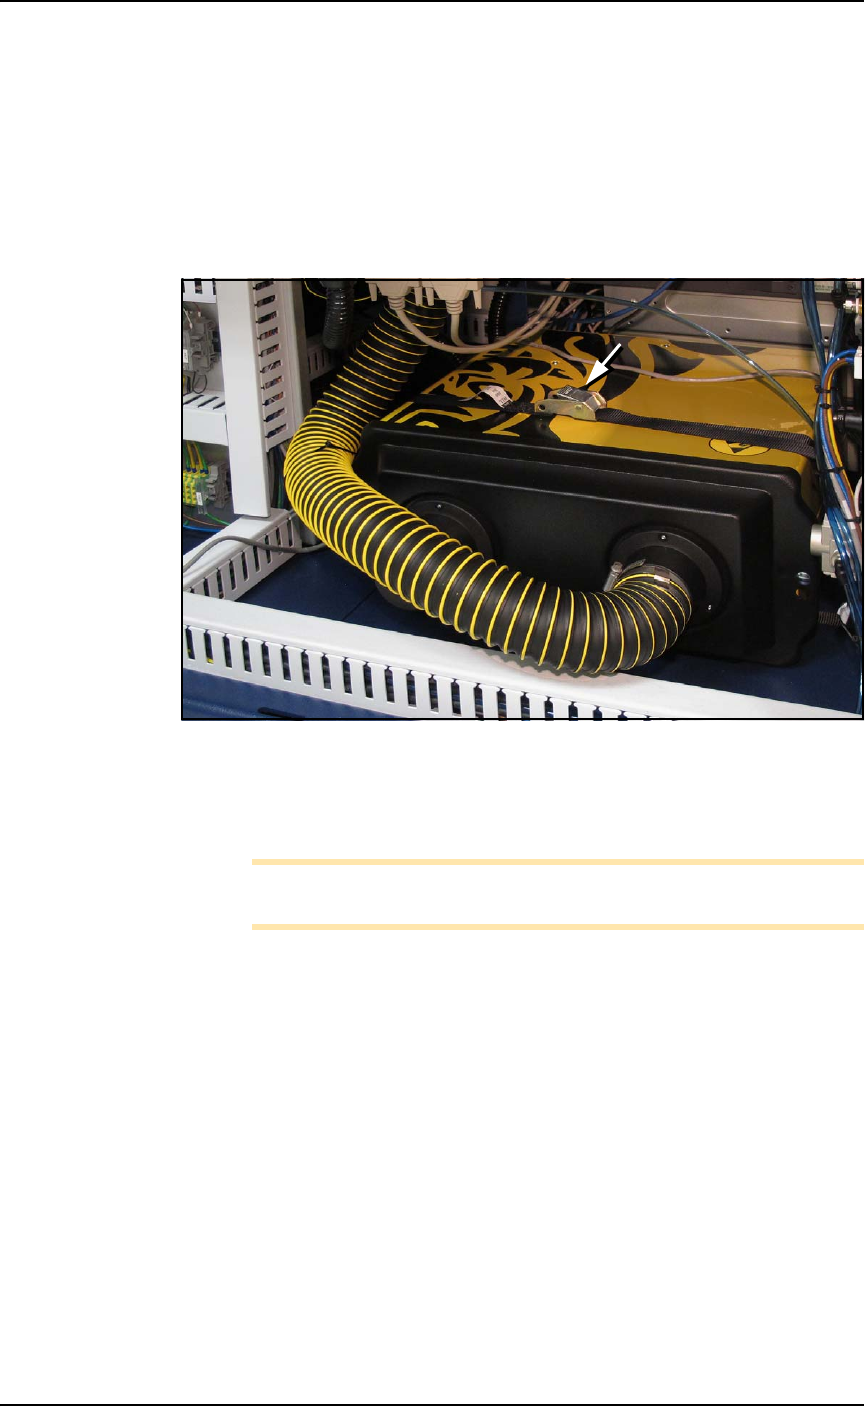
3. Unbuckle the strap securing the Fume Extractor to the machine.
Figure 4-23: The Laser Fume Extractor box is strapped into place. After
unbuckling the strap and removing the lid, the box needs to be raised
for the filters to clear the wire track. Read the warning above before
starting this task.
Note: If the wire cable is removed from the exhaust hose, it needs to
be replaced.
To continue, see the replacement instructions and part numbers of the
Tiger pre-filter and main filter in the Tiger Operating Manual that
came with PSV7000. A PDF copy is included on the CD with this
Owner’s Manual.
■ The Laser Module ◘ Laser Marking Fume Extractor
PSV7000 Owner’s Manual 4—39
back
Figure 4-24: The Pre-Filter is removed from the Main Filter.
To finish, place the filters and your gloves in the bag and seal the bag
and dispose of as hazardous waste. Close the access door on
PSV7000.
WARNING: Possible health hazard from toxic materials! Gov-
ernment regulations apply to the storage of hazardous
waste. Ensure that contaminated filters are:
• properly labeled and stored in your hazardous waste stor-
age area
• not stored on your site longer than government regula-
tions allow (the typical limit is 90 days)—check your govern-
ment regulations for hazardous waste storage requirements.
Cleaning the Laser Computer Air Filter
Requirements
• Very small (jeweler's) Phillips screwdriver
[Laser Marking only] The Laser Computer is located above the Han-
dler Computer on the left side of the machine.
In general, clean this filter every year, depending on environment
and amount of use. See the figure below.
Maintenance ■ The Laser Module
4—40 Data I/O • 096-0640-001B
back
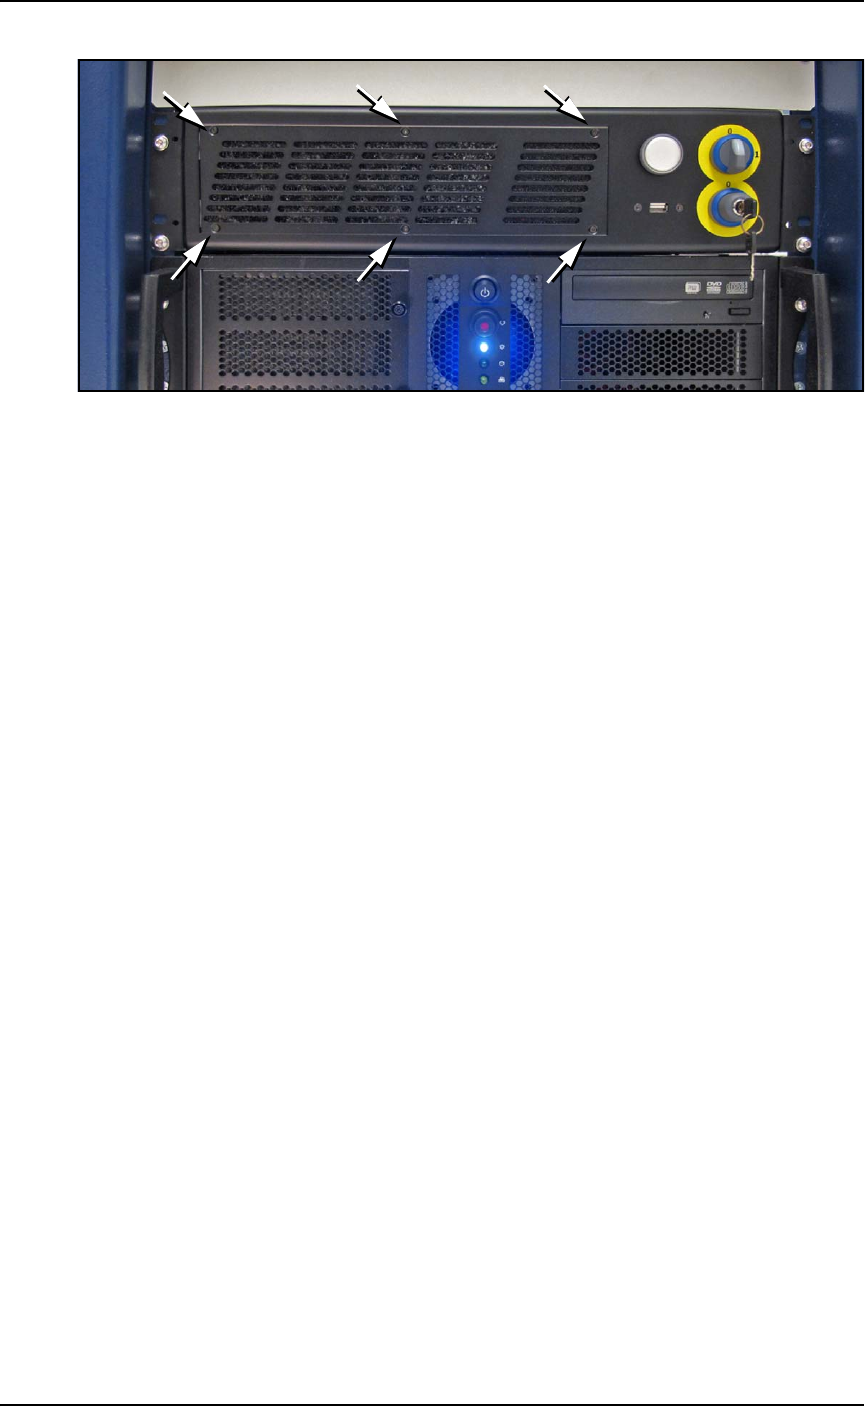
Figure 4-25: The location of Laser Computer filter (Laser Marker
equipped models only). Six screws (arrows) attach the filter grille.
To remove the Laser Computer air filter:
1. Turn OFF the Laser computer.
1a. Switch to the Laser PC by pressing the keyboard key
Scroll-Lock twice and then immediately press 2.
1b. Exit the Lighter Laser software.
1c. Shut down the PC using the Windows Start Menu.
2. Unscrew the six small Phillips screws on the filter grille and
remove it.
3. Remove the old air filter and clean such as with a light-duty vac-
uum (or replace with a new air filter if necessary).
4. Replace the filter grille and attach with the six screws.