00196062-03_SM_LDU-X_EN.pdf - 第21页
4 Service Work 4.2 Replacing Spare Parts Service Manual SIPLACE LDU-X Linear Dipping Unit 11/2017 21 Equipment required ● Standard tools ● Torx key size 6 ● Spare parts: – Flat module plug-in board EDIF secondary IrDA bo…
4 Service Work
4.2 Replacing Spare Parts
20 Service Manual SIPLACE LDU-X Linear Dipping Unit 11/2017
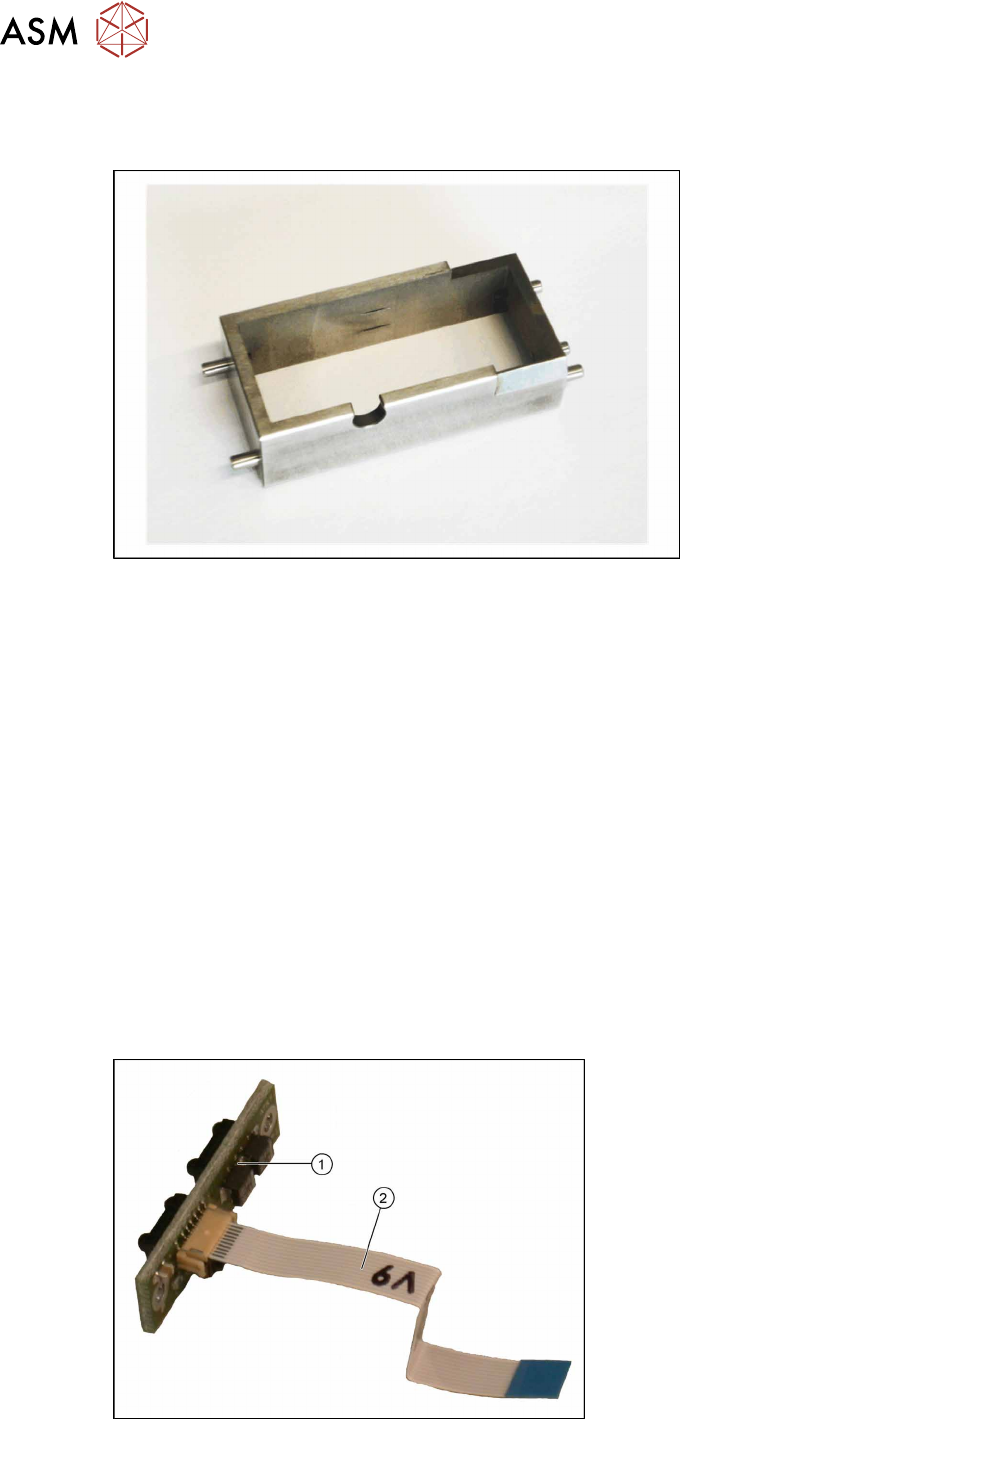
4.2.3 Replacing the Flux Tank
Overview
Flux tank [03060794-xx]
Equipment required
●
Standard tools
●
Spare part: Flux tank standard [03060794-xx]
Removal
► Unlock the downholder and swing it up.
► Remove the flux tank.
Installation
► Fit the new flux tank into place.
Check that three pins are positioned at the right side of the flux tank.
► Swing the downholder down again and lock it.
► Check the flux tank for correct positioning.
4.2.4 Replacing the IrDA Board
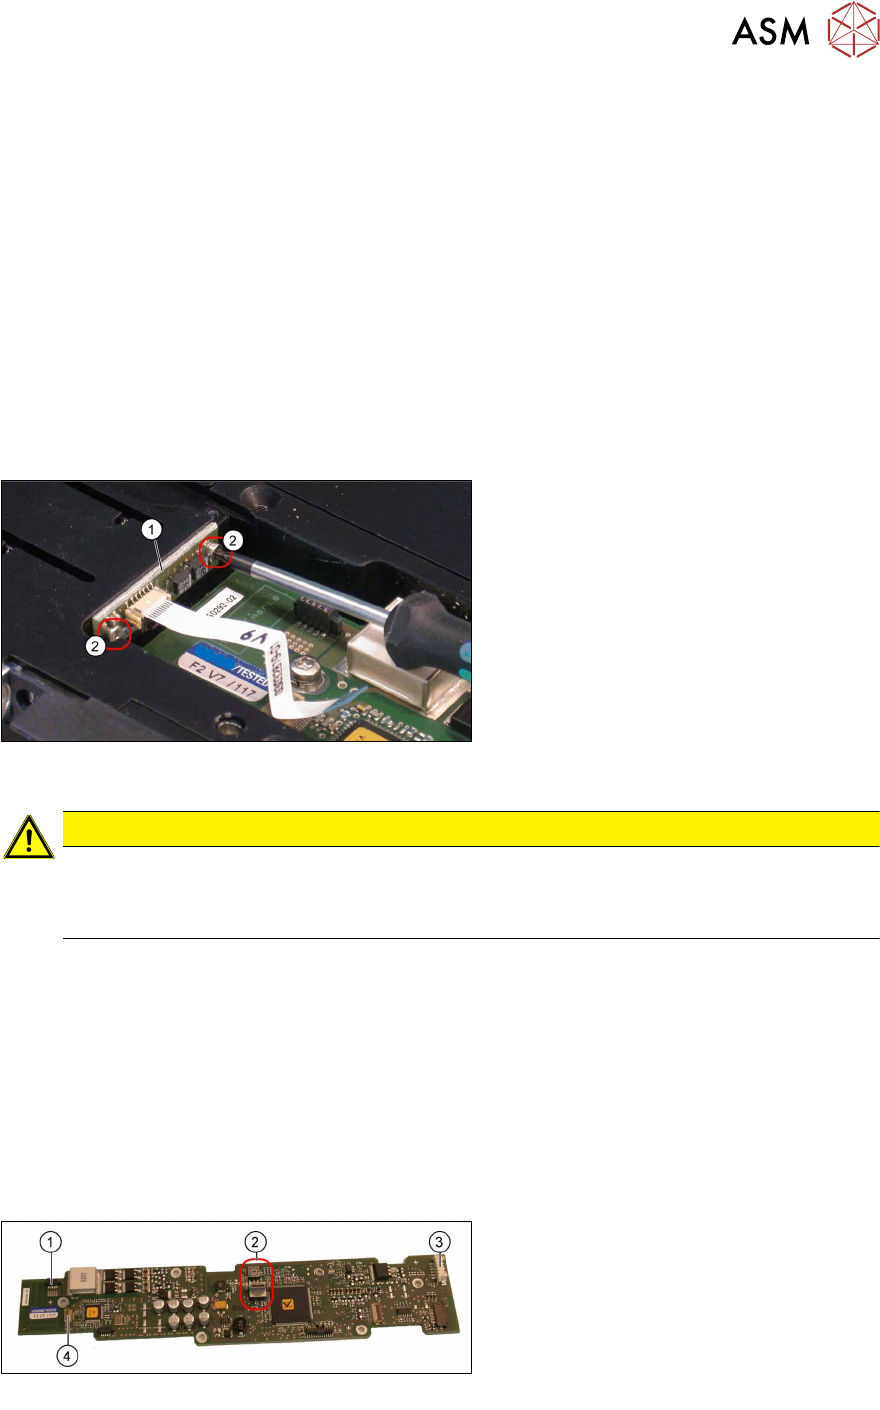
Overview
Flat module plug-in board EDIF secondary IrDA
board [03110865-xx] with flat ribbon cable
1. Flat module plug-in board EDIF sec-
ondary IrDA board
2. Flat ribbon cable to control board for
X adapter
4 Service Work
4.2 Replacing Spare Parts
Service Manual SIPLACE LDU-X Linear Dipping Unit 11/2017 21
Equipment required
●
Standard tools
●
Torx key size 6
●
Spare parts:
– Flat module plug-in board EDIF secondary IrDA board [03110865-xx]
– Flat ribbon cable IrDa – EDIF secondary [03032819-xx]
Removal
► Remove the cover on the X adapter control board (see 4.2.29.11 "Removing the Controller
Cover" [}65]).
► Loosen the cable clamp and unplug the connector to the EDIF unit (see4.2.29.12 "Removing
the EDIF Unit" [}66]).
► Disconnect the flat ribbon cable to the IrDA board (see 4.2.29.15 "Removing the Cable to the
IrDA Board" [}67]).
► Unscrew the two fastening screws(2)
and remove the IrDA board(1).
Installation
CAUTION
Important installation instructions
► Before fitting the IrDA board, connect the flat ribbon cable to the IrDA board.
► Make sure that the flat ribbon cable is not folded, crushed or otherwise damaged.
► Installation is performed by following the above instructions in the reverse order.
See also
2 4.2.5 "Replacing the X Adapter controller" [}21]
2 4.2.29.13 "Fitting the EDIF Unit" [}66]
2 4.2.29.14 "Fitting the Controller Cover" [}67]
4.2.5 Replacing the X Adapter controller
Overview
X-adapter controller [03069261-xx]
1. Connection for EDIF unit
2. Selector switch
3. Connection to the LDU-X control
board
4. Connection for IrDA board
4 Service Work
4.2 Replacing Spare Parts
22 Service Manual SIPLACE LDU-X Linear Dipping Unit 11/2017
Equipment required
●
Standard tools
●
Torx key size 10
●
Spare part: X adapter controller [03069261-xx]
Removal
► Remove the cover on the X adapter control board (see 4.2.29.11 "Removing the Controller
Cover" [}65]).
► Loosen the cable clamp and unplug the connector to the EDIF unit (see4.2.29.12 "Removing
the EDIF Unit" [}66]).
► Disconnect the flat ribbon cable to the IrDA board (see 4.2.29.15 "Removing the Cable to the
IrDA Board" [}67]).
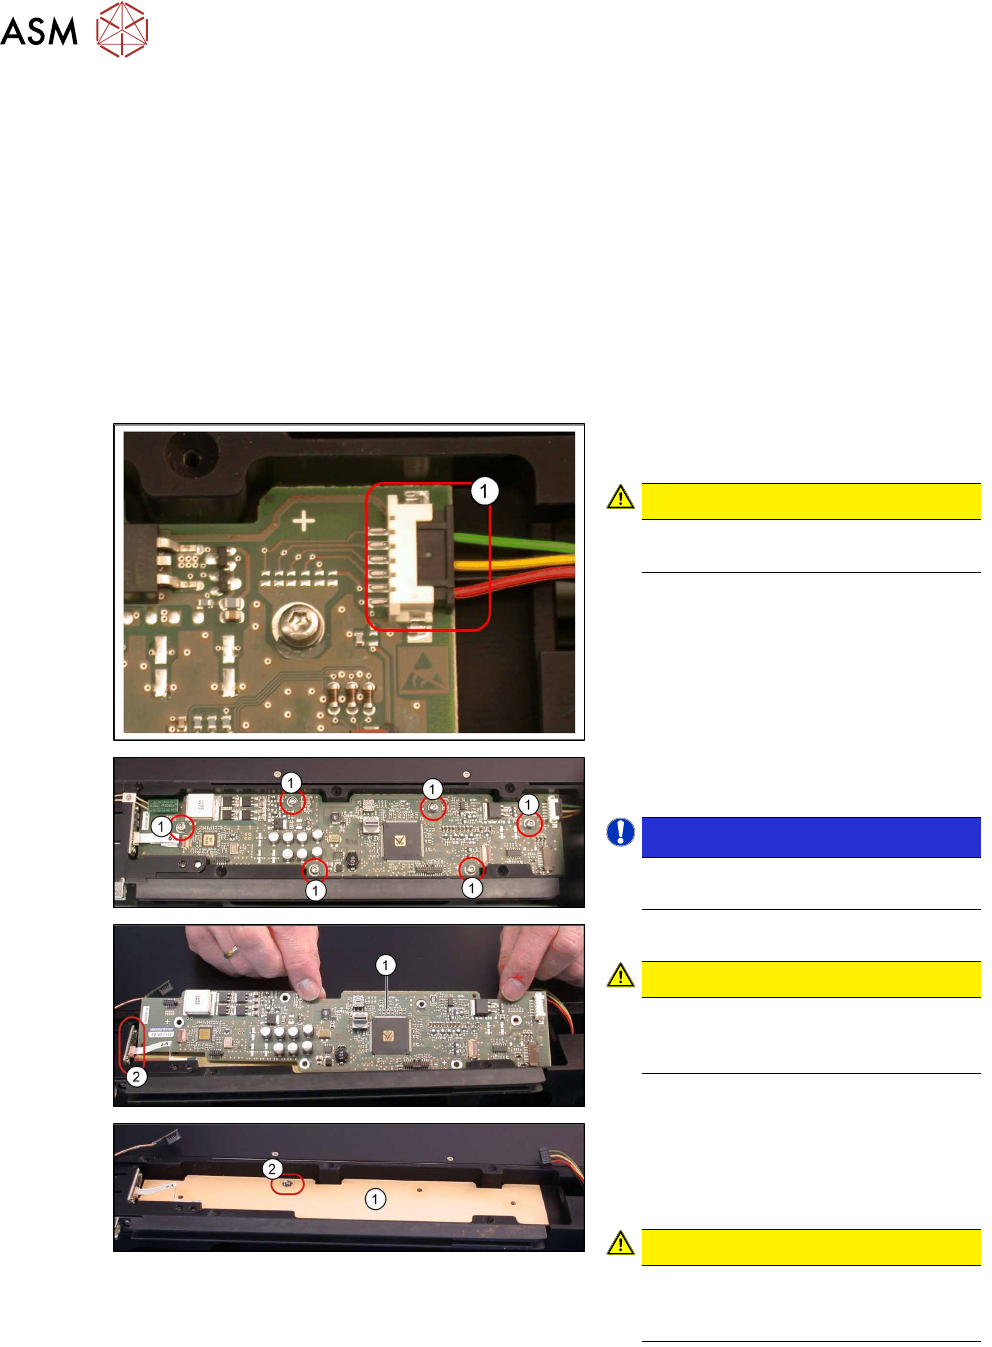
► Unplug the connector (1) to the main
board.
CAUTION!
Make sure that the cable does not fall
into the LDU-X.
.
► Loosen the 6 fastening screws sealed
with locking varnish(1).
NOTICE!
Each screw is fitted with a spring and
washer.
.
► Remove the controller (1) .
CAUTION!
Make sure that you do not damage
the IrDA board(2) attached to the
side!
.
► Check the rubber foil (1) on the inside
of the housing to make sure that it is
clean and not damaged. Do not re-
move this rubber foil.
CAUTION!
There should be a toothed disk at the
marked position(2) . This serves as a
ground connection for the board.
.