M20_Ope_E - 第125页
Chapter 2 Creating and Editing a Program 2-81 Feeder Count The number of feeders used for each component is displayed in the [Feeder Count] column of the [Component] tab window. To change the number of used feeder s, e…

Chapter 2 Creating and Editing a Program
2-80
2-8 Checking a Program
Several functions for checking a created program/library data are available.
2-8-1 Checking a Program
Menu: Program>File>CheckProgram
This feature allows for checking a created program (placement program and associated library
data) for error settings. The feature is automatically performed when you save a program in the
program editor or open a program in the Run dialog box. When errors are detected, error
messages are provided in [Check Program] dialog box.
When you correct library data according to the provided error message, save the library data and
check the data in one of the following three ways:
Open the corresponding program and execute [Check Program] menu
(Program>File>CheckProgram).
Open the corresponding program and save the program (Program>File>Save).
When [Check Program] dialog box is open, execute the Recheck menu (File>Recheck).
The error message “Nozzle No. registered in Component Library is not found in Nozzle
information.” which may be provided in checking a program does not suggest an error setting.
When this error message is provided, execute [Scan ANC] operation in the Nozzle dialog box
(Manual>Nozzle) to let the system identify present nozzles.
Note: This feature is applicable only to saved data.
2-8-2 Program Trace
Menu: Program>Tool>Teach>Trace
This feature allows programmed coordinates (placement/pickup/fiducial) to be monitored on the
CRT monitor. See Teach Entry earlier in this chapter.
2-8-3 Programmed Components & Nozzles
Menu: Program>Tool>ProgrammedComponents&Nozzles
When you edit a program in the program editor, you can refer to component and nozzle
information used in the program.
[Component] ················· shows the used component list, which is quoted from the component library.
[Programmed Nozzle] ····· shows the maximum number of nozzles used by the program
[Nozzle Arrangement] ···· shows the nozzle arrangement in the ANC.
(You do not have to replace nozzles. Nozzles will be automatically
arranged when production starts.)
[Fixed Nozzle] ··············· shows nozzles where to assign when ANC (option) is not installed.
Chapter 2 Creating and Editing a Program
2-81
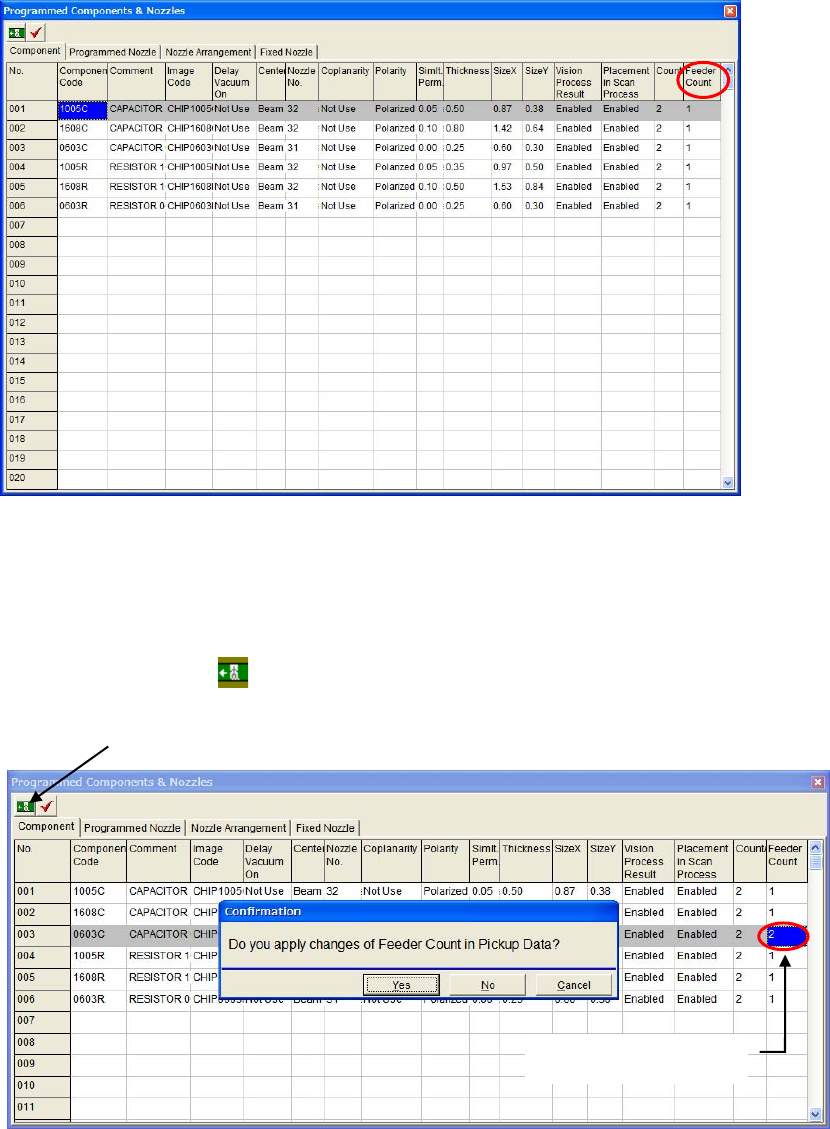
Feeder Count
The number of feeders used for each component is displayed in the [Feeder Count] column of the
[Component] tab window.
To change the number of used feeders, enter the number in this cell.
The numbers entered in the [Feeder Count] cells are reflected in the [Pickup Data] automatically
when you exit this window.
Action:
① Select one of [Component Code] steps which you want to change the number of feeders.
② Enter the desired number of feeders in the [Feeder Count] cell.
(In the [Feeder Count] cell, you can enter up to as many as the number of used components
entered in the [Count /(per) Program] unless 0 or minus number.)
③ Click the exit button
. The following confirmation message appears.
The confirmation message appears when you exit this window.
Ex. Change the [Feeder
Count] from 1 to 2.
Chapter 2 Creating and Editing a Program
2-82
④ Click the <Yes> button and exit the [Programmed Component & Nozzles] window. The
entered number in the [Feeder Count] are reflected in the [Pickup Data].
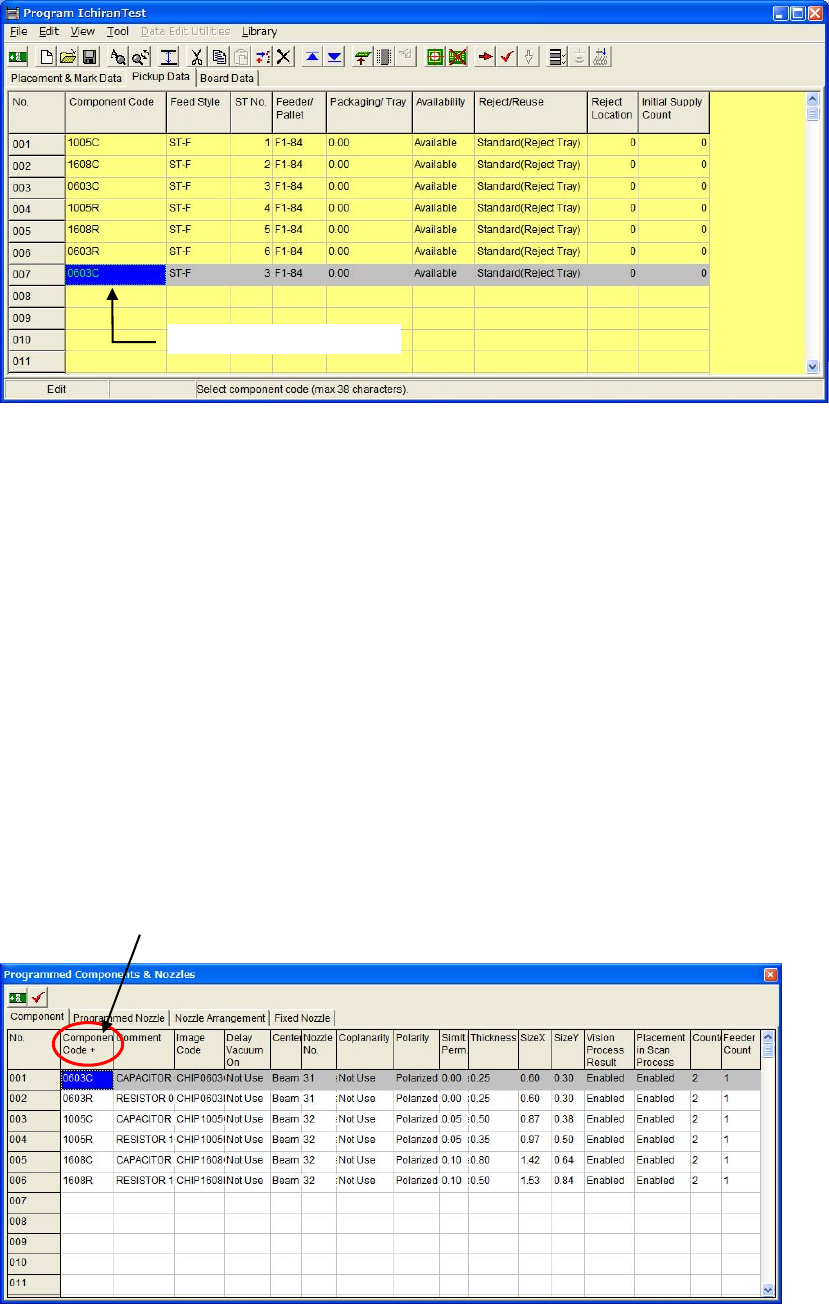
z Increasing Feeder Count
The same number of increased feeders will be added as component data steps in the [Pickup Data]
window. They will be added at the end of the lines.
The added component data have the same station Nos. with the original one.
z Decreasing Feeder Count
The same number of decreased feeders will be deleted in the pickup data from the top.
Note: By executing optimization, optimum feeder station Nos. are assigned and pickup data lines are
sorted.
Sort Function
You can sort each item in the [Component] tab window by double-clicking a column title.
When you double-click a column for the first time, the column is sorted in ascending order.
Double-clicking the second time sorts the column in descending order.
One pickup data is added.
To sort the column, double click the title cell.
+: Ascending order, -: Descending order