M20_Ope_E - 第187页
Chapter 5 Libraries 5-37 Click the <Full Screen Mode> button. Note: When the <Full Screen Mode> button is clicked, all the eight heads can be displayed in the monitor as shown below. Note: In the mark Image L…
Chapter 5 Libraries
5-36
5-1-2-8 Zoom In the Image Test Display
In the Image Library window, the displayed image can be zoomed in and out.
Note: The captured image by Image Test or ADA is displayed enlarged initially as shown in the
figure below.
a)
<Full Screen Mode>
button
Shows all the images of the eight heads within the monitor.
(It can be four heads depends on the mounter
configuration.)
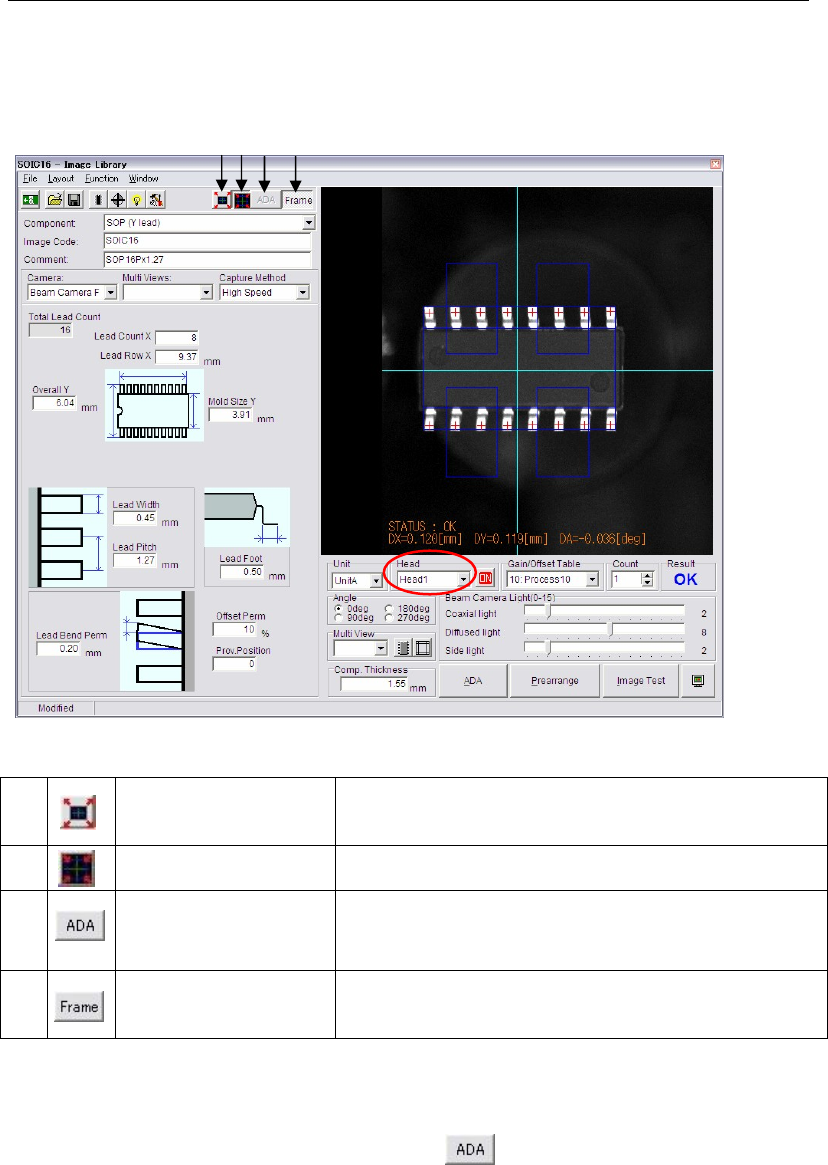
b)
<Head Zoom Mode>
button
Enlarges the image of the selected head.
c)
<Area Select ADA
Mode> button
Enables to specify the ADA range.
(This function is only available when used with the [Full
Screen Mode])
d)
<Frame> button
By selecting the <Frame> button, the component frame will
be able to appear with the image captured by Image Test.
This button is available for ADA too.
Addition to the <Full Screen Mode> and the <Head Zoom Mode> buttons, image size can be
changed by the following mouse operations.
z To enlarge and reduce the image, scroll the mouse wheel.
(When the <Area Select ADA Mode> button is selected, this operation is invalid.)
z To move the image in the monitor, drag the mouse.
Note: The <Full Screen Mode> button and the <Head Zoom Mode> buttons are available for ADA,
too.
a) b)
c) d)
Chapter 5 Libraries
5-37
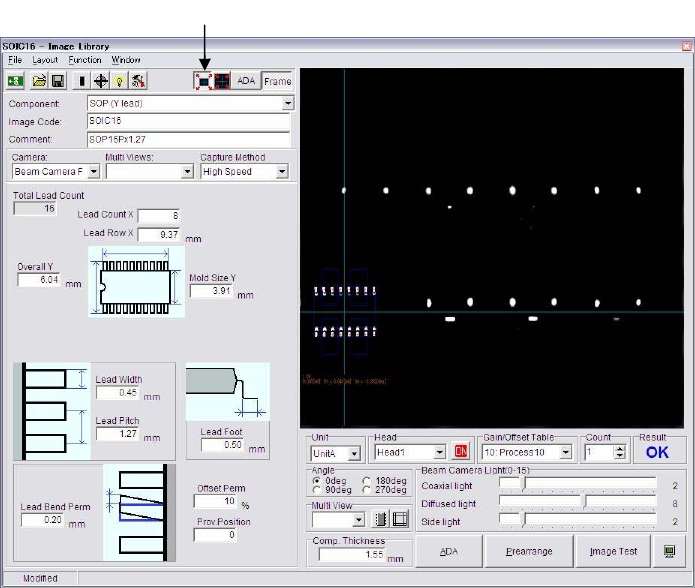
Click the <Full Screen Mode> button.
Note: When the <Full Screen Mode> button is clicked, all the eight heads can be displayed in the
monitor as shown below.
Note: In the mark Image Library window, the image can be zoomed in and out as well as in this
window.
Chapter 5 Libraries
5-38
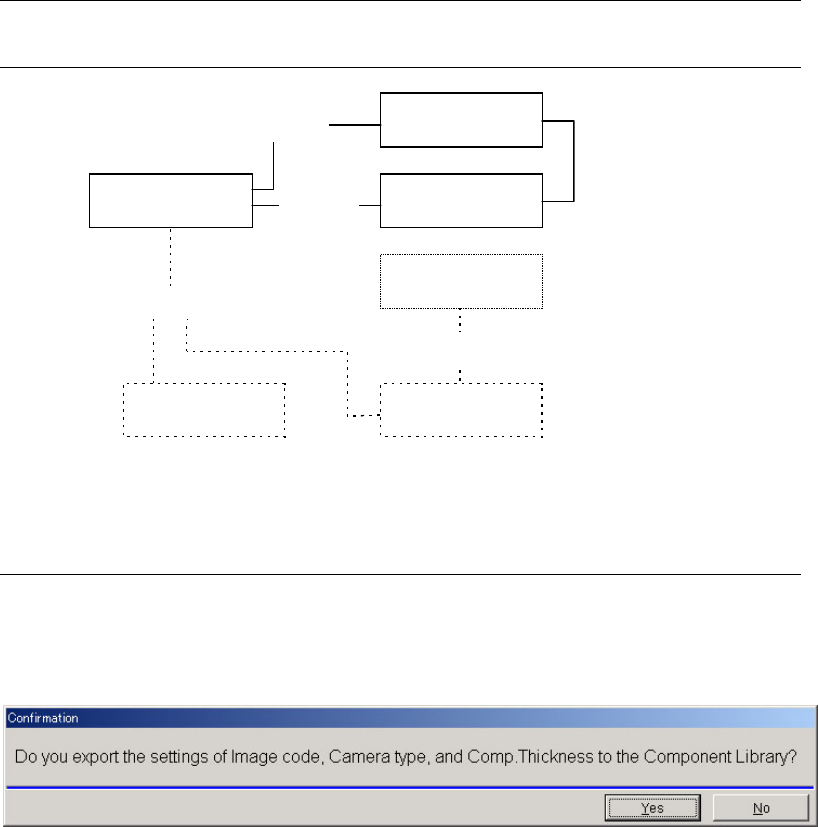
5-1-3 Vision Processing and Libraries
5-1-3-1 Vision-related Libraries
Component library
Pickup data
Placement & Mark data
Fiducial data &
Bad mark data
Image library
Nozzle library
Nozzle No.
Image code
Mark code
Component code
Code: In the Placement&Mark Data editor, enter a component code for a component process
(placement) step, a mark code for a mark process (fiducial/bad mark) step.
5-1-3-2 Exporting settings to Comp-LB at data-saving of Image-LB
When you open an Image library recode by double-clicking Image code name in Component
Library, you will see the following messages when you tried to save the Image library after
editing.
If you click [Yes] here, the new Image library code you specified, the Camera type, and
Comp.Thickness value will be exported into the resourced component library record.
If you do not want to change any settings of the resourced component library record, click [No].
Note: If [Yes] is clicked, the three settings of Image code, Camera (Centering), and Comp.Thickness in
the resourced component library will be modified according to the edited image library. If
there is at least one setting of them that should not to be modified, select [No] here, and later
you should change only the necessary setting of the component library manually.