M20_Ope_E - 第279页
Chapter 9 Running a Job 9-7 9-3 Running a Job 9-3-1 Running a Job Executes actual continuous job run or test job run. Before executing job run, check the machine setu p according to Pre-operation Check and Initial Settin…
Chapter 9 Running a Job
9-6
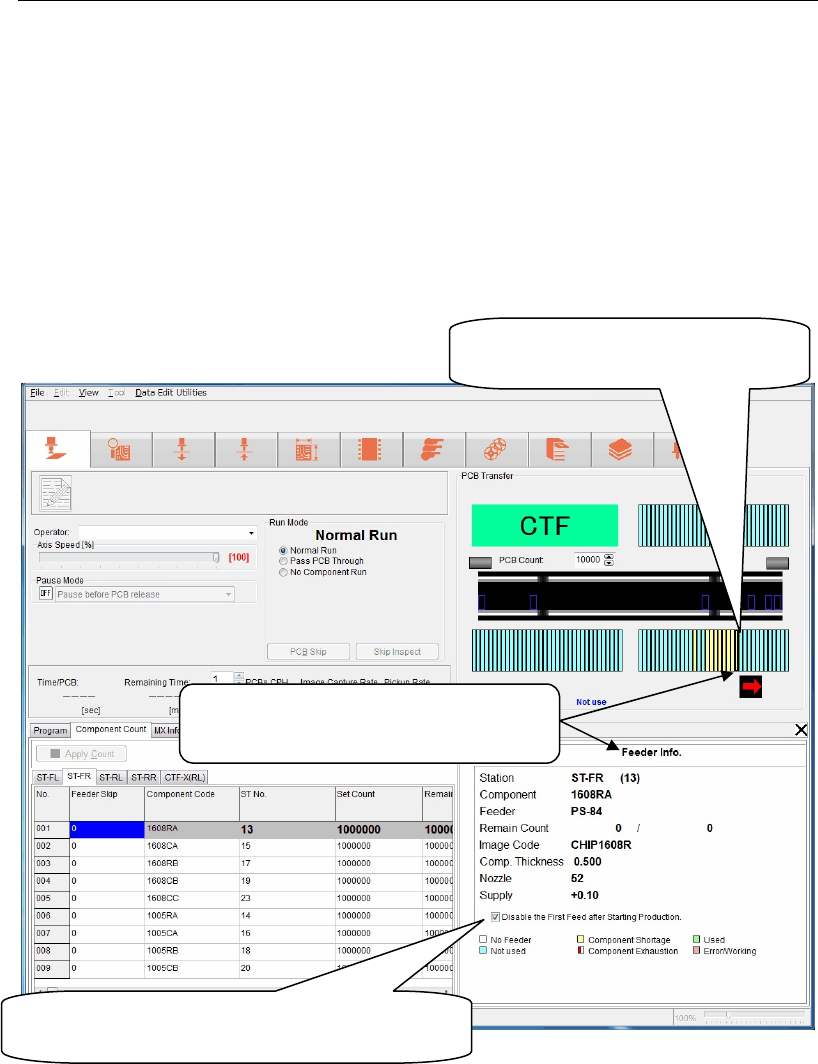
9-2-5 Confirming Feeder Setting
Menu: Run>Feeder Info
When selecting Run>Feeder Info, you can check that the feeder is set on the station specified by
the program in the [Feeder Info.] window. If a required feeder is not set, the corresponding
feeder station is displayed in brown. Conversely, when the feeder is set correctly, the
corresponding feeder station is displayed in yellow green. Note that this window indicates
only the presence/absence status of the feeders and does not check the feeder type. To check
the feeder type, you must visually check it.
Additionally, the feeder status, such as component shortage is also displayed in other color.
For details about indication colors, see the [feeder Info.] window.
Note: Install the feeder on the station properly.
If the feeder is lifted up from the proper position, the nozzle may collide with the feeder.
Note: When using this [Disable the First Feed after Starting Production] function, pay special
attention to the following points.
① When the data is updated, this setting is cleared. So, set this function during pause
immediately before starting the operation.
② This function is invalid for the MS-3 feeder.
③ Select User Parameter>Functions (1)> and check on [Disable the First Feed after Starting
production]. The first feed of all stations is not performed.
Ri
g
ht-clickin
g
a feeder position will
jump to the component pickup data
s
p
ecified for this ST number.
When the component is alread
y
present on the
feeder, check on this box to disable the first feed
after startin
g
p
roduction.
Left-clickin
g
a feeder position will displa
y
the [Feeder Info] window for this ST
number.
Chapter 9 Running a Job
9-7
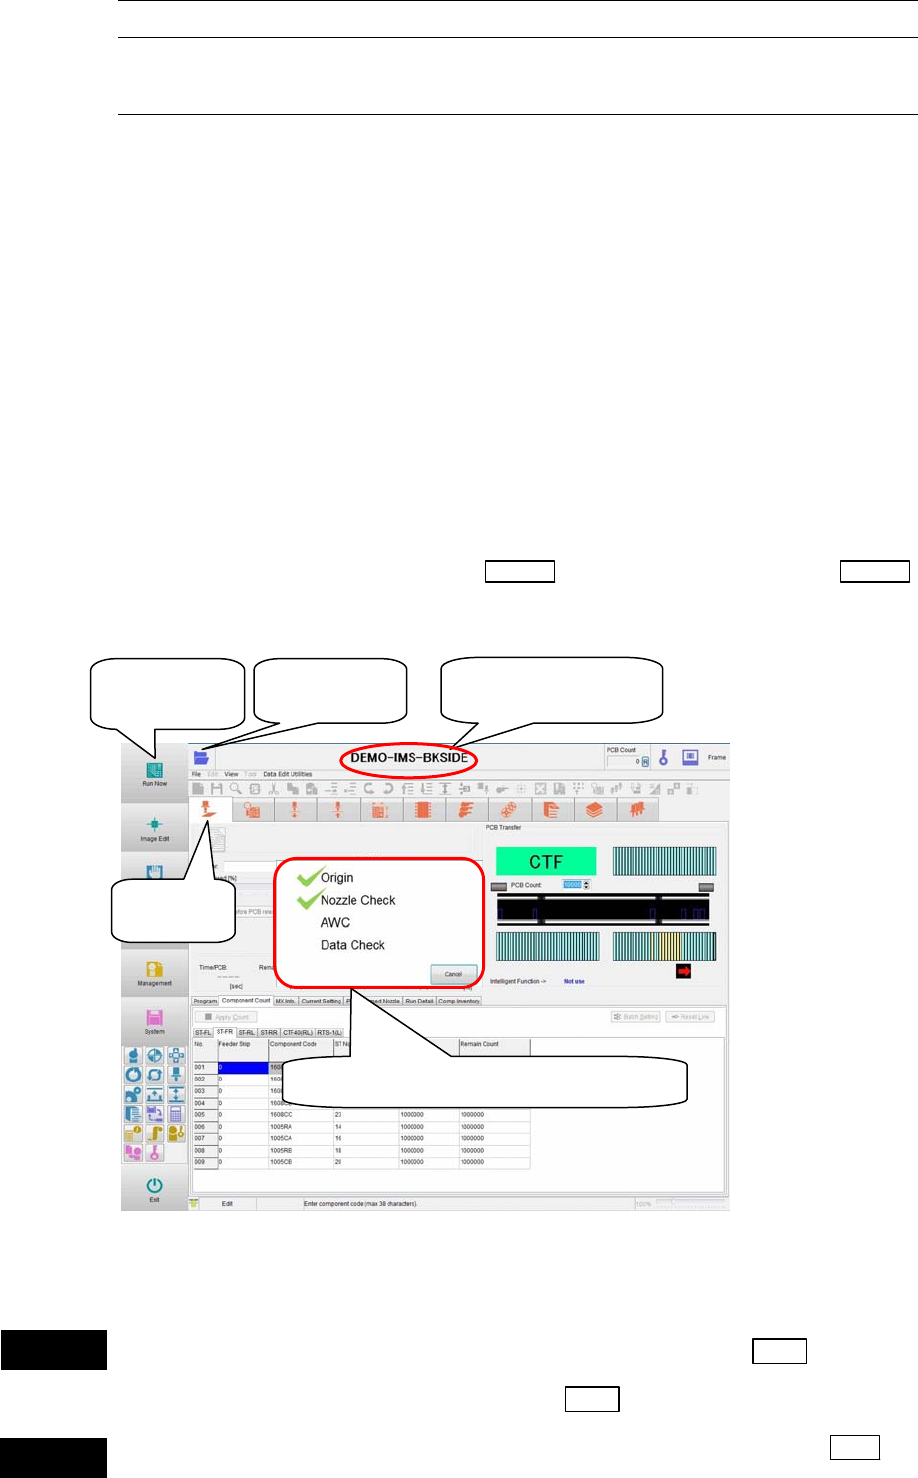
9-3 Running a Job
9-3-1 Running a Job
Executes actual continuous job run or test job run.
Before executing job run, check the machine setup according to Pre-operation Check and Initial
Setting in this Chapter.
Action:
① Click the <Run> icon in the program area. The [Run] window appears.
② Click the <Open> icon. The [Select Program] window appears.
Select a program you want to run. The selected program name is displayed at the upper
part of the window.
③ In the main menu, click the <Run Now> icon. The mounter automatically performs the
following preparation tasks. The check mark is put after relevant task has been performed
completely.
z Origin
z Nozzle Check
z AWC
z Program Check
④ When all the tasks are performed, the
START switch starts blinking. Press the START
switch to start the job.
Note: Origin and Nozzle Check are already performed. These tasks are not performed unless they are
required.
Do not put your head or hand inside the mounter when pressing the Start switch.
Doing so may cause serious personal injury. Additionally, make sure that no one is
present around the mounter before pressing the Start
switch.
Do not place any foreign object inside the mounter or tray feeder when pressing the Start
switch. Doing so may cause the mounter or tray feeder to break.
①Click
[
Run
]
.
② Click
[
O
p
en
]
.
③ Click [Run
Now].
③ Check mark is put on prepared items.
② Program name is
dis
p
la
y
ed.
Warning
Caution
Chapter 9 Running a Job
9-8
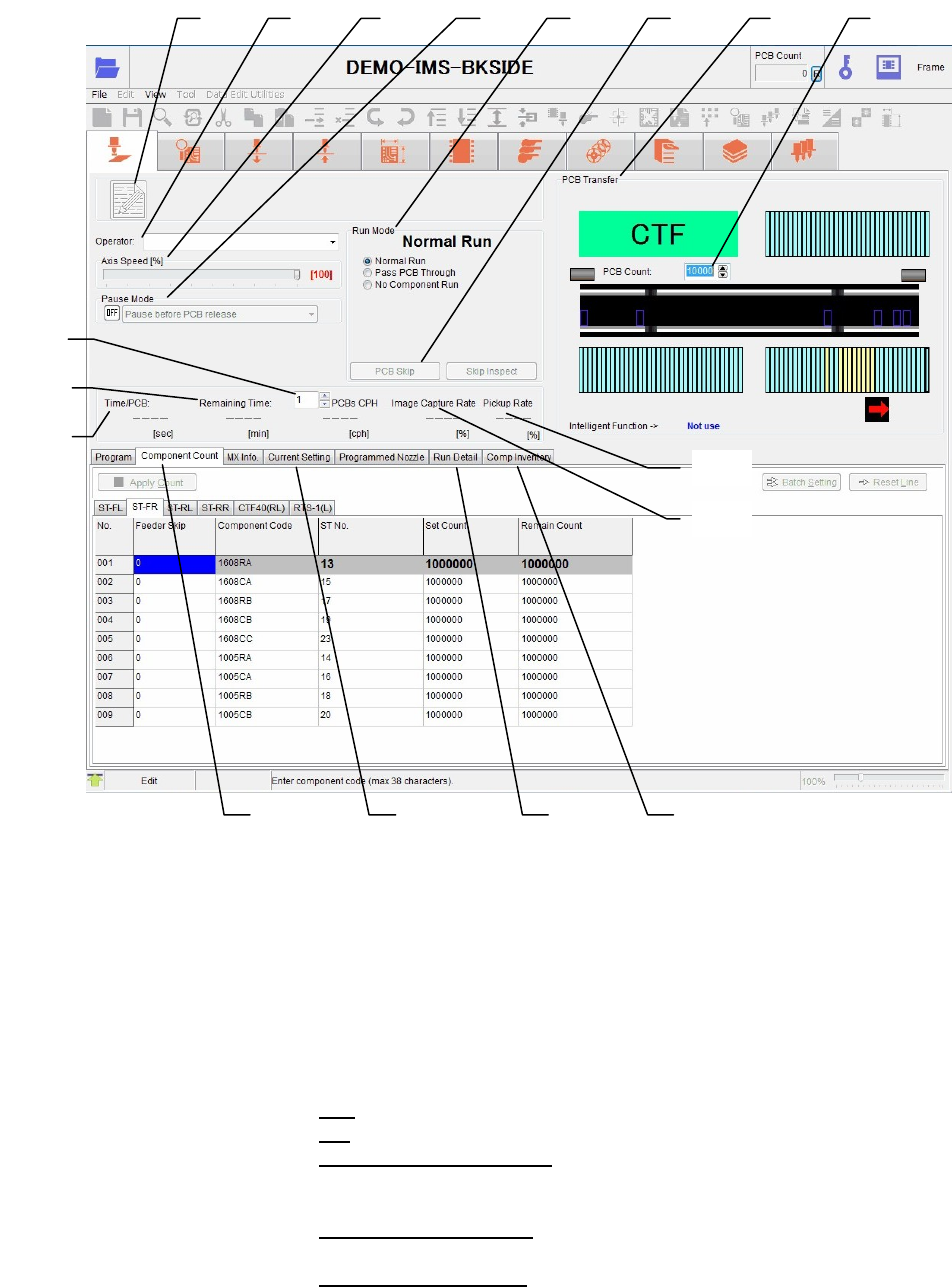
Window:
1. Edit & Teach Used to edit the program during production.
For details, see Edit & Teach Mode during a Job Run.
2. Operator: Select an operator name. Only operators registered for
Management>RegisterOperator are selectable here. Job run can be
performed without registering an operator.
3. Axis Speed [%]: Set a ratio to the maximum speed (100%) to slow down the speed of
all axes.
4. Pause Mode: You can pause a job run for every single PCB.
OFF
Job run continues without a pause.
ON
Select a desired pause method from the combo-box.
[Pause before PCB release]:
Job run pauses before a PCB is released (after production of one
PCB).
[Pause after PCB release]:
Job run pauses after a PCB is released (after production of one PCB).
[Pause before PCB load]:
Job run pauses without loading the next PCB after the current PCB
board has been unloaded.
1 2 3
4
5
7 6 8
9
10
11
12
13
17 14
15
16