M20_Ope_E - 第293页
Chapter 9 Running a Job 9-21 Relocating Components To set components that are different from thos e registered to the data base into the feeder, execute the following steps. Action: ① Remove the feeder from the feeder …

Chapter 9 Running a Job
9-20
9-3-5 Intelligent Feeder (optional)
Menu: System>UserParameter>IntelligentFeeder
To Enable the Intelligent feeder function, check <Enable the Intelligent Feeder Function> box.
For details, see Chapter 11 Parameter Setting.
Component Exhaustion
If components have run out during operation, execute the following steps.
Action:
① Remove the feeder from the feeder bank.
② Remove the emptied component reel, and install a new component reel.
③ Scan the "Show / Hide" barcode to display the ID registration window (InputBar).
④ Scan the feeder’s barcode. →The feeder information will be displayed.
⑤ Scan the component’s barcode.
⑥ Scan the "Register Database" barcode.
→The “Remain Count” in the production window will be reset to the initial value.
⑦ Check whether the count has been reset to the initial value. If so, scan the "Show / Hide"
barcode to close the ID registration window.
⑧ Attach the feeder to the feeder bank.
Clearing an Error
If an error (e.g. suction NG, feeder trouble and removal lock errors) other than the “out of
component” error has occurred, clear the error as follows.
Action:
① ALARM OFF→Recovery
② Check the error contents by observing the message and LEDs.
→For feeder LED display contents, refer to “Data”.
③ Remove the feeder from the feeder bank, and make necessary corrections.
④ Scan the "Show / Hide" barcode to display the ID registration window (InputBar).
⑤ Scan the feeder’s barcode.
⑥ Scan the component’s barcode.
⑦ Scan the "Register Database" barcode. The remaining count will not be initialized.
⑧ Check whether “OK” is displayed. If so, scan the "Show / Hide" barcode to close the ID
registration window.
⑨ Attach the feeder to the feeder bank.
Note: When <Comp. Exhaustion Automatic Release> is enabled in UserParameter>Functions(1), you
can restart the production by skipping ③ through ⑧. To skip these procedures, feeders should
not be removed from the feeder bank.
Chapter 9 Running a Job
9-21
Relocating Components
To set components that are different from those registered to the database into the feeder,
execute the following steps.
Action:
① Remove the feeder from the feeder bank.
② Scan the "Show / Hide" barcode to display the ID registration window (InputBar).
③ From the ID registration window (InputBar), select >Mode>Remove using the mouse. The
‘Start remove mode’ dialog box appears.
④ Scan the feeder’s barcode.
⑤ Remove the old components from the feeder.
⑥ Scan the "Cancel Database" barcode.
⑦ If “OK” is displayed, set new components in the feeder.
⑧ Scan the feeder’s barcode.
⑨ Scan the new component’s barcode.
⑩ Scan the "Register Database" barcode.
⑪ Check whether “OK” is displayed. If so, scan the "Show / Hide" barcode to close the ID
registration window.
⑫ Attach the feeder to the feeder bank.
Note: You can skip step ③ when <Disable Remove Mode> button is checked in
InputBar>Option>Setup Window.
Removing Components
To remove components from a feeder, execute the following steps.
Action:
① Remove the feeder from the feeder bank.
② Scan the "Show / Hide" barcode to display the ID registration window (InputBar).
③ Select the remove mode using the mouse.
→In the InputBar window, select Mode > Remove. The following dialog box appears, so
click <OK> button.
④ Scan the feeder’s barcode.
⑤ Scan the "Cancel Database" barcode.
⑥ Check whether “OK” is displayed. If so, scan the "Show / Hide" barcode to close the ID
registration window.
⑦ Remove the components from the feeder.
Note: You can skip step ③ when <Disable Remove Mode> button is checked in
InputBar>Option>Setup Window.
Chapter 9 Running a Job
9-22
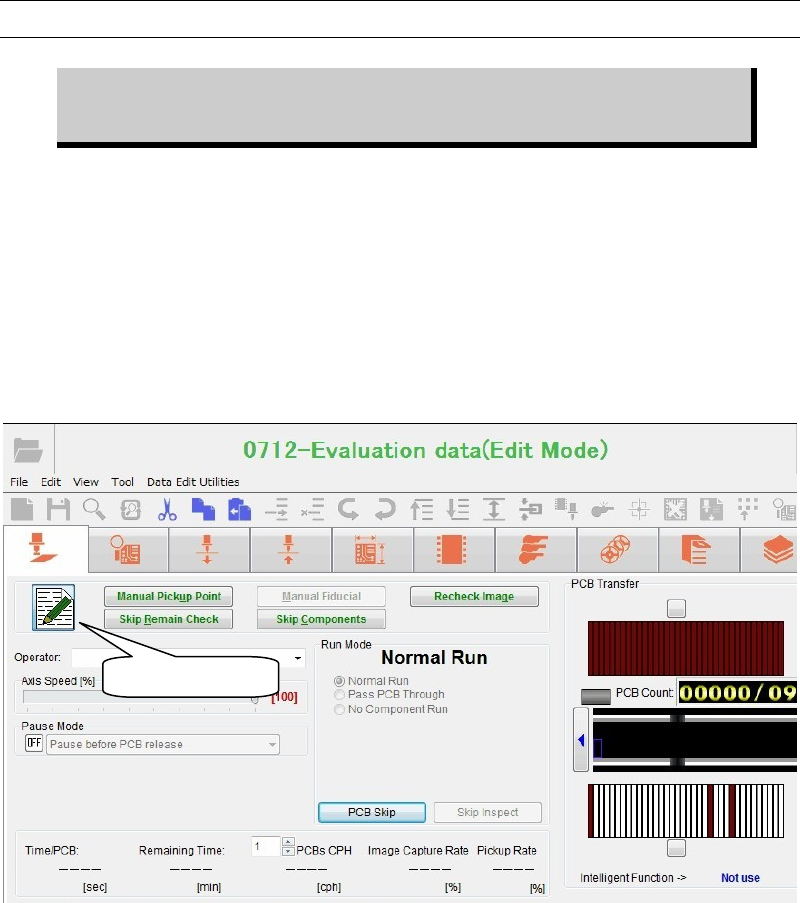
9-4 Edit & Teach Mode during a Job Run
You can perform the edit operation, such as data entry, teaching, or image test
to correct or change the program or data during job run. The edit contents you
have corrected or changed can also affect the production immediately.
Note: For information on the workaround menus for the job run, see the next section.
When the production is paused or the production is stopped by the fiducial mark recognition
error or component shortage, the <Edit Mode> button becomes valid. When clicking this
button, the sub-mode will move to “Edit” from “Pause”, allowing you to edit the data. You can
perform the edit operation similar to the normal edit operation, but you cannot execute the
function that changes the PCB clamp status or controls DO directly.
After you have edited or changed the program or data, click the <Edit Mode> button to return
to the “pause” status, and then restart the job run.
When the job run is restarted, the contents you have edited or changed will affect the job run.
When performing the edit during job run, the edited data is compared with the original data in
addition to the normal data check. When any of the following error is found, the updated data
cannot be applied to the job run. If any of the followings arises, the data cannot be updated.
When a program step is added or deleted.
When the head assignment is modified.
When [Task] setting of the program is modified.
When Board Data>Coordinates>Board Origin is modified.
When an error is detected through [Check Program] process.
When an error is found by [Check Program] process or the data comparison check, you have to
re-edit the data or cancel the job run.
<Edit Mode>