M20_Ope_E - 第304页
Chapter 9 Running a Job 9-32 ---Blank page---
Chapter 9 Running a Job
9-31
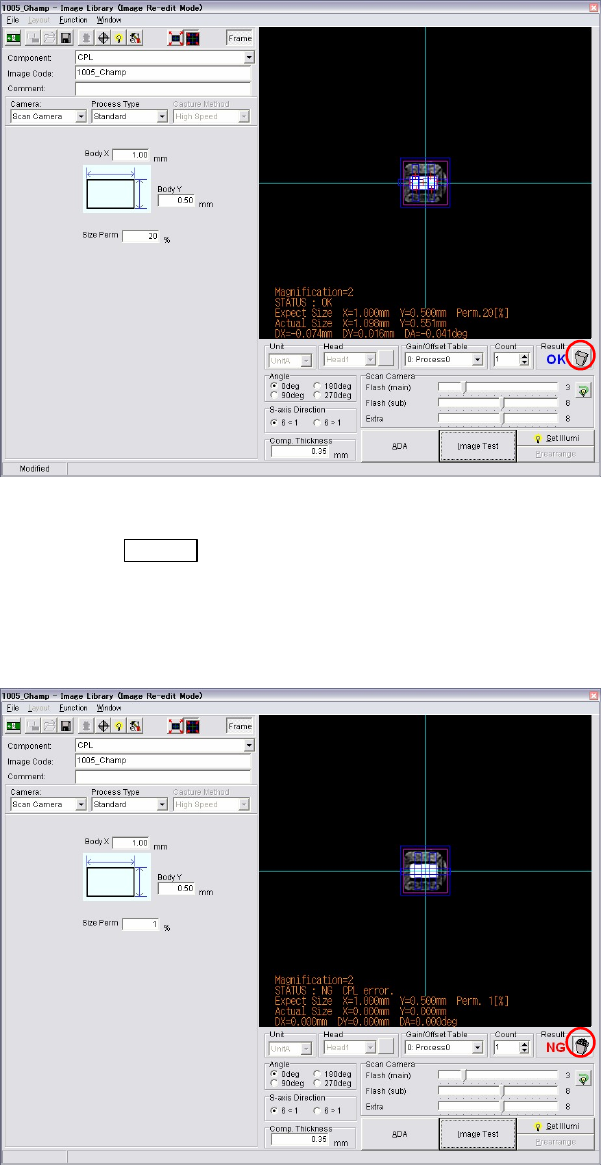
③ The necessary items, [Camera], [Head], [Comp. Thickness] etc., are already entered. Just
modify the necessary data. Also the ADA is available.
④ When the image data re-edit is complete, execute image test.
⑤ When the result is “OK”, the trash box next to the result is empty. It means the component
is no need to be rejected or put back to the tray.
⑥ Save the image data. Close the image data edit window.
⑦ Press the START
switch to restart the job run.
The component still picked up is image captured and placed on a PCB with the newly
captured image. The re-edited image data is used for the placement hereafter.
⑧ If the picked up component is a defective, image test will fail as “NG”. In this case, click
the trash box to make it full. Restart a job run. The component will be rejected or put back
to a tray, and retry a pickup for the next component.
Note: Clicking the trash box changes the box status, full and empty.
z Empty trash box : When the trash box is empty, you can re-edit the component
currently picked up and can use the component for placement.
z Full trash box : When the tray box is full, the component currently picked up will be
rejected or put back on a tray. And the next component will be picked up for a retry.
Chapter 9 Running a Job
9-32
---Blank page---
Chapter 10 Replenishing Components and Using Maintenance Menus
10-1
Chapter 10
Replenishing Components and
Using Maintenance Menus
Status Report Window
In case the System Stops Responding
Using manual menus
Signal I/O
Using maintenance menus
Stopping and Restarting a Job Run
Component Handling in Machine Shutdown
Replenishing components
Other Menus