M20_Ope_E - 第339页
Chapter 10 Replenishing Com ponents and Using Maintenance Menus 10-35 Reset Menu: Manual>Maintenance>Maintenance Notice Action: ① After the notified maintenances have been performed, reset the maintenance periods…
Chapter 10 Replenishing Components and Using Maintenance Menus
10-34
Notification
Action:
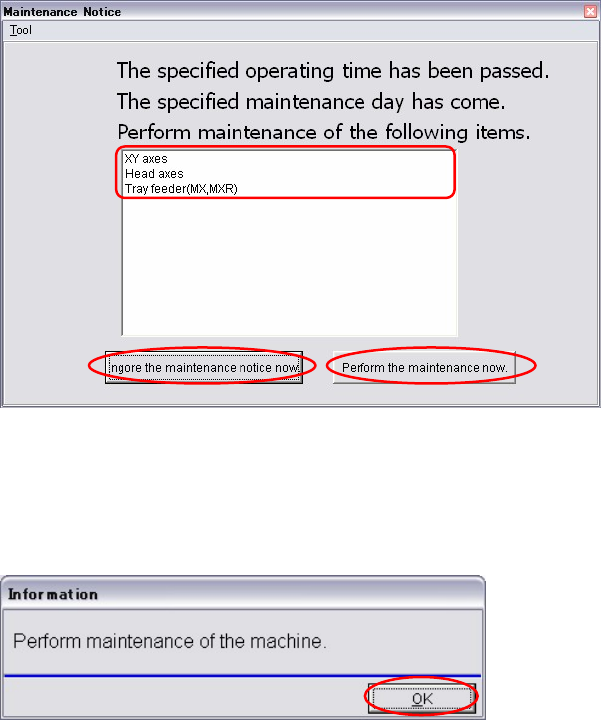
① When maintenance period has been passed; the [Noticed Period Countdown] becomes ‘0’
or the [Date] has come (whichever comes first), the parts which need to be maintained
appear in the Maintenance Notice window.
② Do maintenance of the displayed parts.
Note: For maintenance details, refer to 3. Mechanical Section in the maintenance manual.
③ If you want do the maintenance later, click the <Ignore the maintenance notice now>
button. The confirmation message appears.
④ Click the <OK> button.
The postponed maintenance notice appears again when the mounter is turned on or when
restarting the production after eight hours has passed.
Note: When you postpone the maintenance, be sure to do it later.
Chapter 10 Replenishing Components and Using Maintenance Menus
10-35
Reset
Menu: Manual>Maintenance>Maintenance Notice
Action:
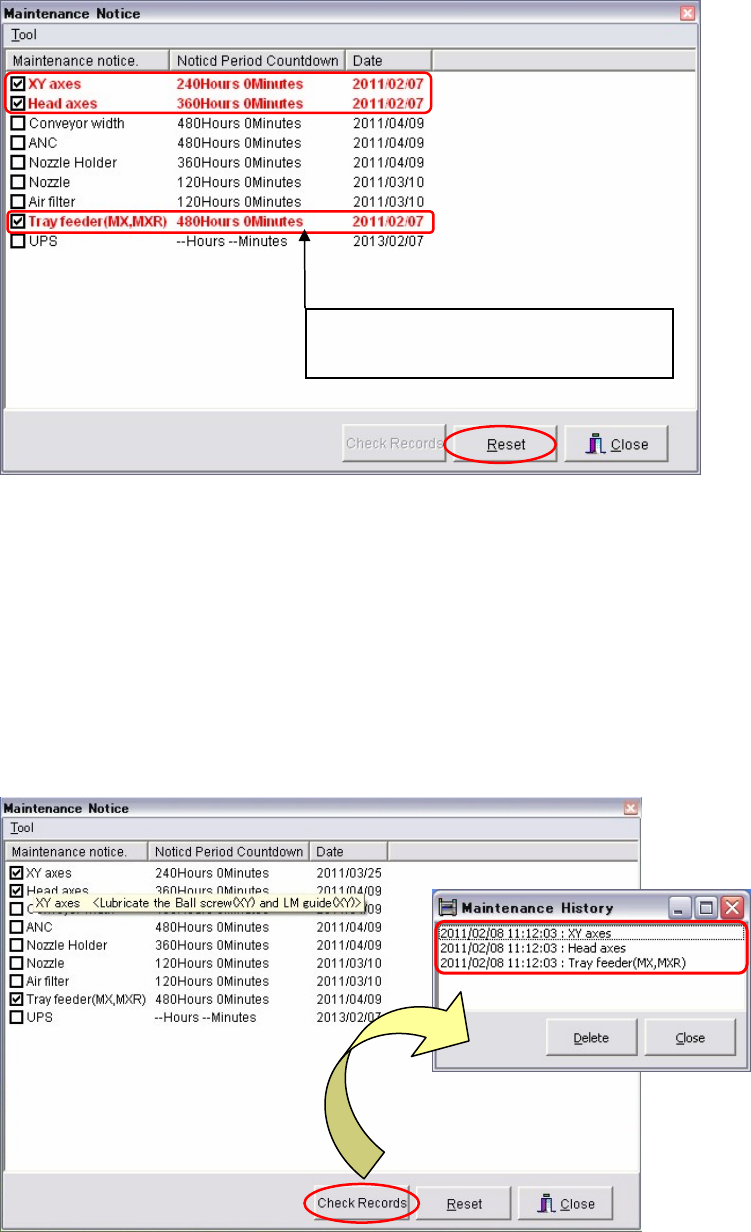
① After the notified maintenances have been performed, reset the maintenance periods for
the next maintenance notice.
The parts need maintenances are displayed in red letters. The procedures are same as
resetting the maintenance period. Click and check the red parts. Click the <Reset> button
to reset the maintenance period of the [Notice Period Countdown] and the [Date].
Note: This window also appears when the <Perform the maintenance now.> button is clicked at step
① in the previous page.
Maintenance history
Menu: Manual>Maintenance>Maintenance Notice
Action:
① Click the <Check Records> button and the [Maintenance History] window appears.
The parts maintained and their dates and times are displayed.
Times of [Notice Period Countdown]
reduce while the mounter is turned on.

Chapter 10 Replenishing Components and Using Maintenance Menus
10-36
10-7 Stopping and Restarting a Job Run
10-7-1 Stopping a Job Run
There are four methods to stop the machine:
Cause Machine State
Cycle Stop
• Pressing STOP switch
• Component exhaustion
• Error
The placement cycle finishes, and then each axis
stops.
Power to the servomotors remains on.
Power to the actuator remains on, so pickup and
board clamp remain on.
Immediate
Stop
• Activation of the interlock
function
1
Each axis stops immediately.
Power to the servomotors remains on.
Power to the actuator remains on, so pickup and
board clamp remain on.
Emergency
Stop
• Pressing
EMERGENCY STOP
switch
• Activation of the overrun
sensor
Each axis stops immediately.
Power to the servomotors is shut off. Restarting
requires zeroing of the axis positions.
Power to the actuators, including the pickup
actuator, is shut off, and board clamp is released.
Safety Stop
• Opening a cover in the AUTO
mode.
Each axis stops immediately.
Power to the servomotors is shut off, but there is
no need to perform zeroing of the axis positions.
Power to the actuator remains on, so pickup and
board clamp remain on.
10-7-2 Restarting a Job Run
If the machine stops during running, restart the machine as follows:
Cause of Stop Restarting Procedure
Pressing STOP START
Opening the front or rear
cover
CLEAR
Î Close the cover Î CLEAR Î START
Component exhaustion
CLEAR
Î CLEAR Î Replenish components Î START
Pressing
EMERGENCY STOP
CLEAR Î Release EMERGENCY STOP Î Remove cause of the
error Î CLEAR
Î READY Î Zero the axes position Î Restart
Activation of the overrun
sensor
CLEAR
Î Remove cause of the error Î CLEAR Î RESET Î
READY
Zero the axes position Î Restart
Note: Zero the axes position via the Manual>Origin menu.
1
The safety interlock function works if you open the front or rear cover or put your hand or part of the body in the
optional safety guard or the detection area of the safety sensor during operation.