M20_Ope_E - 第371页
Chapter 11 Parameter Setting 11-25 11-2-3 Board ID for Multi-board Machine can recognize one Board ID per one board. Even all small boards of Multi-panel have Board ID, only one Board ID is acquired. Only on the followin…

Chapter 11 Parameter Setting
11-24
11-2-2 Placement History File
Note: Placement History Files are saved in the specified folder selected in “Location of History Data”
in iOSII. They are sorted out in folders each day as below.
Placement History files are saved in ID.csv format.
In csv files, data is output in the following order.
= Board ID, Date, Component code, Lot No., Machine Serial No., Feeder ID, Feeder serial No.,
Nozzle ID, Head No.
Example
ABC_TEST092115101000,2007/09/21 15:10:05,ERJ2GE0R00,A00243,A99999,61,522,32,201
ABC_TEST092115101000,2007/09/21 15:10:05,ERJ2GE0R00,A00243,A99999,61,522,32,202
ABC_TEST092115101000,2007/09/21 15:10:05,ERJ2GE0R00,A00243,A99999,61,522,32,203
ABC_TEST092115101000,2007/09/21 15:10:05,ERJ2GE0R00,A00243,A99999,61,522,32,204
Board ID
20070921
ABC_TEST092115101000.csv
ABC_TEST092115101001.csv
ABC_TEST092115101002.csv
ABC_TEST092115101003.csv
ABC_TEST092115101004.csv
ABC_TEST092115101005.csv
20070922
Chapter 11 Parameter Setting
11-25
11-2-3 Board ID for Multi-board
Machine can recognize one Board ID per one board. Even all small boards of Multi-panel have
Board ID, only one Board ID is acquired.
Only on the following conditions, all small boards of multi-panel can get Placement History.
① There is only one repeat block and no other placement steps out the repeat block.
② The last 6 digits of Board ID are numbers.
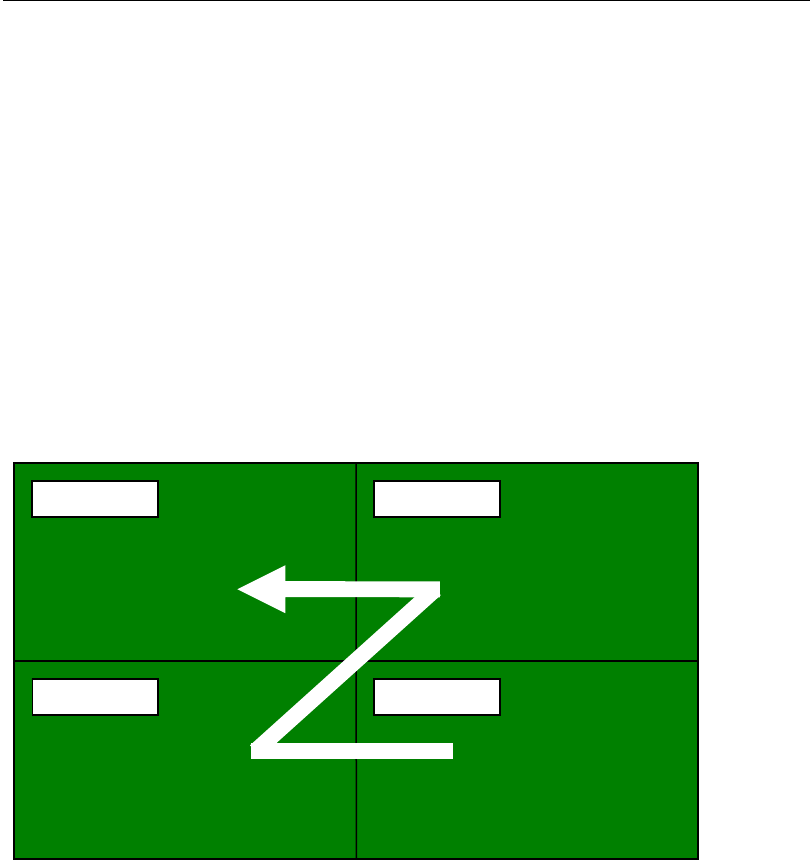
③ Board ID numbers of small boards increase in order from the right to left of the lowest
boards and right to left of the next upper boards.
④ Repeat placement order of small boards is the same to the Board ID as 7-3.
⑤ Repeat placement flag is enabled in ¥your application path¥iOSENVCF.ini file as below.
[Trace]
Block_On=1 *1=Enable, 0=Disable
Sample of Placement Data
Step No.1 Start of repeat placement
Step No.2 Placement step
Step No.3 Placement step
Step No.4 Placement step
Step No.5 End of repeat placement
Step No.6 Repeat offset - A000002
Step No.7 Repeat offset - A000003
Step No.8 Repeat offset - A000004
A000004
A000002
A000001
A000003
1st 2nd
3rd 4th

Chapter 11 Parameter Setting
11-26
11-3 Intelligent Feeder (optional)
Menu: System>UserParameter>IntelligentFeeder
To enable the Intelligent Feeder, check [Enable the Intelligent Feeder Function] box and other
features in this window.
Procedures:
① To enable the Intelligent Feeder, check [Enable the Intelligent Feeder Function” box and
save the User Parameter. And the Client communication software will starts up.
Æ To disable the Intelligent Feeder function, uncheck the box.
(All the feeder LED indicators will be invalid.)
② Make sure the features of the Intelligent Feeder in this window.
■Intelligent Function (Select one of three features.)
Not Use: Disables the Intelligent feeder function. However, the LEDs on the
intelligent feeders (out of component / component shortage / feeder error)
will remain enabled.)
Setup Verifier: Enables the feeder set mistake prevention function.
Relocatable: Enables the relocatable function (optional).
■Dispense with reregistration when removed
Re-registration to the database is not necessary even if a feeder is removed from the feeder bank.
→If this checkbox is not checked, registration to the database needs to be performed again if a
feeder is removed from the feeder bank.
■Start production despite mislocation
If the feeder set mistake prevention function is enabled, production can still be started even if a
feeder is mis-located (feeder LED is lit in pink or flashing).
■Allow to use intelligent feeder and also others
Check this checkbox when using PS and F1 feeders (non-intelligent type) with the intelligent
feeder.
■Distinguish Component exhaustion and Pickup error
If this checkbox is checked, the feeder status and LED display will also be distinguished between
“out of component” and “pickup NG”.
→At this moment, this checkbox must not be checked.