M20_Ope_E - 第404页
Chapter 14 Intelligent Feeder 14-4 ■ Using the Intelligent Function by Two or More Mounters Features ・ Unified management of feeder ID and component barcodes registered by two or more mounters is possible. ・ Unified data…
Chapter 14 Intelligent Feeder
14-3
14-1-2 Operation Environment
The intelligent feeder function can be used in the following three kinds of environment, and
the features of each environment are given below.
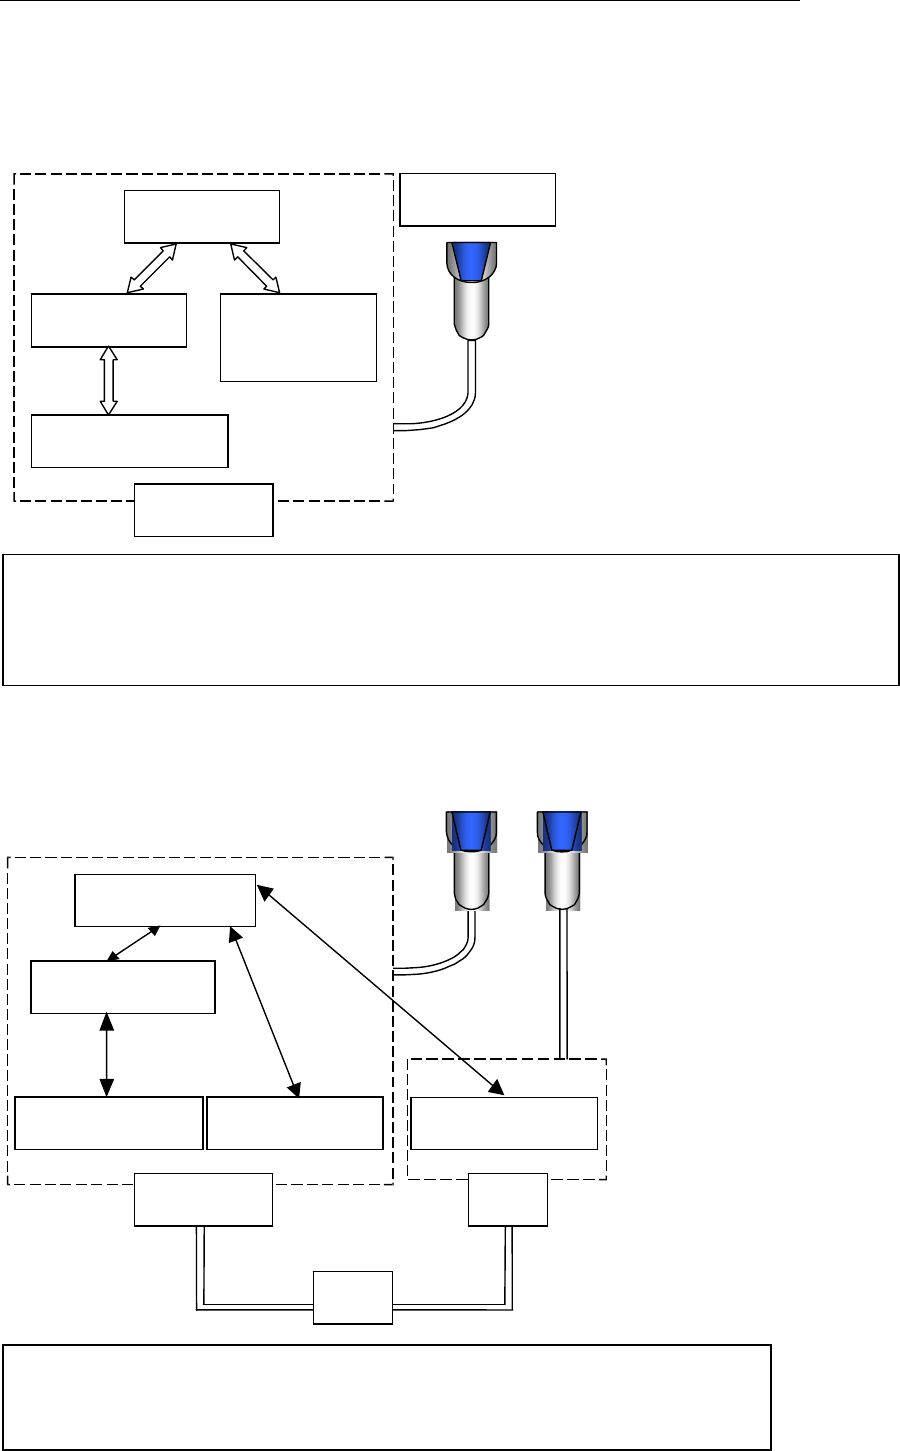
■Using the Intelligent Function by One Mounter Only
Server software
Barcode input
software
Client software
Mounter software
Mounter
Barcode reader
2、
■Using the Intelligent Function by One Mounter and One PC
Features
・It is not necessary to build a local area network (LAN).
・The intelligent feeder function can be used right away without making network settings.
・Databases can be created on the mounter only.
Features
・Databases can be created in any location (mounter, PC) since registration can be
performed on the PC.
Server software
Barcode input software
Client software
Mounter software
Mounter
Barcode input software
PC
LAN
Chapter 14 Intelligent Feeder
14-4
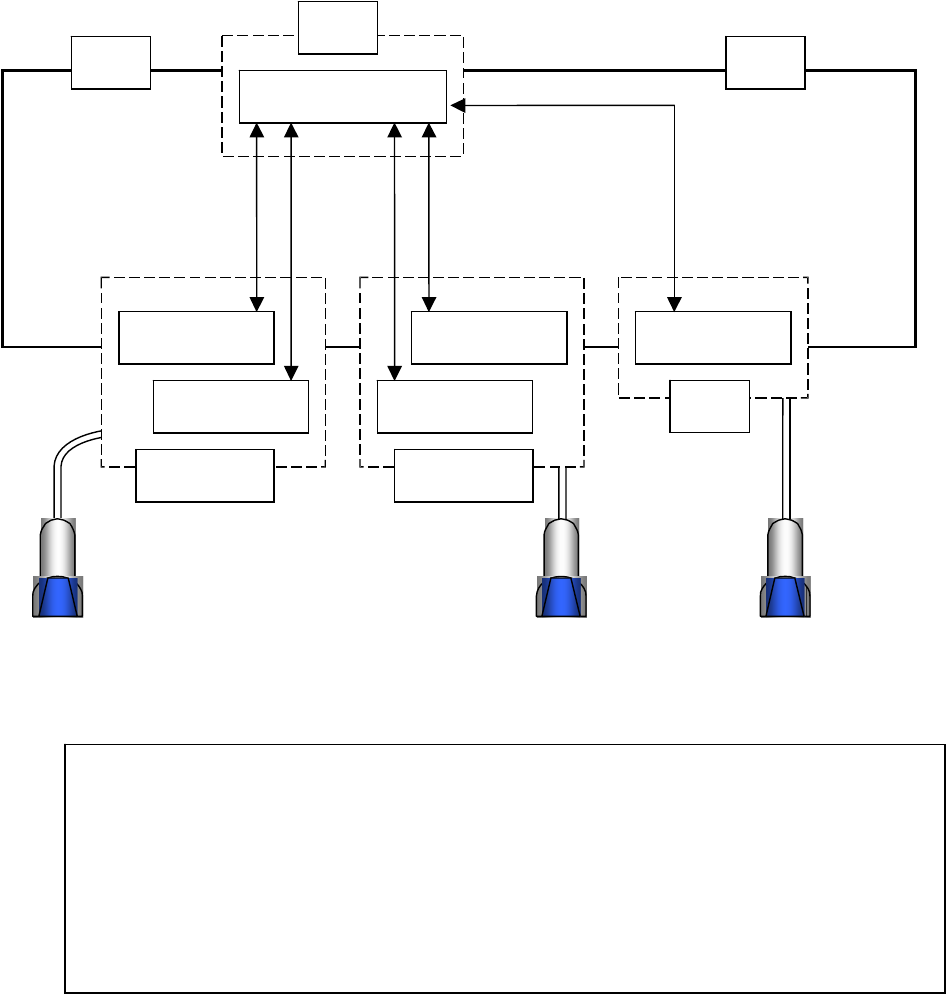
■Using the Intelligent Function by Two or More Mounters
Features
・Unified management of feeder ID and component barcodes registered by two or more
mounters is possible.
・Unified database management allows you to use feeder ID and component barcodes
for two or more mounters once they are registered.
・Databases can be created in any location (mounter, PC) since registration can be
performed on the PC.
LAN
Barcode input
software
Client software
Mounter
PC
Mounter
PC
Server software
LAN
Client software
Barcode input
software
Barcode input
software
Chapter 14 Intelligent Feeder
14-5
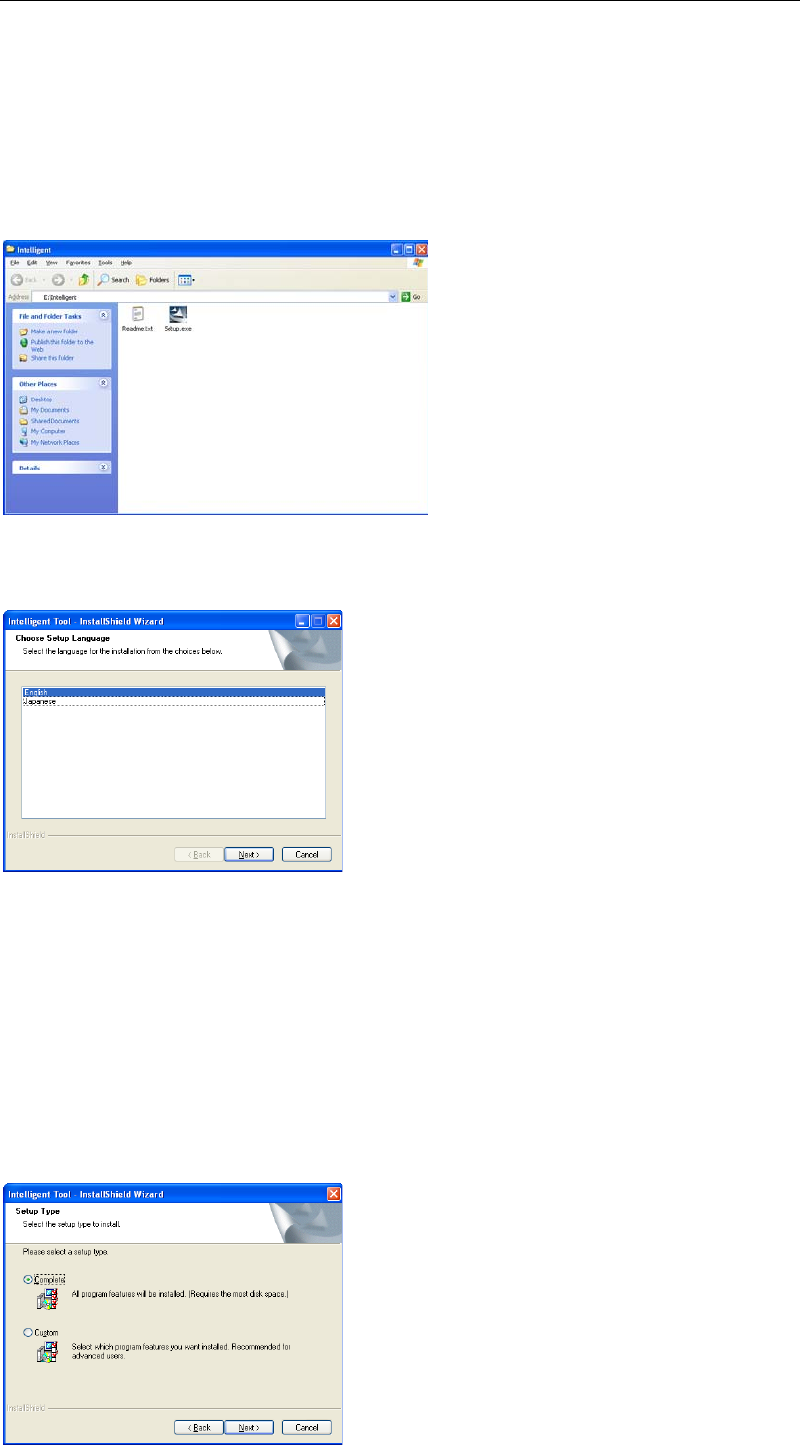
14-1-3 Installing the Software Programs
This section explains how to install the intelligent feeder related software programs (i.e. server
software, barcode input software, barcode print software) to a PC.
Action:
① Display the contents of the recovery CD-ROM (supplied with the mounter) using
Windows Explorer etc.
② Open the “Intelligent” folder on the CD-ROM and double-click “Setup.exe” to start the
installer.
③ The following language selection window appears, so select the desired language and
then click <Next> button.
④ Intelligent Tool Setup window appears, so check the contents and then click <Next>
button.
⑤ [Choose Destination Location] window appears. If you want to install the software in a
folder other than the default folder, specify the desired folder. (Default folder is
“C:¥Program Files¥Intelligent”.) After the folder is specified, click <Next> button.
⑥ The Setup Type window appears, so select the desired setup method.
→To install all the software programs, select [Complete] and click <Next> button.
→To install only the necessary software programs, select “Custom” and click <Next>
button. The Select Components window appears, so check the checkboxes for the software
programs to be installed, and then click <Next> button.