M20_Ope_E - 第422页
Chapter 14 Intelligent Feeder 14-22 ■ Creating a Component Table Barcode Print File Action: ① From the taskbar, select Option > Comp. Ta ble to display the Comp Table List window. ② Select the component tab le(s) whos…

Chapter 14 Intelligent Feeder
14-21
Comp.Code : Within 38 letters
Comp.InitialCount : 1~9,999,999
Note:
If there is a registration of the same Comp.Barcode, select whether to overwrite it or cancel the
import. When you select “overwrite”, and if the record has been related with feeder already,
the relation would be rearranged with the new setting. Then, the Comp InitialCount would be
initialized.
If there are any problems in the file to import, the import processing would be canceled.
Correct the problem cause, and try the importing again. (At that time, no record would be
imported.)
If the maximum number of registration were achieved during the importing, the import
processing would be quitted. (The importing would be performed until the total registration
would be the maximum.)
This function can be performed at non-production state.
■Deleting a Component Table
Action:
① From the taskbar, select Option > Comp. Table to display the Comp Table List window.
② Select the component table(s) to be deleted. To select two or more component tables
collectively, drag the mouse while holding down the left button of the mouse.
③ After a component table record(s) is selected, click <Delete> button. A message “Do you
want to delete selected item?” will appear, so click <Yes>.
Note: The feeder linked with the component to be deleted will be deregistered. The deregistered
feeder needs to be re-registered to the database.
Chapter 14 Intelligent Feeder
14-22
■Creating a Component Table Barcode Print File
Action:
① From the taskbar, select Option > Comp. Table to display the Comp Table List window.
② Select the component table(s) whose barcode is to be printed. To select two or more
component tables collectively, drag the mouse while holding down the left button of the
mouse.
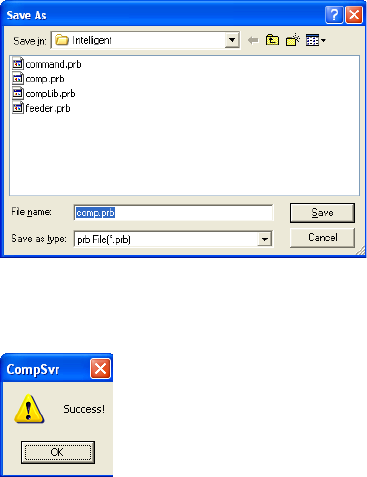
③ After a component table record(s) is selected, click <Print File> button. The following
dialog box will appear, so enter the name of the file to be saved and the directory in which
the file is to be saved, and then click <Save>.
④ When the print file is saved successfully, a message informing you will appear, so click
<OK> button.
⑤ Close the Comp Table List window.
REFERENCE: For component table barcode printing, refer to “Printing Barcodes”.
Creating a Print Command File
This section explains how to create a command barcode print file that is necessary for operation
of the intelligent feeder function. This file allows you to make duplication of command
barcodes when command barcode reading accuracy has dropped or when the barcode reader is
used in multiple locations.
■Creating a Command Barcode Print File
Action:
① From the taskbar, select File > Create Command File.
② The following dialog box will appear, so enter the name of the command print file to be
saved and the directory in which the file is to be saved, and then click <Save>.
→The default file name is “command.prb”.
③ When the print file is saved successfully, a message informing you will appear, so click
<OK> button.
REFERENCE: For command barcode printing, refer to “Printing Barcodes”.

Chapter 14 Intelligent Feeder
14-23
14-3-5 Creating a Component Barcode Print File
This function enables creation of a print file for component barcodes that are to be registered to
the database. Any contents (component name, component count) can be set in the file.
When creating link information between component codes and component barcodes, this
function can be used to use existing component codes that have been registered to the
mounter’s component library.
■Creating a Component Barcode Print File
Action:
① From the taskbar, select File > Create Comp. File.
② The Print Comp. Barcode window will appear, displaying the component codes that are
stored in the folder specified in [Comp. Library Path].
→If this window is opened on the mounter, the component codes that are stored in the
mounter’s component library will be displayed (by default). If it is opened on the PC, the
specified folder (path) will be referred to and the results displayed. In either case, the
folder to be referred to can be specified by changing the folder displayed in [Comp.
Library Path].
→The default folder is “D:¥MtSystem¥Mmi¥Dat¥Lib_Dat¥”.
①
Click the browse button.
②
Specif
y
the folder to be
referred to.
③ Select the component(s) for which a barcode print file is to be created. To select two or
more components collectively, drag the mouse while holding down the left button of the
mouse. After a component(s) is selected, click <Print File> button.
④ The following dialog box will appear, so enter the name of the file to be saved and the
directory in which the file is to be saved, and then click <Save>.
→The default file name is “compLib.prb”.
⑤ When the print file is saved successfully, a message informing you will appear, so click
<OK> button.
⑥ Close the Print Comp. Barcode window.
REFERENCE:
・To add a new component code, enter its component code name in [New Comp. Barcode] and
click <ADD> button.
・For command barcode printing, refer to “Printing Barcodes”.