M20_Ope_E - 第497页
Chapter 16 Dispenser 16-27 16-5 Cleaning screw type dispense heads 16-5-1 Cleaning the cartridge body 16-5-1-1 Removing the cartridge body Action: ① Loosen the tube joint nut at the car tridge body si de, then disconnect…
Chapter 16 Dispenser
16-26
② In this window, click the <Get Z Offset> button in the [Offset Acquisition] area.
the nozzle moves down to push the roll paper on the dot station so as to acquire the nozzle offset in
the Z-direction.
③ Next, select a dispense code and click the <Get XY Offsets> button.
The dispense is performed onto the roll paper on the dot station to acquire the nozzle offset in the
XY-direction.
④ The acquired nozzle offset values display at this screen's [Offset] item.
Note: Acquire the nozzle offset under dispense conditions with proper dispense area and dispense shape.
In particular, if the dispense shape is incorrect, such as fluid stringing or ellipse, the center of the dispense
point deviates, causing an error.
Note: An [Auto] dispense check occurs during production when the Placement & mark (program) contains a
"dispense check" (dot station) step.
Nozzle offsets are also acquired when this dispense check occurs.
Therefore, this manual acquisition operation should be used for nozzle offset tests.
Chapter 16 Dispenser
16-27
16-5 Cleaning screw type dispense heads
16-5-1 Cleaning the cartridge body
16-5-1-1
Removing the cartridge body
Action:
① Loosen the tube joint nut at the cartridge body side, then disconnect the tube from the cartridge
body.
Note: From this point, use care to protect the ceramic nozzle from damage (prevent it from striking hard objects,
etc.).
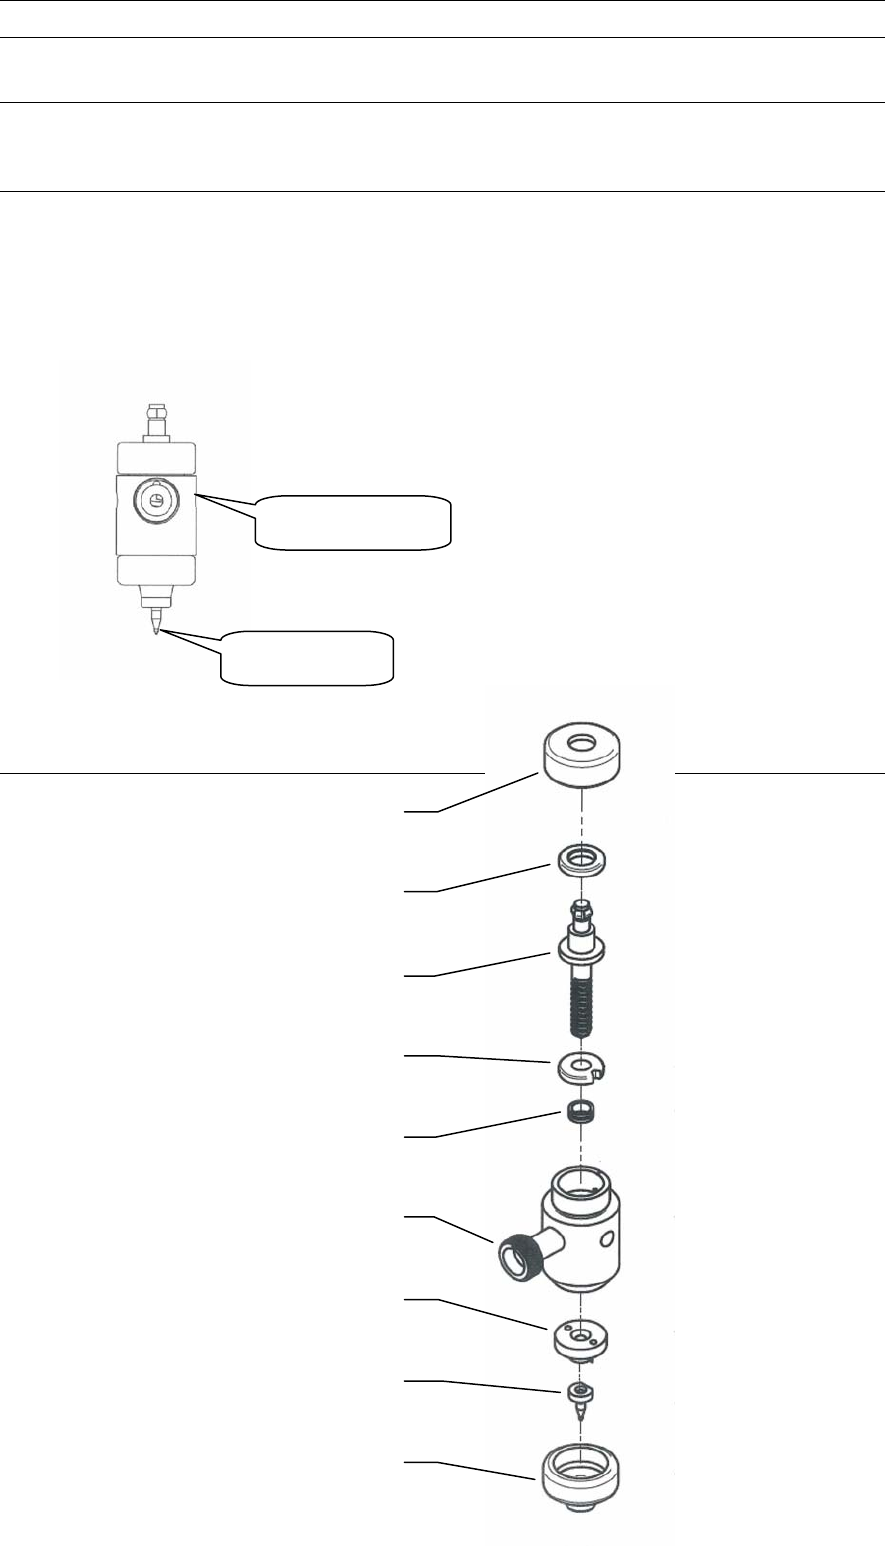
16-5-1-2 Cartridge body components
Screw retainer cap
Upper bearing
Screw
Lower bearing
Seal ring
Cartridge body
Adapter plate
Ceramic nozzle
Nozzle retainer cap
Removed
cartrid
g
e bod
y
Ceramic nozzle
Cartridge body
Chapter 16 Dispenser
16-28
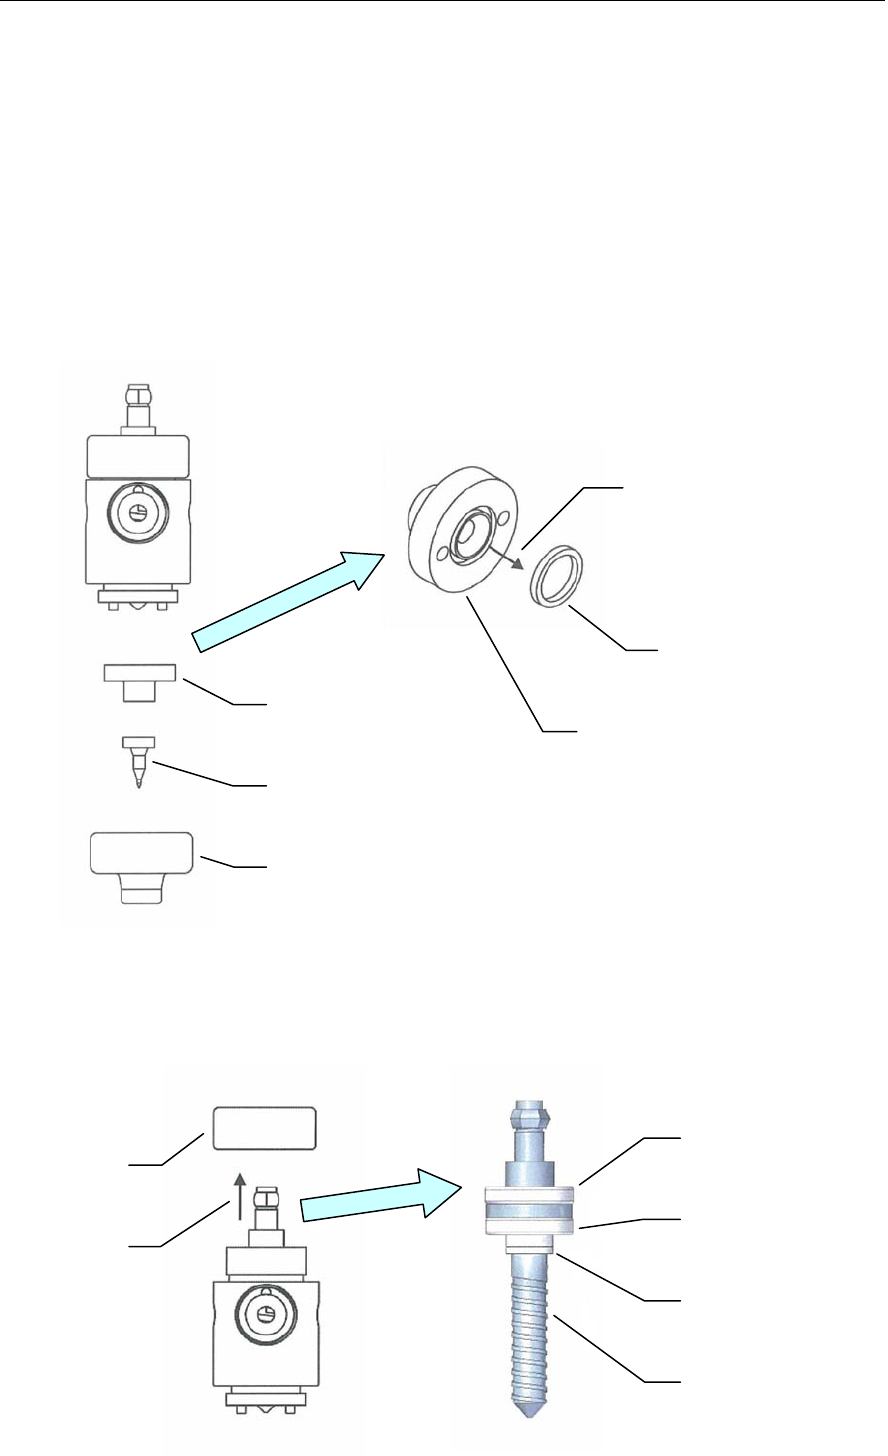
16-5-1-3 Disassembling the cartridge body
Action:
① Loosen and detach the nozzle retainer cap.
Note: From this point, use care to protect the ceramic nozzle from damage (prevent it from striking hard objects,
etc.).
② Remove the ceramic nozzle.
③ Remove the adapter plate.
④ Remove the face seal from the adapter plate.
Note: When removing the face seal, use care to prevent it from making contact with sharp objects.
Such contact could damage the seal, making it unusable.
Normally, the face seal can be easily removed from the adapter plate by lightly shaking the adapter plate.
In cases where it fails to drop out, however, use a piece of adhesive tape, etc., to remove it.
⑤ Loosen and remove the screw retainer cap.
⑥ Extract the screw from the cartridge body.
Note: Grasp the hexagon top of the screw and gently extract by pulling it vertically upward.
①
②
③
④
Adapter plate
Face seal
⑤
⑥
Screw area
Upper bearing
Lower bearing
Seal ring
Screw