M20_Ope_E - 第499页
Chapter 16 Dispenser 16-29 ⑦ Extract the upper bearing, seal ring, and lower bearing from the screw. Note: While extracting the seal ring and lower bearing, grasp the hexagon top of the screw and turn the scr ew gently i…
Chapter 16 Dispenser
16-28
16-5-1-3 Disassembling the cartridge body
Action:
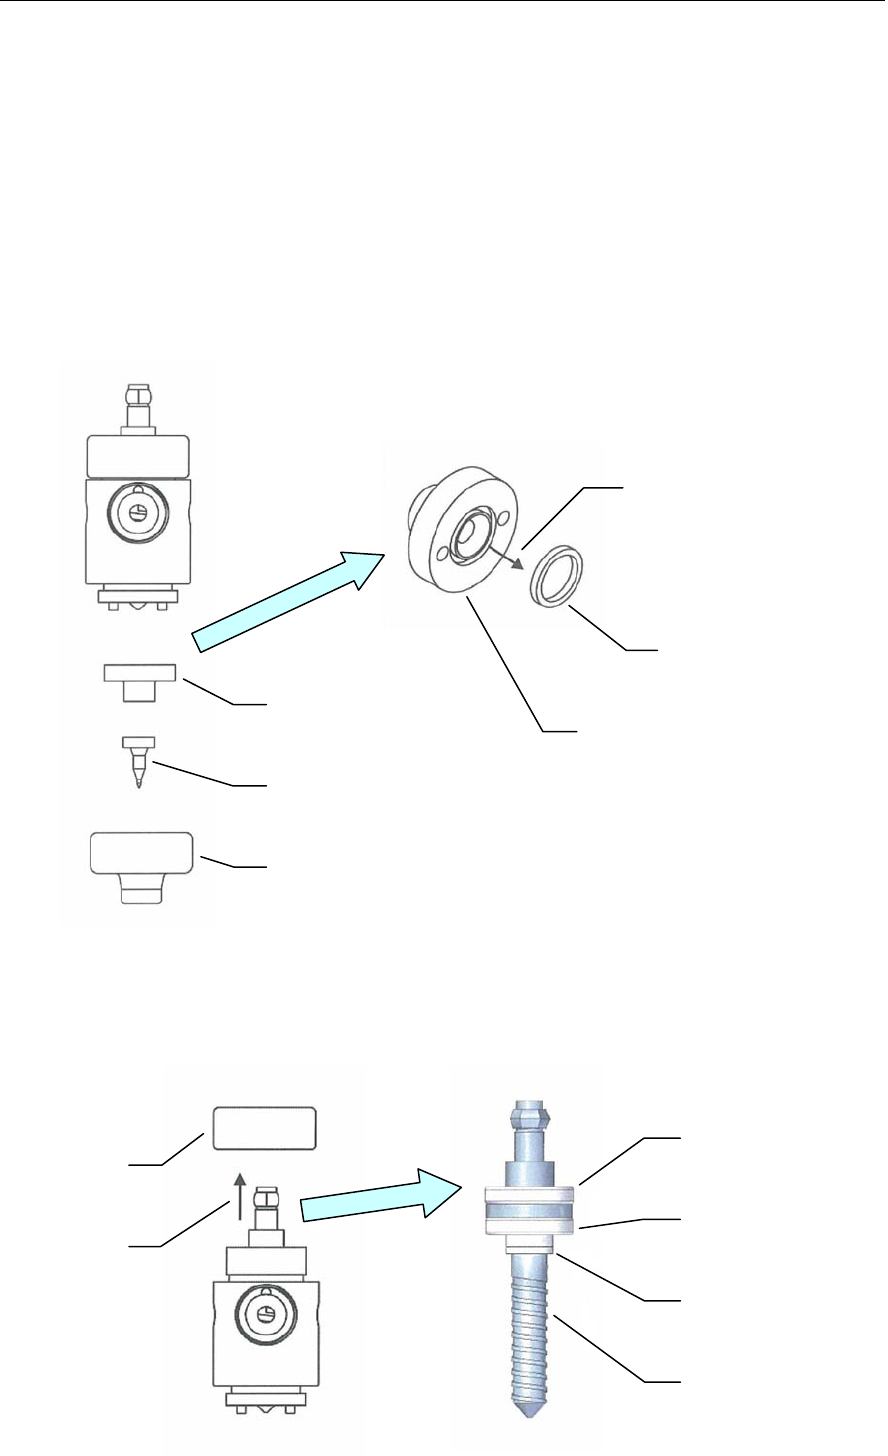
① Loosen and detach the nozzle retainer cap.
Note: From this point, use care to protect the ceramic nozzle from damage (prevent it from striking hard objects,
etc.).
② Remove the ceramic nozzle.
③ Remove the adapter plate.
④ Remove the face seal from the adapter plate.
Note: When removing the face seal, use care to prevent it from making contact with sharp objects.
Such contact could damage the seal, making it unusable.
Normally, the face seal can be easily removed from the adapter plate by lightly shaking the adapter plate.
In cases where it fails to drop out, however, use a piece of adhesive tape, etc., to remove it.
⑤ Loosen and remove the screw retainer cap.
⑥ Extract the screw from the cartridge body.
Note: Grasp the hexagon top of the screw and gently extract by pulling it vertically upward.
①
②
③
④
Adapter plate
Face seal
⑤
⑥
Screw area
Upper bearing
Lower bearing
Seal ring
Screw
Chapter 16 Dispenser
16-29
⑦ Extract the upper bearing, seal ring, and lower bearing from the screw.
Note: While extracting the seal ring and lower bearing, grasp the hexagon top of the screw and turn the screw
gently in the clockwise direction.
16-5-1-4 Washing the cartridge body components
Action:
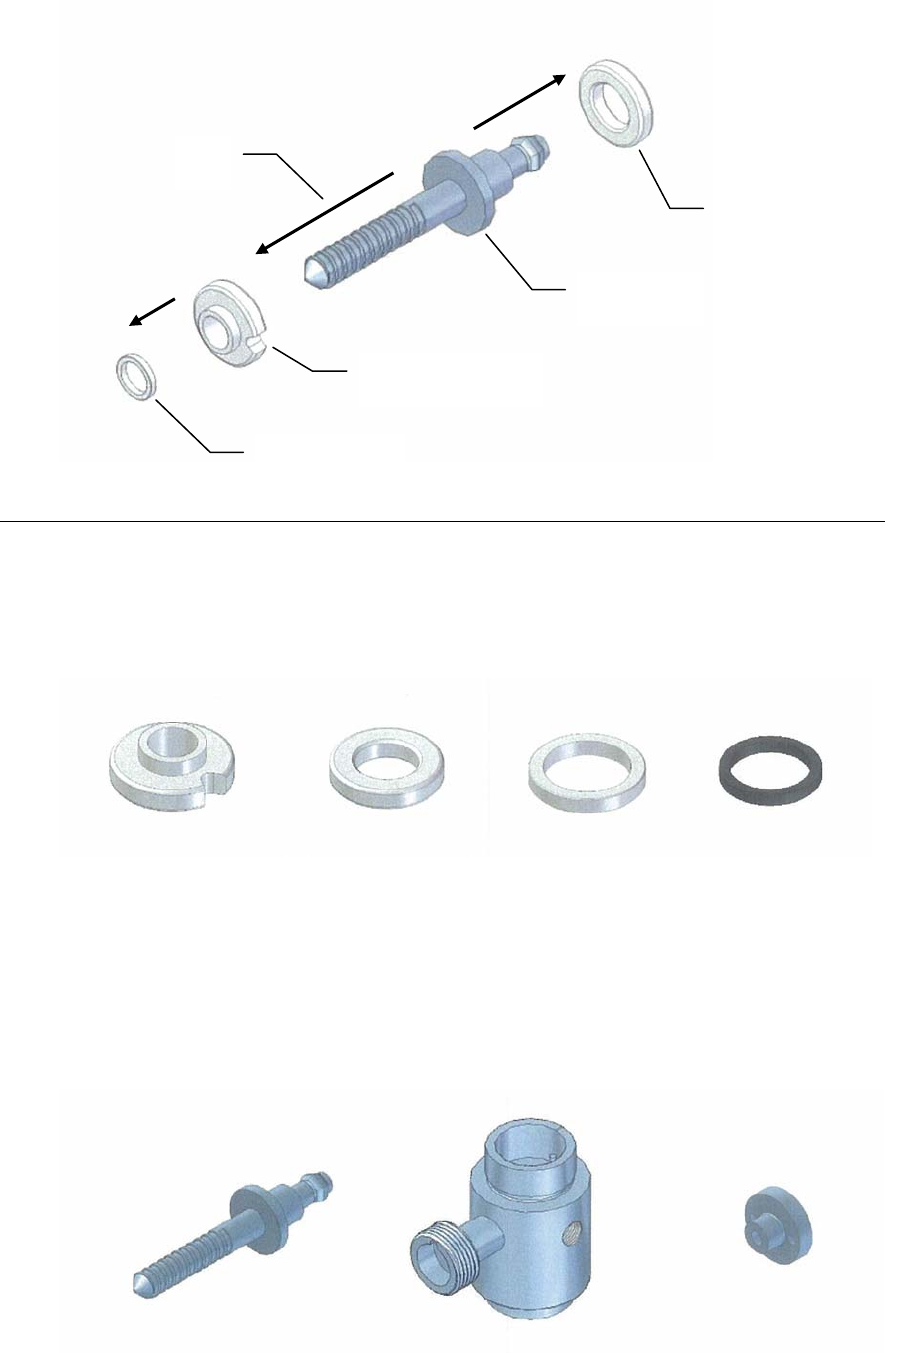
① Do not wash the following components with a solvent as doing so could cause them to swell.
Use a cloth wetted with ethyl alcohol or isopropyl alcohol to clean off an adhered dispense material.
② After removing any residual glue from their interiors, wash the following components ultrasonically
in ethyl alcohol or isopropyl alcohol. Use care not to damage the components during the ultrasonic
washing process.
Avoid washing the components ultrasonically for extended periods as doing so could heat up the
components and possibly damage them. (The recommended ultrasonic washing period is 2 minutes
or less.)
⑦
Upper bearing
Screw
Lower bearing
Seal ring
Lower bearing
(material: Teflon)
Upper bearing
(material: Teflon)
Seal ring
(material: Teflon)
Face seal
(material: Viton)
Screw Cartridge body Adapter plate
Chapter 16 Dispenser
16-30
③ After removing any residual dispense material from the ceramic nozzle interiors, wash
the nozzle ultrasonically in ethyl alcohol or isopropyl alcohol. Use care not to damage
the nozzle during the ultrasonic washing process.
In particular, do not wash nozzle together with other components. Doing so could
cause contact with the other components, possibly resulting in nozzle damage. Always
wash nozzles individually.
16-5-1-5 Reassembling the cartridge body
Action:
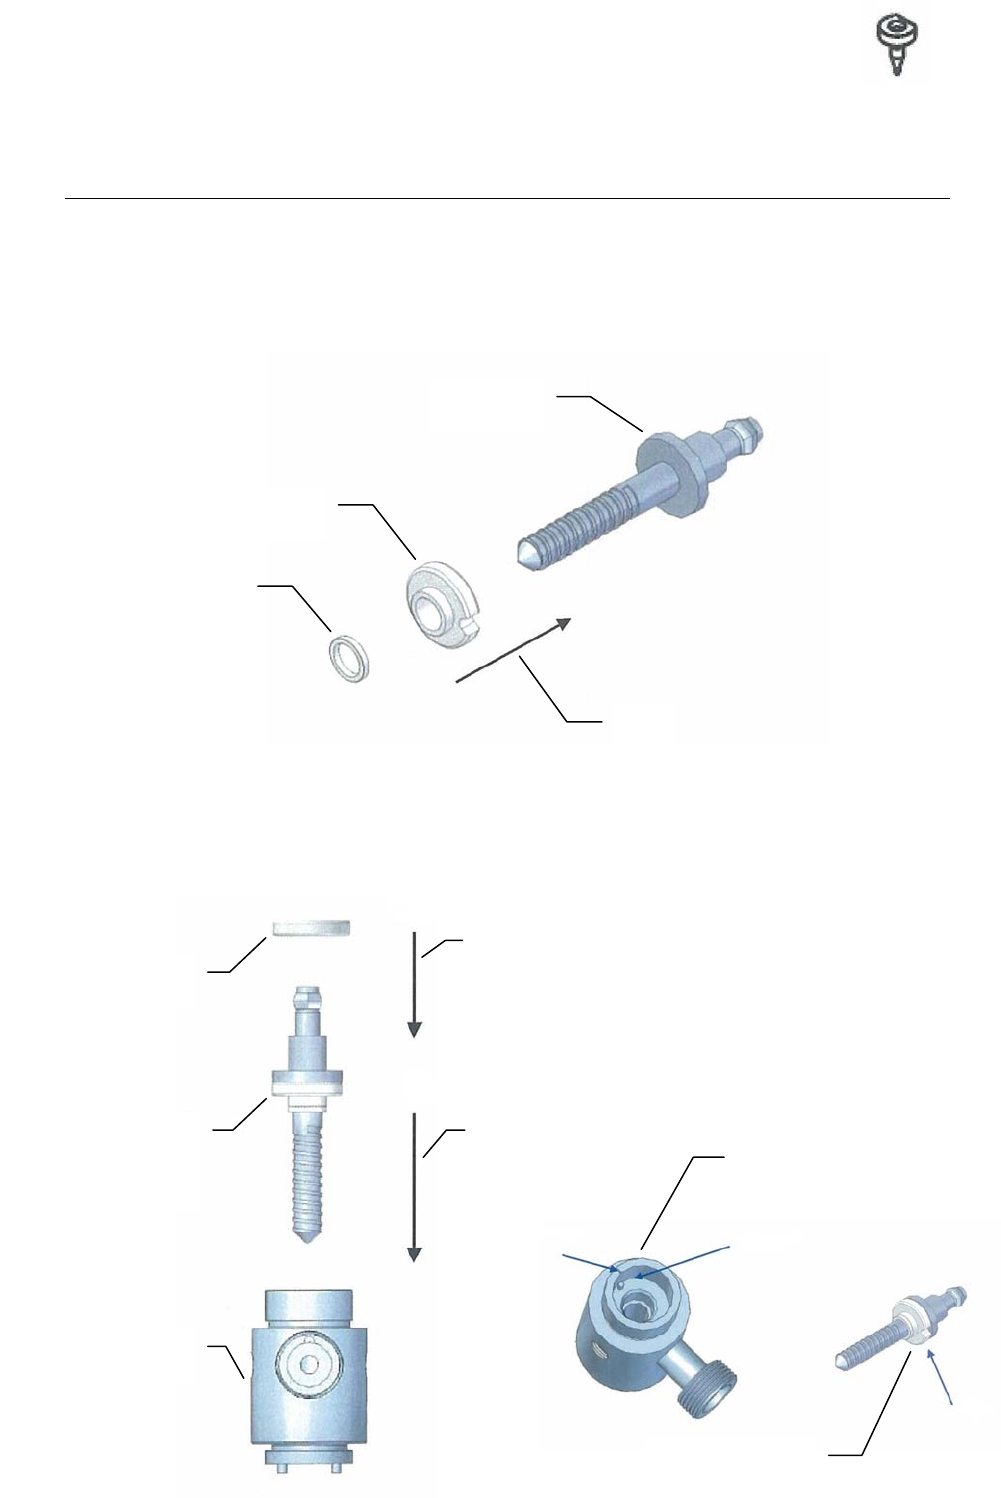
① Insert the lower bearing and seal ring into the screw.
Note: While inserting the lower bearing and seal ring, grasp the hexagon top of the screw and turn the screw
gently in the counterclockwise direction.
Insert these two components one at a time. Do not attempt to insert them together.
② After inserting the lower bearing and seal ring into the screw, insert the screw into the
cartridge body. Be sure that the lower bearing's V-cut is aligned with the cartridge
body's anti-rotation pin when inserting the screw into the cartridge body. This
alignment is facilitated by referring to the guide mark on the cartridge body.
③ Insert the upper bearing into the cartridge body and screw.
Ceramic nozzle
Screw
Seal ring
Lower bearing
①
Upper bearing
Screw with lower
bearing and seal
ring inserted
Cartridge body
②
③
Anti-rotation
pin
Guide mark
V-cut
Cartridge body
Lower bearing