M20_Ope_E - 第502页
Chapter 16 Dispenser 16-32 16-5-2 Cleaning the tube joint 16-5-2-1 Removing the tube joint Action: ① Turn the syringe in the counterclockwise direction to remove it. ② Loosen the tube joint nut at the car tridge bo dy si…
Chapter 16 Dispenser
16-31
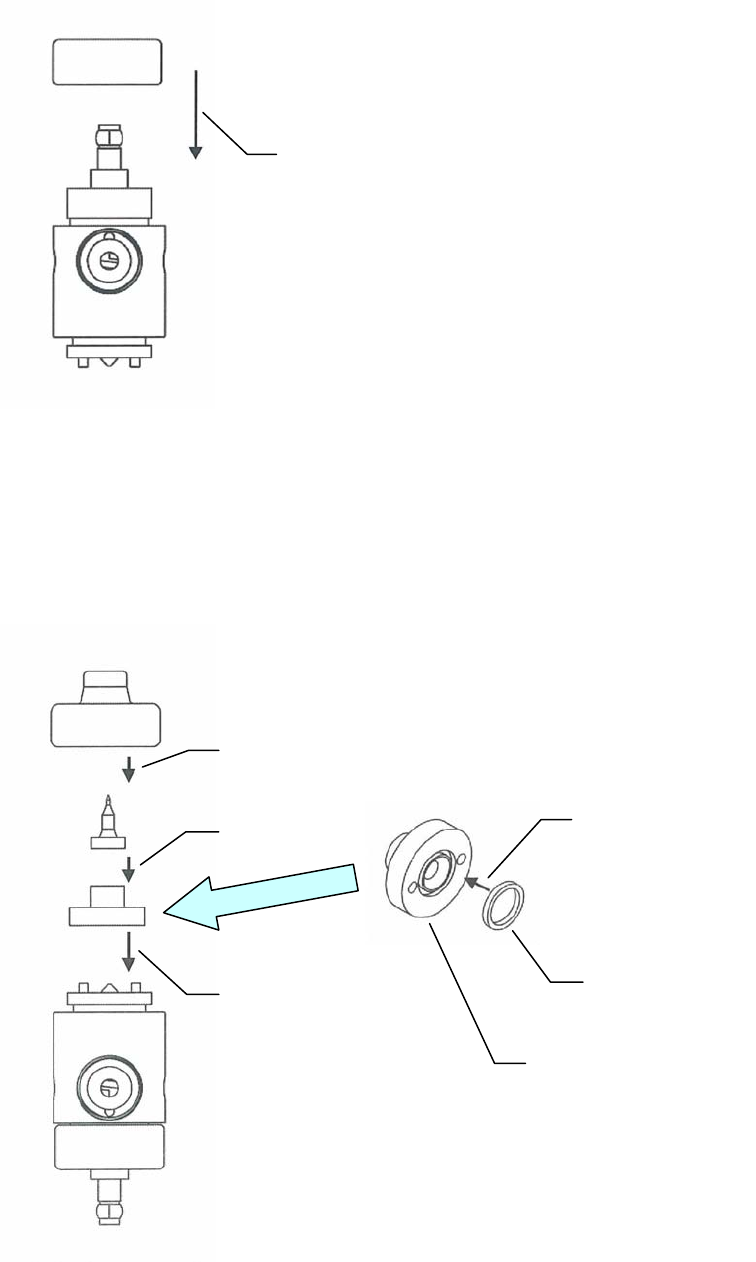
④ Attach and tighten the screw retainer cap.
Note: Finally, grasp the hexagon top of the screw and rotate the screw to verify that rotation occurs easily
without interference.
It may be impossible to rotate the screw if the screw retainer cap is tightened with the lower bearing and
upper bearings inserted incorrectly.
⑤ Attach the face seal to the adapter plate.
⑥ Turn the cartridge body upside down and attach the adapter plate.
⑦ In this posture, also attach the ceramic nozzle.
Note: From this point, use care to protect the ceramic nozzle from damage (prevent it from striking hard objects,
etc.).
⑧ Attach and tighten the nozzle retainer cap.
④
Adapter plate
Face seal
⑤
⑧
⑦
⑥

Chapter 16 Dispenser
16-32
16-5-2 Cleaning the tube joint
16-5-2-1 Removing the tube joint
Action:
① Turn the syringe in the counterclockwise direction to remove it.
② Loosen the tube joint nut at the cartridge body side, then disconnect the tube from the
cartridge body.
③ Remove the O-ring from inside the cartridge body joint.
Note: When removing the O-ring, use care to prevent it from making contact with sharp objects.
Such contact could damage the O-ring, making it unusable.
If the O-ring cannot be easily removed, use a piece of adhesive tape, etc., to remove it.
Remove the O-ring.
It can be easily extracted by using a
piece of adhesive tape, etc.
O-ring
Loosen this nut
Cartridge
body
Tube
Tube joint
Chapter 16 Dispenser
16-33
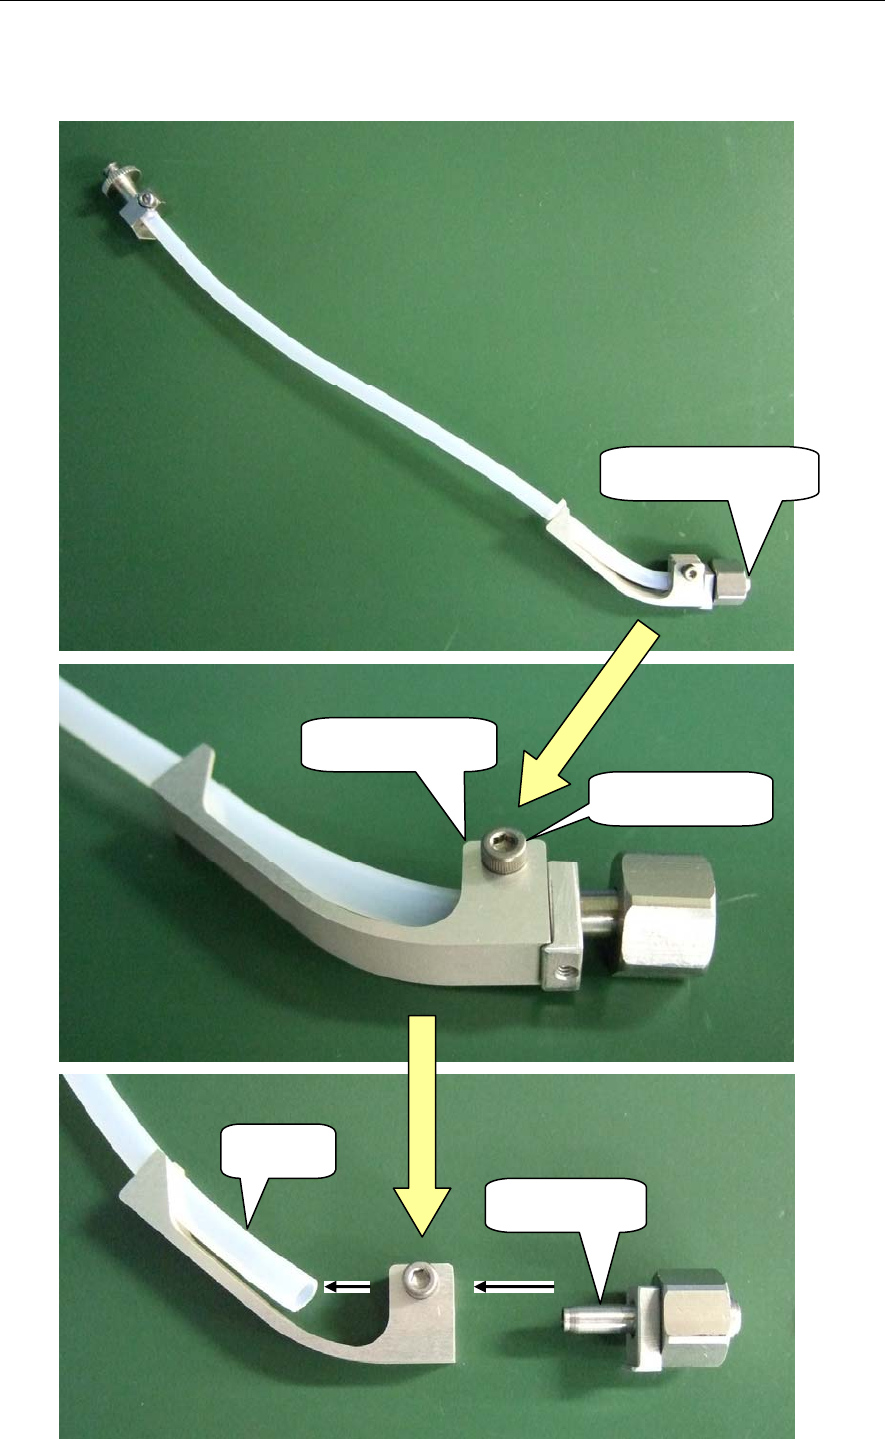
16-5-2-2 Disassembling the tube joint
Action:
① Loosen the tube clamp bolt at the cartridge body side.
② Extract the tube clamp and tube from the tube joint.
Tube clamp
Loosen this bolt.
Tube
Tube joint
Cartridge body side